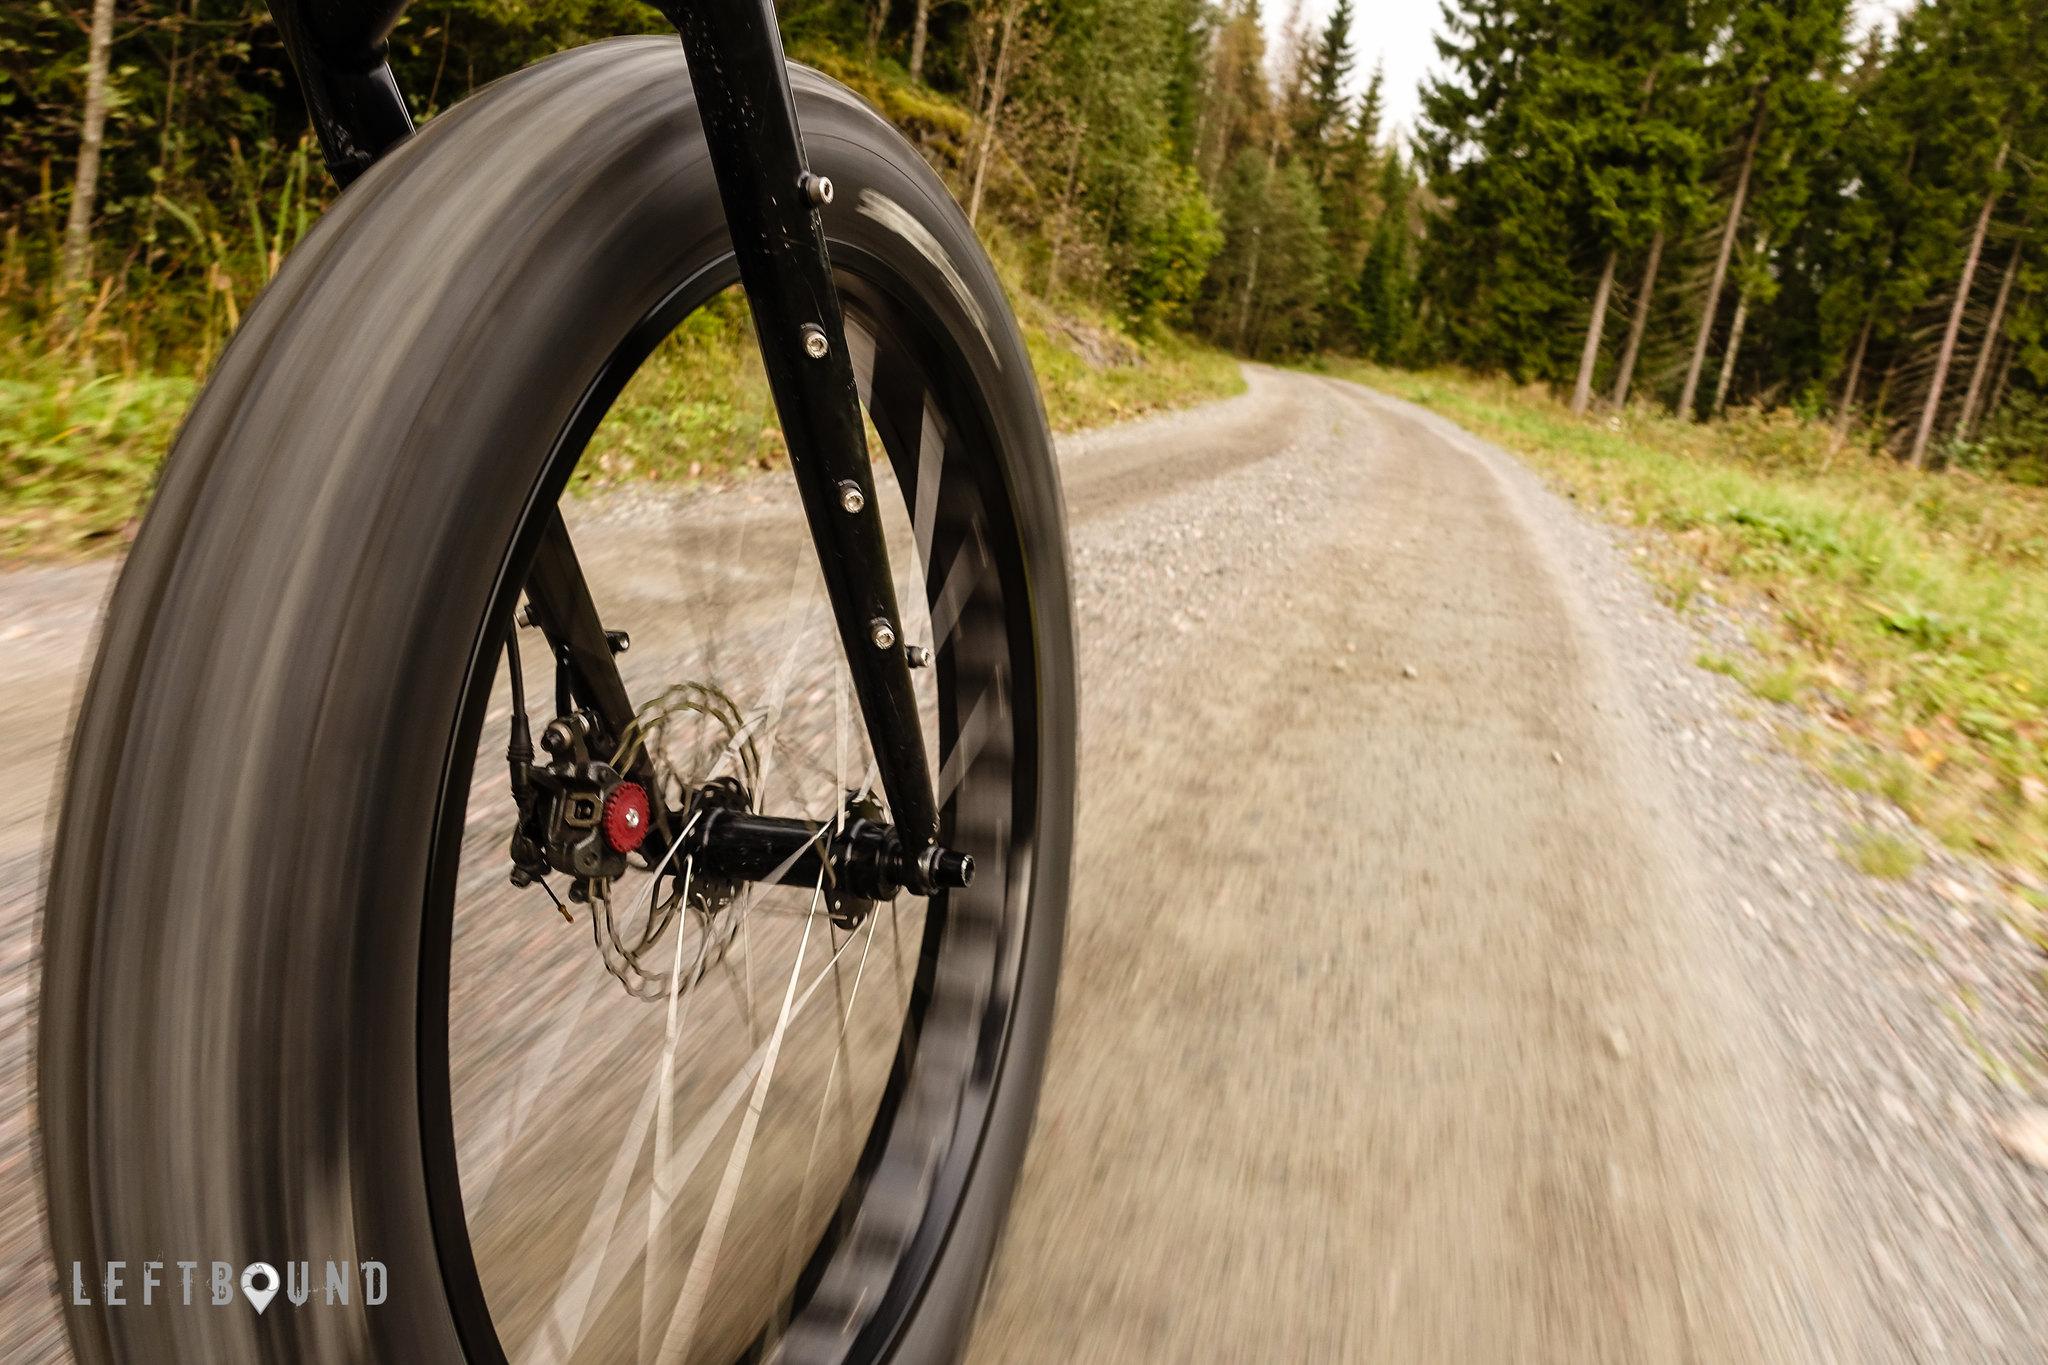
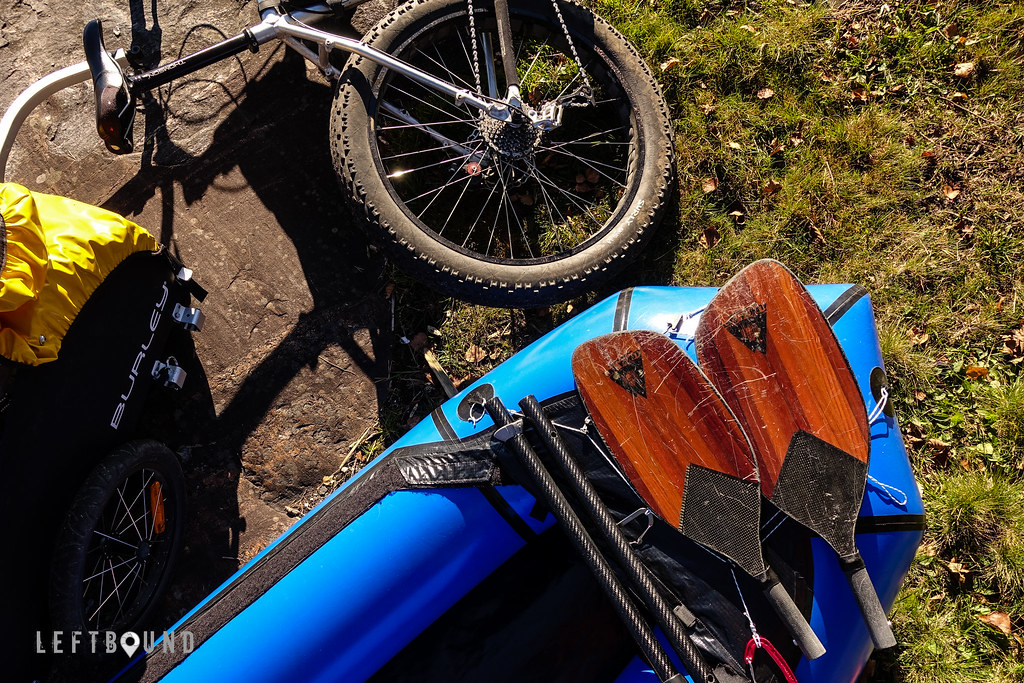
Outcome was that customizing some of the currently available carbon paddles, it would be possible to reach, with a reasonable range of adjustments (length-wise) and weight as low as sub-700 grams, but price would become a significant factor. Hence I never pursued getting one put together, but parked the idea and happily kept on paddling with my 5-piece Sawyer paddle.
As it happens, folks at the Packrafting Store, ever growing the Anfibio line of packrafts and accessories, had also been contemplating with the idea of such a paddle, and this spring launched a new ultralight paddle, especially targeted for their similarly ultralight Nano SL packraft - the Anfibio Fly. I was eager to get one in for a trial, as it seemed to have a solid balance of features, weight and cost.
Per the specifications, the Fly is 460 grams light and 49 centimeters short (packed) 5-piece paddle. Adjustable freely both in length, between 178 and 210 centimeters, and for the feathering (blade angle), it packs a punch for anyone looking for a versatile tool for packing and paddling out with minimal bulk and weight.
With a slimmed down shaft, 24 millimeters in diameter, it still sits well in hand, even for a guy like me with rather long fingers. I had my doubts initially especially about this, but during the few months of using the paddle, I’ve never experienced or noticed any discomfort, and quickly got used to this narrower shaft.
Blades are made of nylon, which, as opposed to crafting those from carbon fiber, help tremendeously in keeping not just the weight, but also the price at an acceptable level. Blades do flex quite a bit if pulling by hand, which is expected, but are robust and I’ve not felt I’d need to watch over them (and I haven’t). Their shape gives a solid purchase in water, and while there is some flex, it doesn’t have a noticeable impact on the overall “performance” of the paddle - do remember that this is an ultralight paddle not comparable with any real performance-oriented paddles. I lended the paddle over to my friend with extensive experience on kayak paddling, and paddles, and while he did pay attention more than myself to the flex, he agreed it felt solid and robust for such a lightweight paddle.
As the shaft is fully adjustable in length, there aren’t any shortcomings also when it comes to multi-use. I use mine as a center pole for my pyramid tent (Ultamid 4), where the 178 to 210 centimeter range is perfect for a fully adjustable pitch in different weather conditions. In water, I use nothing but the maximum, as it gives me the most comfortable reach over the tubes - your mileage may vary, also depending on the raft’s tube size, seat height and your personal dimensions. It would be nice to have the feathering angles etched into the ferrule lock (or at least 30 and 60 degree marks in it), but that’s a minor detail that’s easy to add yourself, if you miss the typical markings.
The spring locks connecting the shafts and the blades are well positioned, and there is sufficient overlap to create a solid connection that does not induce unnecessary flex and ensures longevity and sufficient strength. And luckily all parts are fully interchangeable (except of course for the middle piece with the locking mechanism), so you won’t be annoyed pushing two parts together only to notice that part is wrong way around or needs to be connected to that OTHER blade you’re not currently holding.
During the extended use over few months, including pushing against the wind through the coastal swell in the archipelago, paddling through rivers and small streams and crossing lakes, this paddle has performed without trouble, and I cannot think of anything I’d change.
As it is, Fly is a solid choice to complete a packable and lightweight packrafting kit, and will work nicely also as a backup paddle (which you should always bring on an extended excursion or expedition). Bundled with a lightweight (or an ultralight) packraft, such as the Delta MX I have, and perhaps a Buoy Boy PFD I myself use, it brings you back to the origins of packrafts as portable, but not heavily performance-oriented vessels, for boundaryless exploration.
❯❯ Flickr album: Anfibio Fly Paddle.
]]>In addition to Joby, I have also held onto a Pedco Ultrapod I. A superlight and small, and cheap, yet sturdy tripod, it has even held a full frame DSLR without flinching. And with the included velcro strap one can easily secure a smaller camera on a tree branch or similar sketchy platform. Third tripod I have is actually one without legs, the TrailPix Ultralight Tripod. I got this off Kickstarter back in 2013, but it hasn’t really been used much.
The reason is mainly that in addition to utilizing two short poles you ought to have with you, it still needs a third one, typically a spare pole (if you carry one) or a separate aluminum pole. Of course a wooden stick would do as well. I have poles when going (telemark) skiing, cross country or nordic skating poles are simply too long if you consider the need for a third one, and on some of the longer hikes, but most of hiking, paddling, climbing and whatnot is done without any poles. So, while the product is actually very good, with legs locked in place with screws and a solid Kingjoy BD-1 ballhead included, for me it’s not a very convenient product to use. But mainly for the (removable) ballhead, I still hold on to it.
TrailPix aside, none of the above easily bring the camera higher up, or help take the camera further than an arms length, should you hold it in your hands. Years ago, around the time first GoPro’s came out, I had been for some time wanting something taller/longer to screw a camera onto. Considering a monopod, I was also browsing the limited range of trekking poles meant for photographers. I quickly ditched the idea of a dedicated monopod as it would just have been another thing to carry. And having a perfectly good set of poles for different uses, it seemed wasteful to get another pair just to attach a camera to. Why not simply add a threaded bolt to an existing pole and be done with it?
From idea to action, a visit to the local nuts and bolts specialty store (as the needed ¼-20 UNC threaded screws are not standard items in a typical hardware store in Finland) soon had me pulling off the handle on my Gibron Sherpa II telescopic pole. A pre-drilled hole through the top of the handle helped to screw in the threaded bolt from the inside of the handle, fixed in place with a knob of hot glue. Threaded through just the right amount to not bottom out on the camera, it worked perfectly.
For example the below video was shot using this pole and a GoPro, strapped on the bow, extending a meter or so outside of the canoe.
As the Sherpa’s were my skiing poles, I’ve used them a lot as a monopod for family and group photos in the winter. Sticking a pole into firm snow, with a small(ish) camera threaded in, is solid enough to trust on, unless there’s hard wind. In those cases I’ve typically piled some snow around it, or pushed it in deeper, sometimes removing the basket. With the GoPro’s coming into play, threading one at the end of the pole has been a fun way to shoot one another skiing down the slopes, being able to reach out close enough for interesting angles. And of course it works like charm for including yourself, but also more of the surroundings, in the picture or a video reportage, despite not having an ultra wide angle lens.
I’ve since then done a similar work on two other pairs of poles I regularly use, both from Black Diamond. Traverse poles, great poles for ski touring by the way, were done the same way as the Gibron, first removing the handle by heating it - use hot water or a blow dryer. The strap comes off by pushing out a pin that locks it down, and it needs to be removed for drilling and threading in the bolt. It’s a tight fit, but worked out fine, and once the bolt is securely in place, the strap can be re-attached without a fuzz. I opted to thread a nut on top, slightly recessed, which again was secured with a drop of hot glue.
Latest modification was done on a pair of Distance Carbon FLZ Trekking Poles I had gotten for my trip to Iceland, requiring a slightly different approach. I could not get the handles off from these, most likely since, made of EVA foam, they appear to be glued in. Being ultralight poles, the wrist straps are not bolted in, but are held by a string of nylon running though the handle, past the midpoint. As I couldn’t remove it, and didn’t want to accidentally cut it, I had to place the bolt way up front, and not being able to remove the handle and thread it in from below, the bolt had to go in head first from the top. Being made of soft foam, I just pre-drilled a large enough hole into the soft handle to squeece the bolt in. After dry testing, I pushed hot glue into the hole, and in went the bolt, EVA stretching out as needed for a snug fit.
As you can see in the photo, I used a nut here as well, mainly due to the softness of the handle - this way, and with the hot glue filling, the assembly was secure and solid, not giving in at all. Used since last autumn, also this pole has worked well as a make-do monopod, and with my new pyramid tent, the pair will get out even more in the future. Quite a versatile piece of kit they have turned out to be - from trekking poles to amonopod to an adjustable center pole!
I’ve mentioned GoPro, which can easily be connected to the pole with the Tripod Mount accessory, but similarly you can use many other accessories to hook up whatever recording device you need, including your mobile phone. My iPhone 6 never leaves the protective Catalyst Case, and I’ve got a Multi-Sport Mount to lock it down securely to any of my monopod poles.
Needless to say, these have been extremely useful modifications for me, and relatively simple to do, I can recommend them to anyone. If you already have a good pair of poles, I see no reason to invest into a new pair just to get the tripod mount. Not having to unscrew anything is a big plus in my books, as opposed to removable caps and whatnot seen on some of the dedicated products, essentially offering the same functionality in a bit more polished, though maybe over-engineered, package.
❯❯ Flickr album: MYOG - Monopod Pole.
]]>My choice of kit has evolved slightly this year, as I finally added a pair of real skating poles, having resorted to an old pair of telescopic poles, tuned with Exel’s Ice Skater Tips and weights to better (and safely) serve their new purpose. I originally rigged them up as I had trouble finding long enough poles, but eventually found and switched to a 162 centimeter long Lundhags Flash, conveniently on discount at the end of the season, last spring. While these poles are by far better fit for purpose, I do miss the tripod thread I am not able to fit into the slim handles of said poles.
The skate/binding combo has worked great, without any issues. As I ditched the heel piece early on, to allow free rotation of the skate, the setup is very simple and practically bombproof. Hiking short distances (say, couple of kilometers at max) with these telemark boots is perfectly fine, and I’ve only switched to shoes on longer stretches on land. The setup is hence pretty versatile, also providing the much needed support for the lower legs when powered by a small kite - something I plan to test a bit more this winter. At the moment I have no reservations for recommending a similar setup.
Nordic skating can help to fill the potentially grim gap between late autumn and a full blown winter, offering a great way to enjoy the multitude of recently frozen lakes and of course the archipelago. While sea ice was pretty limited last season, this autumn the season kicked off nicely, with potential for very good coverage over the coming months, should winter take and keep roughly its normal course from this point onwards. It would be great to have an opportunity to do a longer tour on the outskirts of the Baltic Sea archipelago, open horizon firmly at sight - fingers crossed!
While I prefer to tour alone or with a friend or two, focusing more on exploration and nature observation rather than mileage or speed, the possibility to join some of the many tours organized by Skrinnari, a national tour skating club, is a great asset. As a member of said club, having completed the basic training, one is free to join any of the organized tours, varying in speed and length, and tap into the online resource which offers up-to-date information on ice conditions and also plenty of insight and inspiration for self-organized tours. This season, I’ve joined two organized tours - one early on close by and another one further away, in Raasepori.
After kicking off the season on December 10, with a 30-kilometer tour at the outskirts of solid ice in the inner arhipelago, I joined a 2-day trip across Espoo and Kirkkonummi archipelago, which my fellow adventurer Marko had plotted on a map. A mix of uncertainty, adversity, achievement and awe, it had all the key elements of a fun and rewarding adventure. Video from the trip is embedded below.
The last tour I did before the year end was a bus tour to Raasepori, organized by Skrinnari. Having explored the Västerby region on foot and by bike before, the jagged lake uplands on that same area were of great interest. Upon arrival in Tammisaari, the busload of skaters split into few groups, with five of us deciding to go explore the area not previously visited by the club. Starting out with a hike to lake Långträsket, we spent the day circumventing wilderness-like lakes, including Grabbskog Storträsket, following every nook and granny on mostly superb ice.
Spotting animal tracks across snowy patches on lake ice, some were easier to identify than others. Sliding marks were no brainer, though the jesting otter was nowhere to be seen, tracks finishing to an air hole. Weather remaining overcast and foggy, it just added to the experience and the day was a success. Finishing the 40-kilometer tour with a loop around the inner Gennarbyviken bay, weather turned soggy, and we skirted around shallow pools of water to the finish - journey back home begun at sundown.
It’s 2017 now, and we finally have a second go on white winter, after November’s bliss, as the new snow just fell last night. Cold front now sweeping over Finland, with temperatures dropping as low as minus twenty degrees celcius even in the south, the Nordic skating season continues strong. See you on ice!
❯❯ Flickr album (with more photos): Early Winter on Skates.
]]>Kaldoaivi is the largest of the twelve wilderness areas in Finland, situated in the municipalities of Utsjoki and Inari up north. The landscape of this mostly roadless fell area, roughly 2900 square kilometers in size, varies from deep and steep river valleys to gentle slopes. The rolling fells and wide open plateaus, spotted with stray patches of scrubby mountain birch, make it a great destination also for snowkiting.
It’s a long way from Espoo to Nuorgam, but luckily during the winter season there are flights to Ivalo both from Finnair and Norwegian, which help to connect the dots quicker, often also with a reasonable cost. While Norwegian appears to operate only during winter months, and only on selected days, having two carriers is still an advantage. I chose to fly in with Finnair, a day early, and spent some time in the city of Ivalo, before sharing a ride up to Nuorgam with few other participants. An inexpensive but rather cozy accommodation was found on a short notice at the Ivalo River camping, situated by the river few kilometers from the downtown of Ivalo. There is also a bus connection from Ivalo to Utsjoki, and should you book your venue with Alma Arktika, they would be able to help with the transportation as well.
Our group, seven strong, with Hannu and Reetta from Alma Arktika as guides, gathered in a cottage by the river Teno, for route planning and gearing up. As the wind started to pick up, we loaded up two snowmobiles with gear for three days in the fells, and drove into the starting point at the Pulmankijärvi road. As the wind had picked up quite a bit, we pulled out the small, 5-6 square meter kites to begin our journey. Mine was a HQ Kites Scout III, an inexpensive 5 square meter kite that I had purchased at the beginning of the season, to have something to use when my main kite, a 10 square meter Ozone Access XT (from 2011) would be too powerful to handle. The Scout had worked well on the sea ice, despite lacking some of the more refined features my Access XT has. Without trims and proper safety mechanisms (or any flag-out system), it had been perfectly fine for cruising on ice. But as it turned out on the very first day, in the more varying environment at the fells, those missing features quickly came paramount for safe travel, and I ended up packing the Scout early on, relying on the Access XT for the rest of the trip.
Following the footsteps of the Sami reindeer nomads, we traversed the fells into the heart of Kaldoaivi, covering some 80 kilometers in distance as the crow flies, over the three days. The actual distance skied was somewhere around 140 kilometers. Normally one would split the tour to shorter legs, but as we were out to test a 5-6 day tour in just three days, we had to gain a bit more mileage each day. Each day was different as we traversed across a varying terrain, negotiating over and around the fells. From day one, I was in for a steep learning curve, realizing the importance of skilled maneuvering in the varying terrain, as opposed to flat and open ice fields I am used to, allowing much more room for errors. In the fells, you need to plan a lot more ahead, keeping a close eye on hazards such as ravines, rocks and trees, and changes in the terrain and snow pack, all this while having a full control of your kite, ready for surprises. Wind, though also your best friend in this sport, proposes another potential hazard, as it can change very quickly, both in strength and direction, when you travel on a meandering terrain, exposed at different angles.
While wind was mostly on our side, rarely picking up too much, or completely dying out, the two snowmobiles that we had with us, to carry most of our gear, came in handy at times, allowing us to quickly relocate when necessary. This was done simply by holding on to a long line, attached behind the snowmobiles. Without this type of support, one would simply need to reserve time to cover ground on skis, should the conditions become such that safe travel (or travel at all), propelled by a kite, would no longer be possible. Having a motorized support is of course also a safety measure, as help is far away, and mobile phone reception scarse in the area.
We used PMR walkie-talkies to keep in touch when on the go and to pass information about direction or any sudden hazards, such as qusty wind, traveling as a scattered group. This worked well, although a handsfree kit (a monophone or a headset) is a necessity. For safety, each kiter carried a backpack with essential emergency gear, should one get lost in the fells, or for any other unexpected event leaving one stranded in the wilderness. As one cannot rely on the PMR radios to maintain contact at all times, and with limited mobile phone reception, it’s crucial to keep the group relatively close together. Getting lost in the fells is all too easy, especially if you accidentally wander off, fast, to a wrong direction and the weather suddenly deteriorates.
Traveling across the wilderness, we took shelter for two nights in an old herder’s hut, built alongside of an old reindeer round-up place, roughly half-way of the turn around point. Lacking much of the modern amenities, it fell short on nothing, as we enjoyed the warmth of the wood burning stove, feasting on lappish delicacies, recovering from the long days in the fells. Reaching the furthest point on the second day, we had a lunch break in one of the huts Alma Arktika is renting out, at the lake Riekkojärvi. A beautiful and serene spot, and great also for fishing and hunting the willow grouse.
As I mentioned, despite my earlier experience with kite skiing, this trip brutally revealed the gaps in my kite flying skills, and during the expedition, attacking the steep learning curve head on, I gradually gained confidence. On the second day I started to relax more, getting accustomed to the new terrain, and further honing my skills and adjusting to the environment. Third day was the best day I’ve had so far with a kite, as I was taking it all in, in just about perfect conditions for my large kite. Satisfaction came not only from learning to manage in a new environment, but also from all the small victories along the way - being able to make the right maneuvers, maintaining the intended path in difficult wind, or succesfully negotiating a troublesome obstacle. All this in the stunning, barren but beautiful, landscape.
It was with some sadness when the tour came to an end, and it was time to pack the kites and start the journey home. Sharing this experience with a great bunch of skilled kite skiers was a privilegde, and I learned a lot, gathering also tips and ideas for future tours from the more experienced participants. With Alma Arktika at the reins, I could fully focus on the experience, and rely on their expertise for advice and all the practical arrangements. In addition to a promise to take myself back into the fells with the kite soonest, I returned home also with a whole new mindset in terms of how to further develop my skills as a kite skier, in the familiar surroundings in the Baltic Sea archipelago. I cannot wait for the new season to kick in!
❯❯ Flickr album (with more photos): Kite Skiing Expedition in Kaldoaivi. Photos do not necessarily make justice to the spirit and the feel of kite skiing, especially when touring in the fells. A video, shot from a drone, does the job better, so here a short clip shot during this expedition, courtesy of Toisniemi Backcountry Photography.
]]>While I do like winter cycling a lot, and it’s a blast especially on a fatbike, swooping through a layer of powder snow, as a Finn, skiing is where it’s at. Not a huge fan of cross-country skiing on machine-made tracks, and definitely not a fast skier by any means, it’s the unbroken snow that draws me.
November 10th marked the day when there was enough snow in the forests and forest trails to traverse across western Espoo, from the coast to the northern parts around the ring road. Though requiring some zigzagging to connect the dots, and some passages over and under main roads and other man-made obstacles, it was cool to be able to cover such distance, mostly in unbroken snow, this early in the season.
To store a slice of this unusual experience, I took a few video clips on the way and put together a short movie, shared in Vimeo and embedded below.
What followed this was five more days of awe. Each morning I jumped on skis, right at the doorstep, and headed out in the woods. Taxed by the literal trailblazing, carrying a pack, sometimes with an incredible rulk to use in the open, each day I could feel a bit the weight in the muscles, not yet fully adjusted for skiing. Taking it all in, I enjoyed the transformed landscapes, familiar but new. Footprints of deers, hares, foxes and other wild animals soon crisscrossed under the forest canopy loaded by the thick layer of snow.
One evening, returning home at dusk, on a forest road, I saw a large dog-like animal crossing the road ahead of me, in the distance. First I thought it was a loose dog (this was in the Espoo central park), with owner somewhere unseen, but as I reached the tracks across the road, I was not sure. No dog owners at sight, and large tracks coming directly across the road made me wonder if it could have been a rogue wolf. It’s a slim chance, but a possibility I cannot confirm. The pawprints were deep in the soft powdery snow (a lot like this) to make anything out of them.
Sadly the weather forecast soon turned into worse, and Father’s Day spent out with the family, Monday brought the last longer tour, this time to Nuuksio National Park, accompanied by Marko. Following a new route, somewhat familiar from mountain biking in the area, it was a great tour, again right from our doorsteps!
Tuesday turned out to be better than expected, so a short tour it was again in the nearby forests, before witnessing the imminent destruction of the winter wonderland. Warmed weather and the rain that followed has not completely wiped out the snow, but as trees are now basically clear of all snow, the atmosphere in the forest has changed, as have the acoustics. No picture, as I wish it hadn’t happened just yet. Winter, I’m looking forward to an epic comeback!
]]>Season 2015/2016 was extremely good for me, right from the very start. Opening the season already early December, in Ruka, joining a 3-day telemark boot camp organized specifically for our small group, was the perfect kick off. It was facilitated by Ruka Ski School, with Martti Kontula as the instructor. Lucky with the weather, we even got some fresh powder, and the boot camp was both humbling and educational. Videos shot during the camp were ruthless in their honesty, but were a great way to highlight and discuss improvement areas in one’s form and technique. Tips, ideas and both physical and mental exercises were shared, to carry the teachings through the season.
Plenty of turns followed that great start, with one of the memorable adventures being a road trip to the Lyngen alps, and Northern Sweden, in early April. Not a stranger to the mountains of Norway, having done summer tour in the glaciers near Lyngseidet, climbed rock in the magic islands of Lofoten and ice in Rjukan, I have for long wanted to explore also the ski touring possibilities around the fjords of Norway. So when an opportunity came to plan and execute a road trip in those surroundings, on a camper, no second thoughts were given.
It’s a long way across the country, in total some 1400 kilometers from Espoo to the Tamok valley in Balsfjord, which was the first destination on our loosely planned tour. A great location for ski touring, the 25 kilometer long valley has everything from wide open lines on mellow slopes to steep walls and gnarly chutes. We parked the camper at the ‘Huset’, a legendary basecamp at the foot of mountains, ran by Aadne Olsrud. An old community hall resurrected, it has all the basic amenities to relax and recover after a day in the mountains. While we slept and cooked in the camper, we paid a small fee to use the facilities while there. Evening of arrival was spent over a map and a guidebook, planning, with a keen eye on the weather forecast which wasn’t very promising for the next few days.
Our chosen tour took us next morning to Sjufjellet, a classic peak in the area. Despite the special micro climate which typically makes Tamok more snow-sure than the surrounding valleys, at this time snow was relatively scarse at the valley, but we hoped to find a good run higher up regardless. Skinning up, we transitioned from wet slush into a hardpack, reaching the soft stuff some one thirds up on the face of the Seven. Despite the overcast and clouds hanging low, the visibility remained good on the way up, with a perfectly timed opening in the sky, when we reached the summit after some 900 meters of vertical climbing. Enjoying the views around us, we took a short break. Weather starting to close in again, we headed downhill, and had a great powder run on the upper slopes, cruising down. Visibility remaining good, as we tracked back the short traverse and descended back to the valley. A great first run for the trip!
We stayed for another night, but unfortunately the weather was closing in on us, and we decided to hit the road again next morning, after consulting few maps, guidebooks and yr.no. Northbound again, we drove to Lyngseidet. Arriving there early afternoon, weather was indeed looking a lot better, with a much lighter overcast with few openings in the horizon. Plenty of day left, we decided to take a shot at summiting Kavrintinden, to ski down a steep bowl just below the summit, and cruise down back to the town. Tour started right above Lyngseidet, and followed a well-trodden path through the woods, bringing us without on to the higher, more open terrain. On the way up we awed the surrounding mountains and the fjord down behind us.
Higher up, it got quite steep, and at times, especially on wind-packed snow, I was pushing the limits of my climbing skins, not having a pair of ski crampons (none exists for my NTN bindings). On the soft stuff, things were naturally a whole lot easier. Snowpack was stable, and we could continue at ease, finally reaching the summit ridge. Entering the ridge after some 1300 meters of climbing, the wind blowing from the other side caught us, so we hurried across it, and took shelter just below the summit. We decided to skip hiking the last 5 minutes to the summit above, but instead took a short break and watched the weather miracly starting to clear out completely. Dropping into the bowl, a clumpy ride at first, exiting the steepest section it was pure joy on the way down. We carved turns in untouched powder snow, sun on our backs, unfrozen fjord underneath us. It’s only in places like Lyngen, where you get this kind of spectacular views no camera can truly capture.
While we got lucky with the weather window, it did not hold for long, and so we decided to move on again, this time towards Narvik. Next day, we were considering skiing in the Narvik fell for half a day or so, upon arrival, but since the visibility higher up was bad, there was no point. So we enjoyed a day off and while stocking up supplies, we again hunched over a map and decided to head over to a valley south from Beisfjord.
Driving there on a meandering backroad, it started to snow heavily, and in couple of hours, there were some 20 centimeters of fresh snow accumulated. We camped near a beautiful valley lake with a high mountain skyline all around.
Next morning, again with an overcast, we started our tour from the valley, heading towards Tverrdalsfjellet and Máttačorru. First hour or so we had the skis on our backs, scrambling up a steep rock garden, following a now mostly hidden stream running down from the mountains. Reaching the treeline, and the valley higher up, weather again started to clear up. Sun shone on us sporadically, while we continued to skin up. Once we reached the gulley we had planned to explore, we soon had our skis on our backs again, as we inched up the steep gully, closely monitoring the snowpack for any instability. Due to the fresh snowfall, there was a good amount of fluffy snow on top of a harder layer of old snow, well compacted. Examining the snowpack, we found no alarming weak layers that could potentially fail when loaded.
Reaching the top of the gulley, we were met by astounding views all around. Skies having completely cleared up on our climb up, with no wind to speak off, we were in no hurry to head back, but instead spent few hours touring the upper range and checking the Máttačorru traverse that would have been interesting, had we brought some climbing equipment with us. We skinned up and skied down smaller contours, and basked in the sun. We couldn’t believe how lucky we again had gotten with the weather window. Forecast had indicated weather could clear a bit towards the afternoon, but to our pleasant surprise, it turned into a blue bird!
When it was time to head back down, after a total of 1500 meters of climbing, we found ourselves cruising down the steep gulley, enjoying the perfect soft snow. Apart from a few shouts of awe and joy on the way down, all sounds were muffled by the layer of fresh powder.
A great tour under the belt, but weather closing in on us again (you see a pattern here already?), we moved on again and left Norway, barely. Our next stop was at Riksgränsen, a ski resort just on the border of Sweden and Norway. It was only few weeks I had been there last time (more about that trip later in this blog), ski touring, but this time it served as a place to recover and resupply for a day. I also did some kite skiing, as I had brought the gear with me, should an opportunity like this arise. Weather remained reasonable throughout the day, though windy (hence the kite) and overcast.
Our next, and the road trip’s final tour was decided to be in the vicinity of Låktatjåkka. Parking overnight on the side of the road, on a narrow turnout, ensured an early start straight from the camper.
Mother nature agreed once more, and soon after we had started our way up next morning, we were again greeted the sun, peeping behind the quickly dissipating clouds. Skinning up we took note of areas with soft powder, and saw a herd of reindeers on the lower slopes, passing them from a distance. Once we were up in the valley, through which one also travels to the Låktatjåkkastugan (a mountain hut that can serve as a basecamp for ski touring in the area), we took a right turn, and started climbing up a saddle that would lead us towards Geargecorru summit. Snow was partially wind packed, with soft spots in more sheltered zones, before we reached the top plateau. Completely wind blown and icy, with lots of rocks visible, we gave up on the idea of summiting as pointless, perhaps 200 vertical meters before the summit, and instead continued down south to explore the leeside slopes for some powder turns.
Not surprisingly, the snow was much better on that side, and we had good runs with plenty of soft powder. We saw some traces of avalanches on some of the steep walls nearby and carefully kept on evaluating the conditions for safe skiing. Guidebook we used had warned about hazardous exits from the summit plateau, should one wish to ski down one of the steep couloirs that connect to the valley between the mountains. Despite our careful map reading and good visibility, approach to what we thought was the correct chute, from above over a convex slope, met a dead end. A large drop down below and icy traverse on both sides, had us climbing straight up, skis on our backs. Taking note of the surprisingly icy conditions on that part of the mountain, instead of traversing a bit further, we decided we would be better off taking the long cruise back, following our ascent route from the valley. A smart choice in the end, it was a nice run back to the camper in mixed snow of powder, hard pack and crud.
All good things come to an end, and thrilled about how things had turned out throughout the week, we started the long journey back home. As we had had to make and change plans on the fly, judging the weather and the prevailing conditions in the mountains as we went, having a camper with us turned out to be a trip saver. Being able to move with (or run from) the weather allowed us to take the most out of what nature chose to offer. I can highly recommend a similar tour, and a camper as the moving basecamp. For this trip, there were just two of us, and despite I’ve referred to only ‘skiing’ above (for simplicity), my friend was actually on snowboard, a splitted one, as you can see from the pictures. This worked well, as skinning up we had a similar brisk pace and a team of two keeps thing simple, yet safe enough. Splitboard seemed to work fine for most part, though steep traverses on short but wide halves was definitely more strenuous, especially on hard pack. Of course snowboard is superbly good on powder, so for the extra effort, there is a reward in the end. I use telemark skis myself, NTN’s (Rottefella Freedom) and medium width, lightweight skis (Black Diamond Carbon Aspect), that worked perfectly throughout the season.
As I’ve mentioned, we used maps and guidebooks to make plans on the go. Depending where in northern Norway or Sweden you head to, you might find the following guidebooks useful:
Also few web resources, such as Kugo.no and Snösäker.se, are extremely useful for planning purposes.
❯❯ Flickr album (with more photos): Road Trip in the North
]]>My paddling experience prior to owning a packraft was close to non-existent. I had paddled a bit with a canoe, running down flooding rivers with a friend. But living in a block of flats, I had no room to store a canoe or a kayak of my own. Running across these little vessels online, I was immediately intrigued, as I saw the potential with storability and portability of such rafts. At the time, Alpacka Raft was pretty much the only feasible option, especially for a guy my size, with only one other company in the market, offering slightly more fragile, but also a bit more lightweight rafts for standard-sized paddlers. As packrafts were raising some interest within Europe, I managed to hook up with two guys from Germany, for a group order of rafts and accessories from Alpacka Raft. These guys later established the first European store for packrafting gear, the Packrafting Store.
Exactly 5 years have now passed since I placed the order and few weeks later unpacked a shipment of a Alpacka Raft Llama and a beautiful 5-piece Sawyer paddle, made specifically for packrafting. Ordering a relatively expensive raft just based on videos and reports online, I had opted for a version without a spray deck, to cut some of the cost. I also had no plans to do any white water, and felt I could get by without it just fine. Cost of the optional spray deck was at the time around 250 EUR, while the raft and the paddle together were around 1000 EUR, delivered.
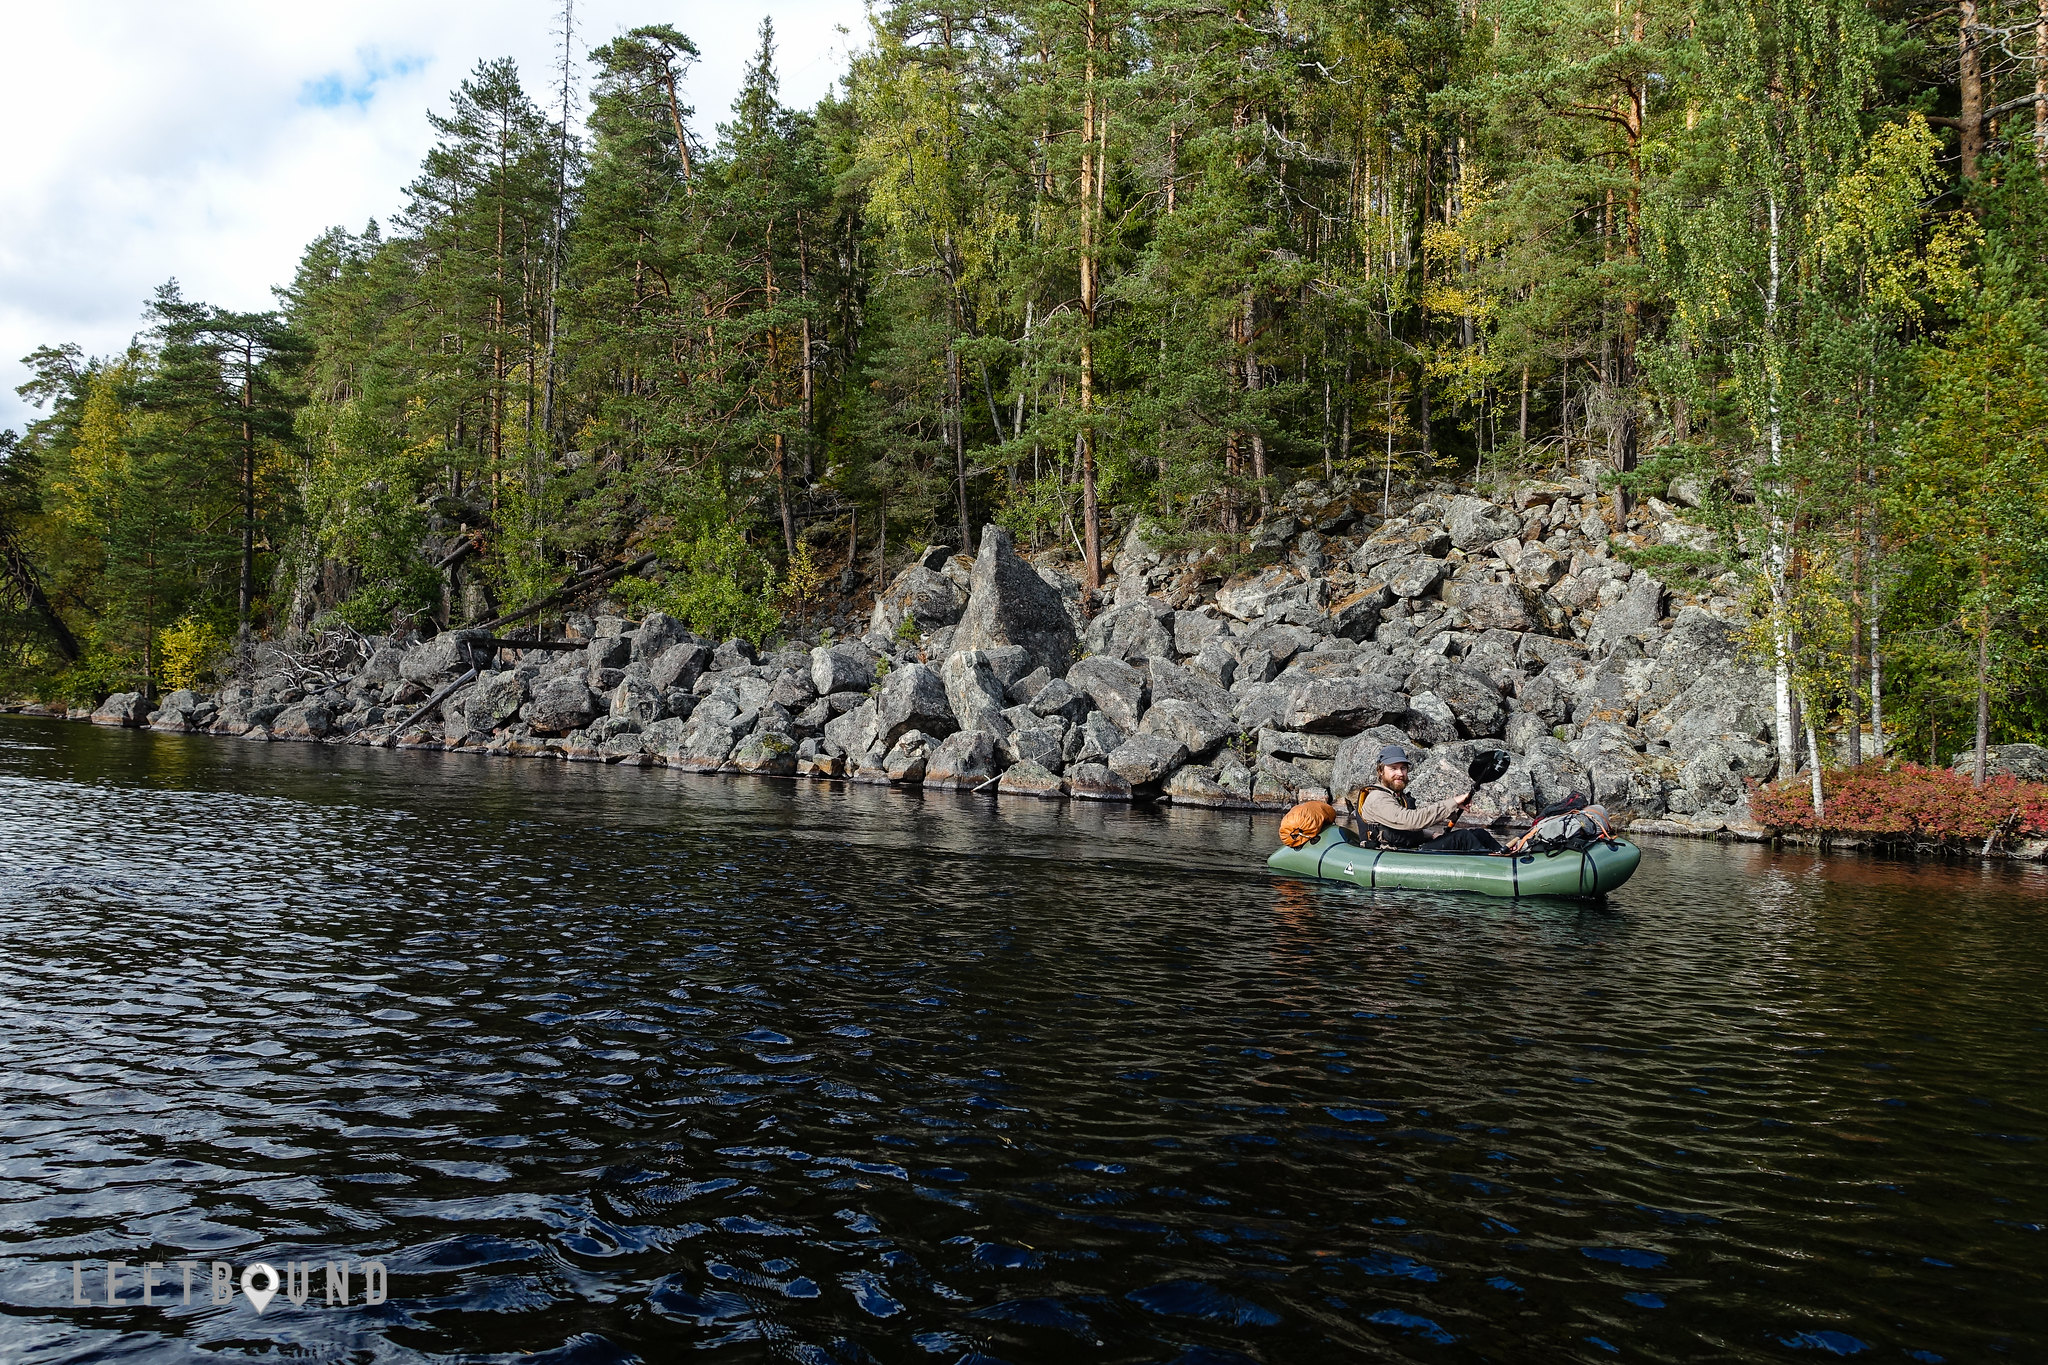
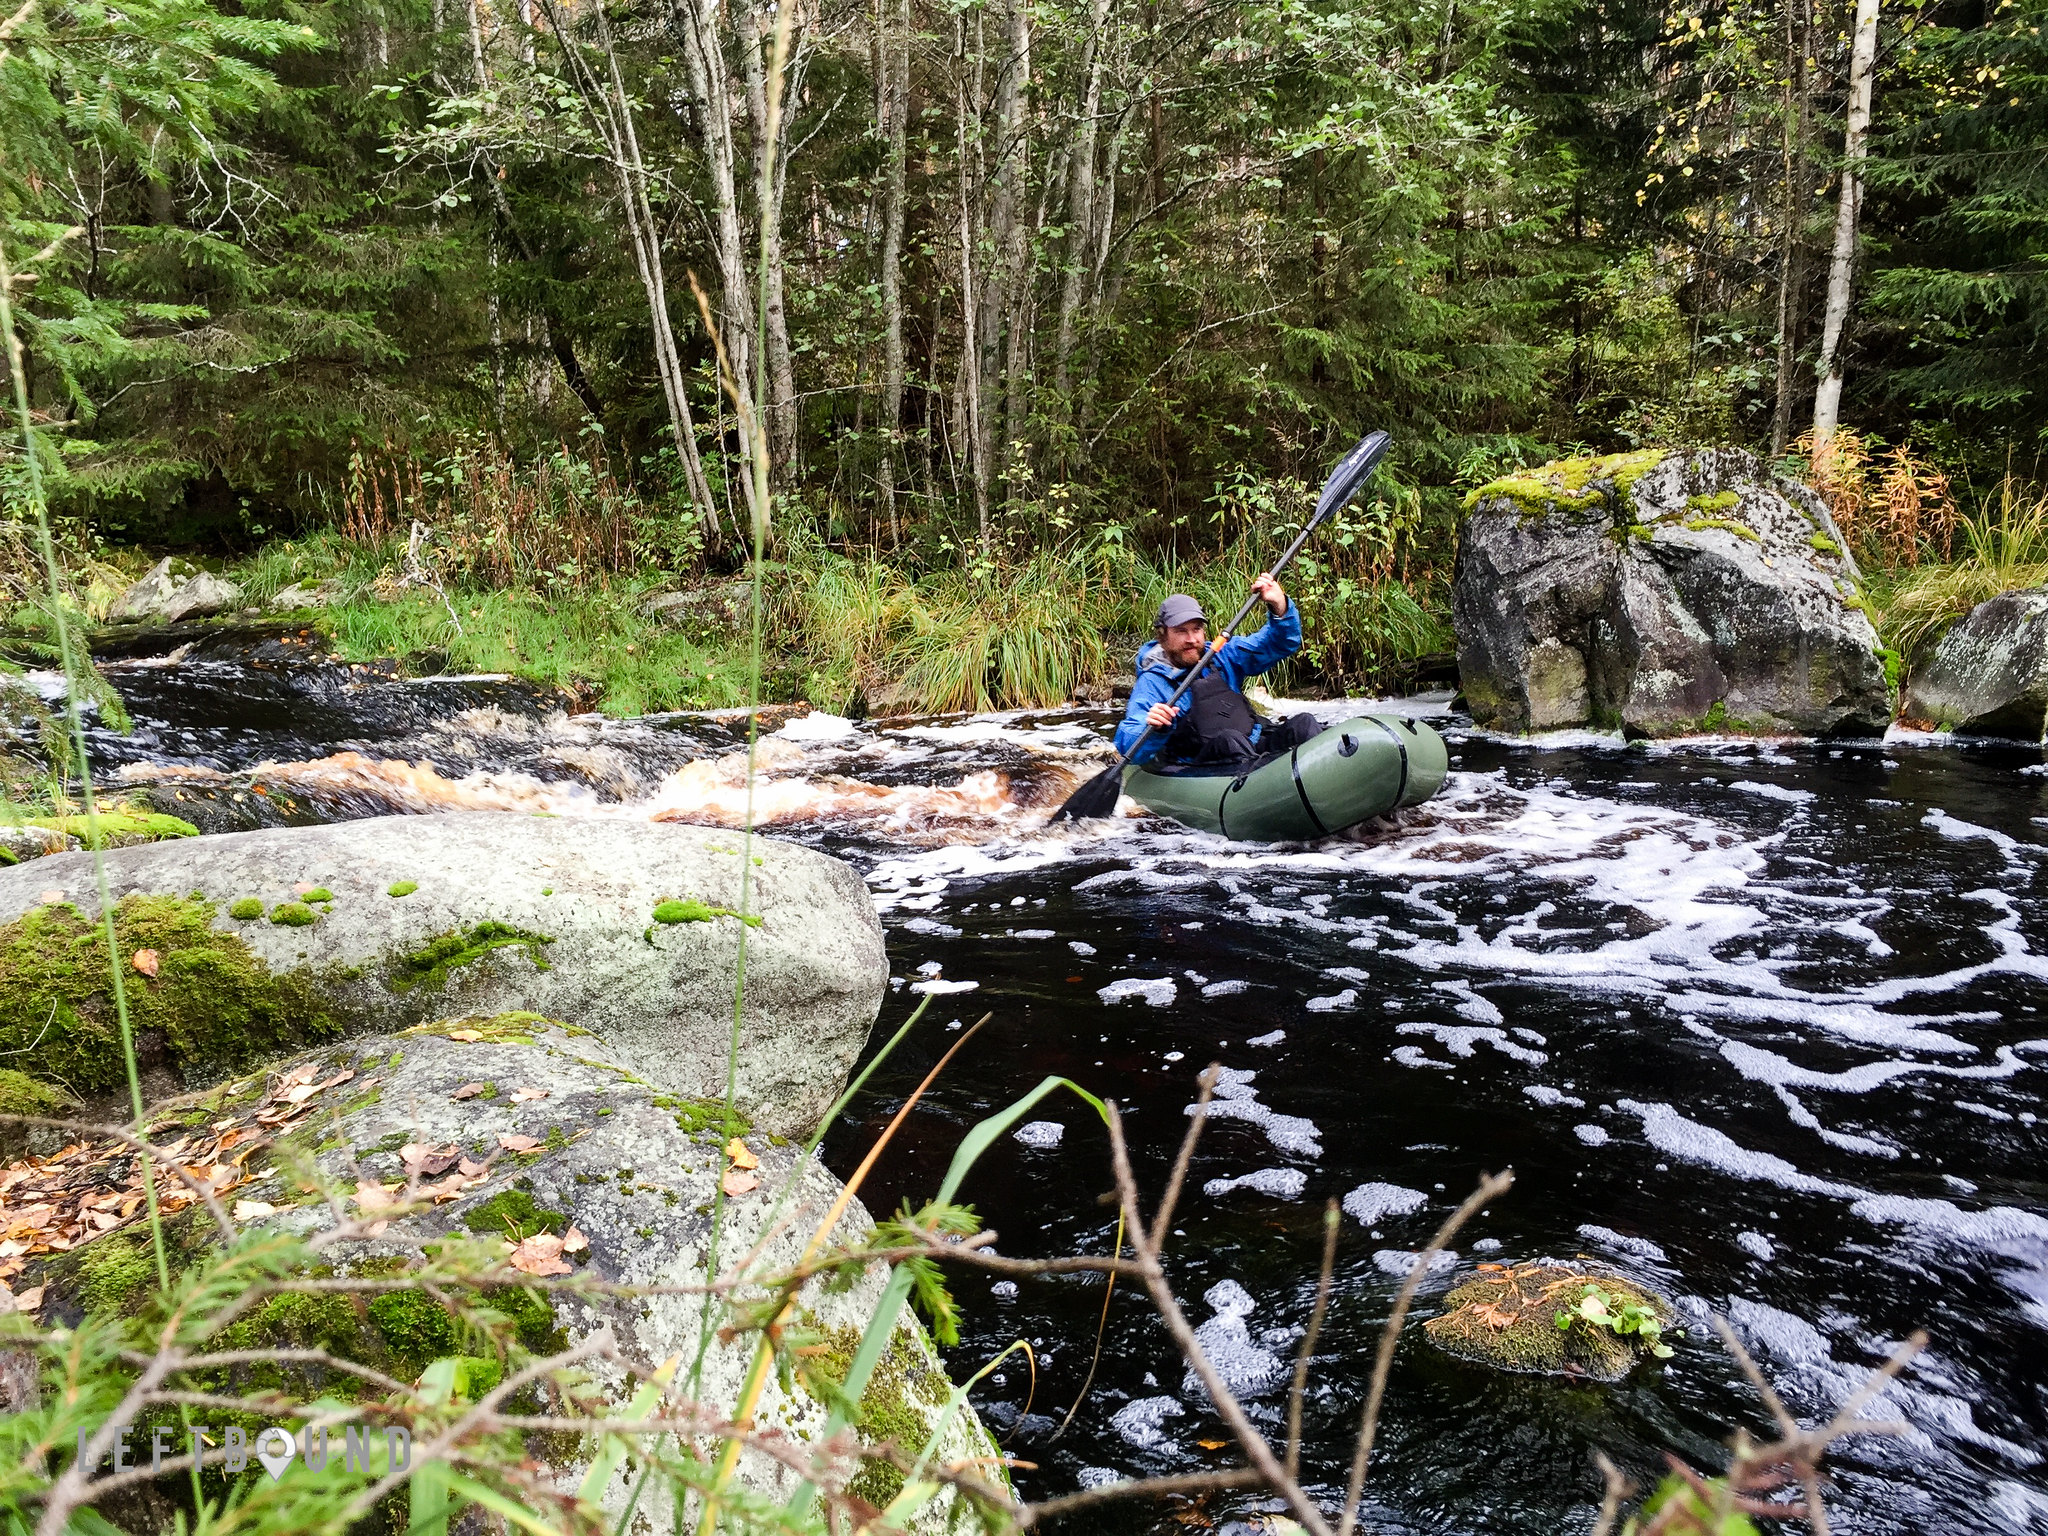
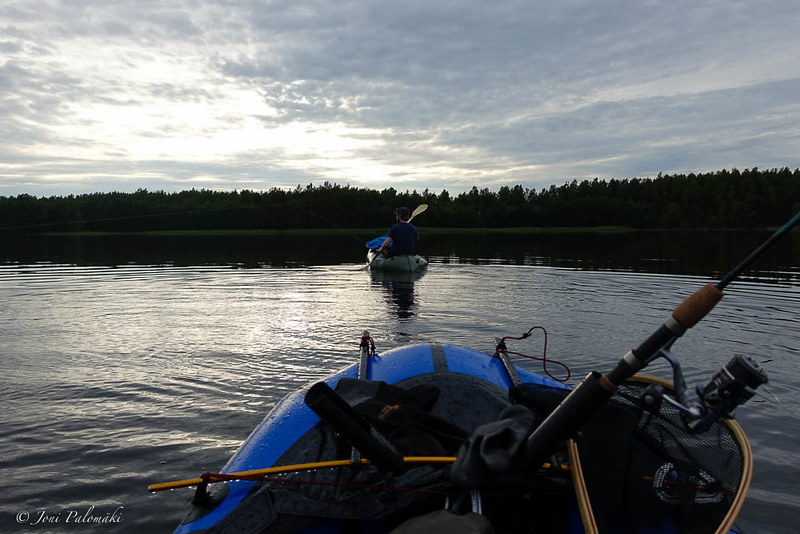
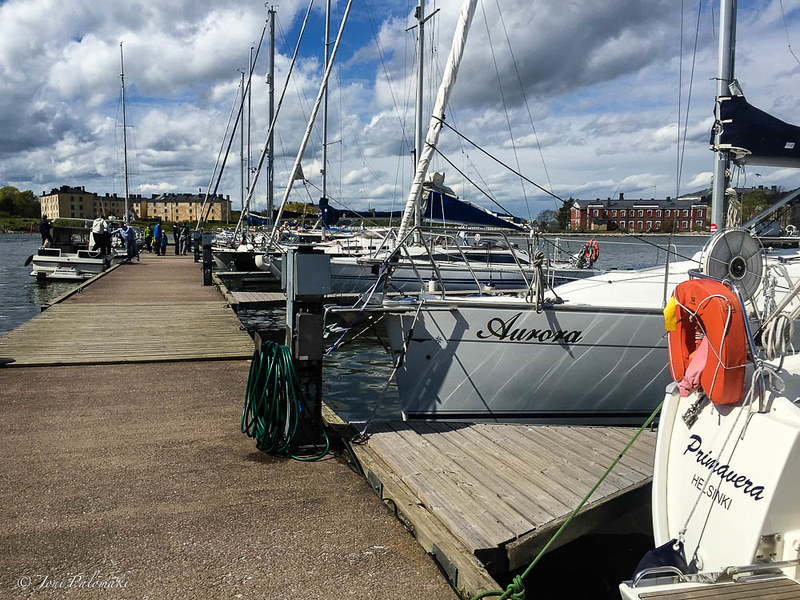
My concerns whether I had made a bad call, purchasing one blindly, quickly evaporated, as I inflated the raft and started exploring the nearby rivers and lakes, and the Baltic Sea archipelago. It quickly became a go-to tool for majority of my outdoor endeavors. Winter in between, once spring floods arrived, against my initial plans, I did venture into rapids and white water, and quickly realized the importance of some sort of spray deck. I also started to see benefits of such for paddling through persistent rain. Hence I ended up selling the raft on the verge of summer, and ordering a new one with a Cruiser spray deck. And, as I could get a very good deal with the raft on a new, reinforced version of the Sawyer Paddle, I also upgraded that with no loss. Total cost of an Alpacka Raft with a spray deck and a Sawyer Paddle (plus some spares and kit) was 1300 eur - this was in May 2012. At the time, Alpacka was doing quite significant remodeling on their packrafts. The latest model I received, sported the extended stern which added stability in rapids and made the raft track much better especially on flats. Compared to the earlier versions, also the bow was more pointed and slightly upturned, which helped the same, with minimal weight penalty.
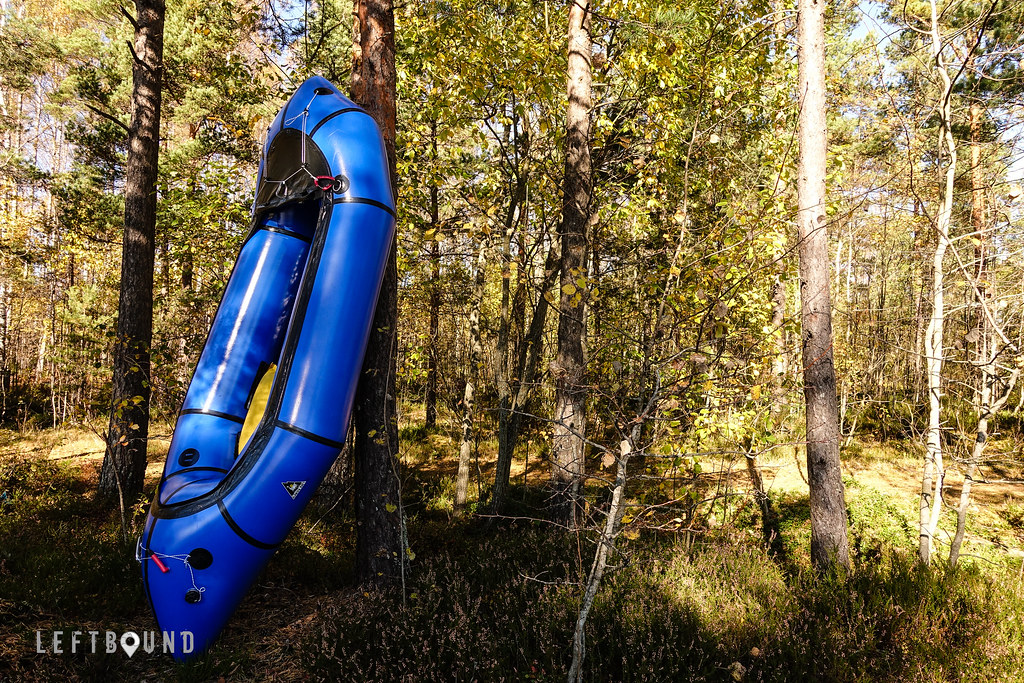
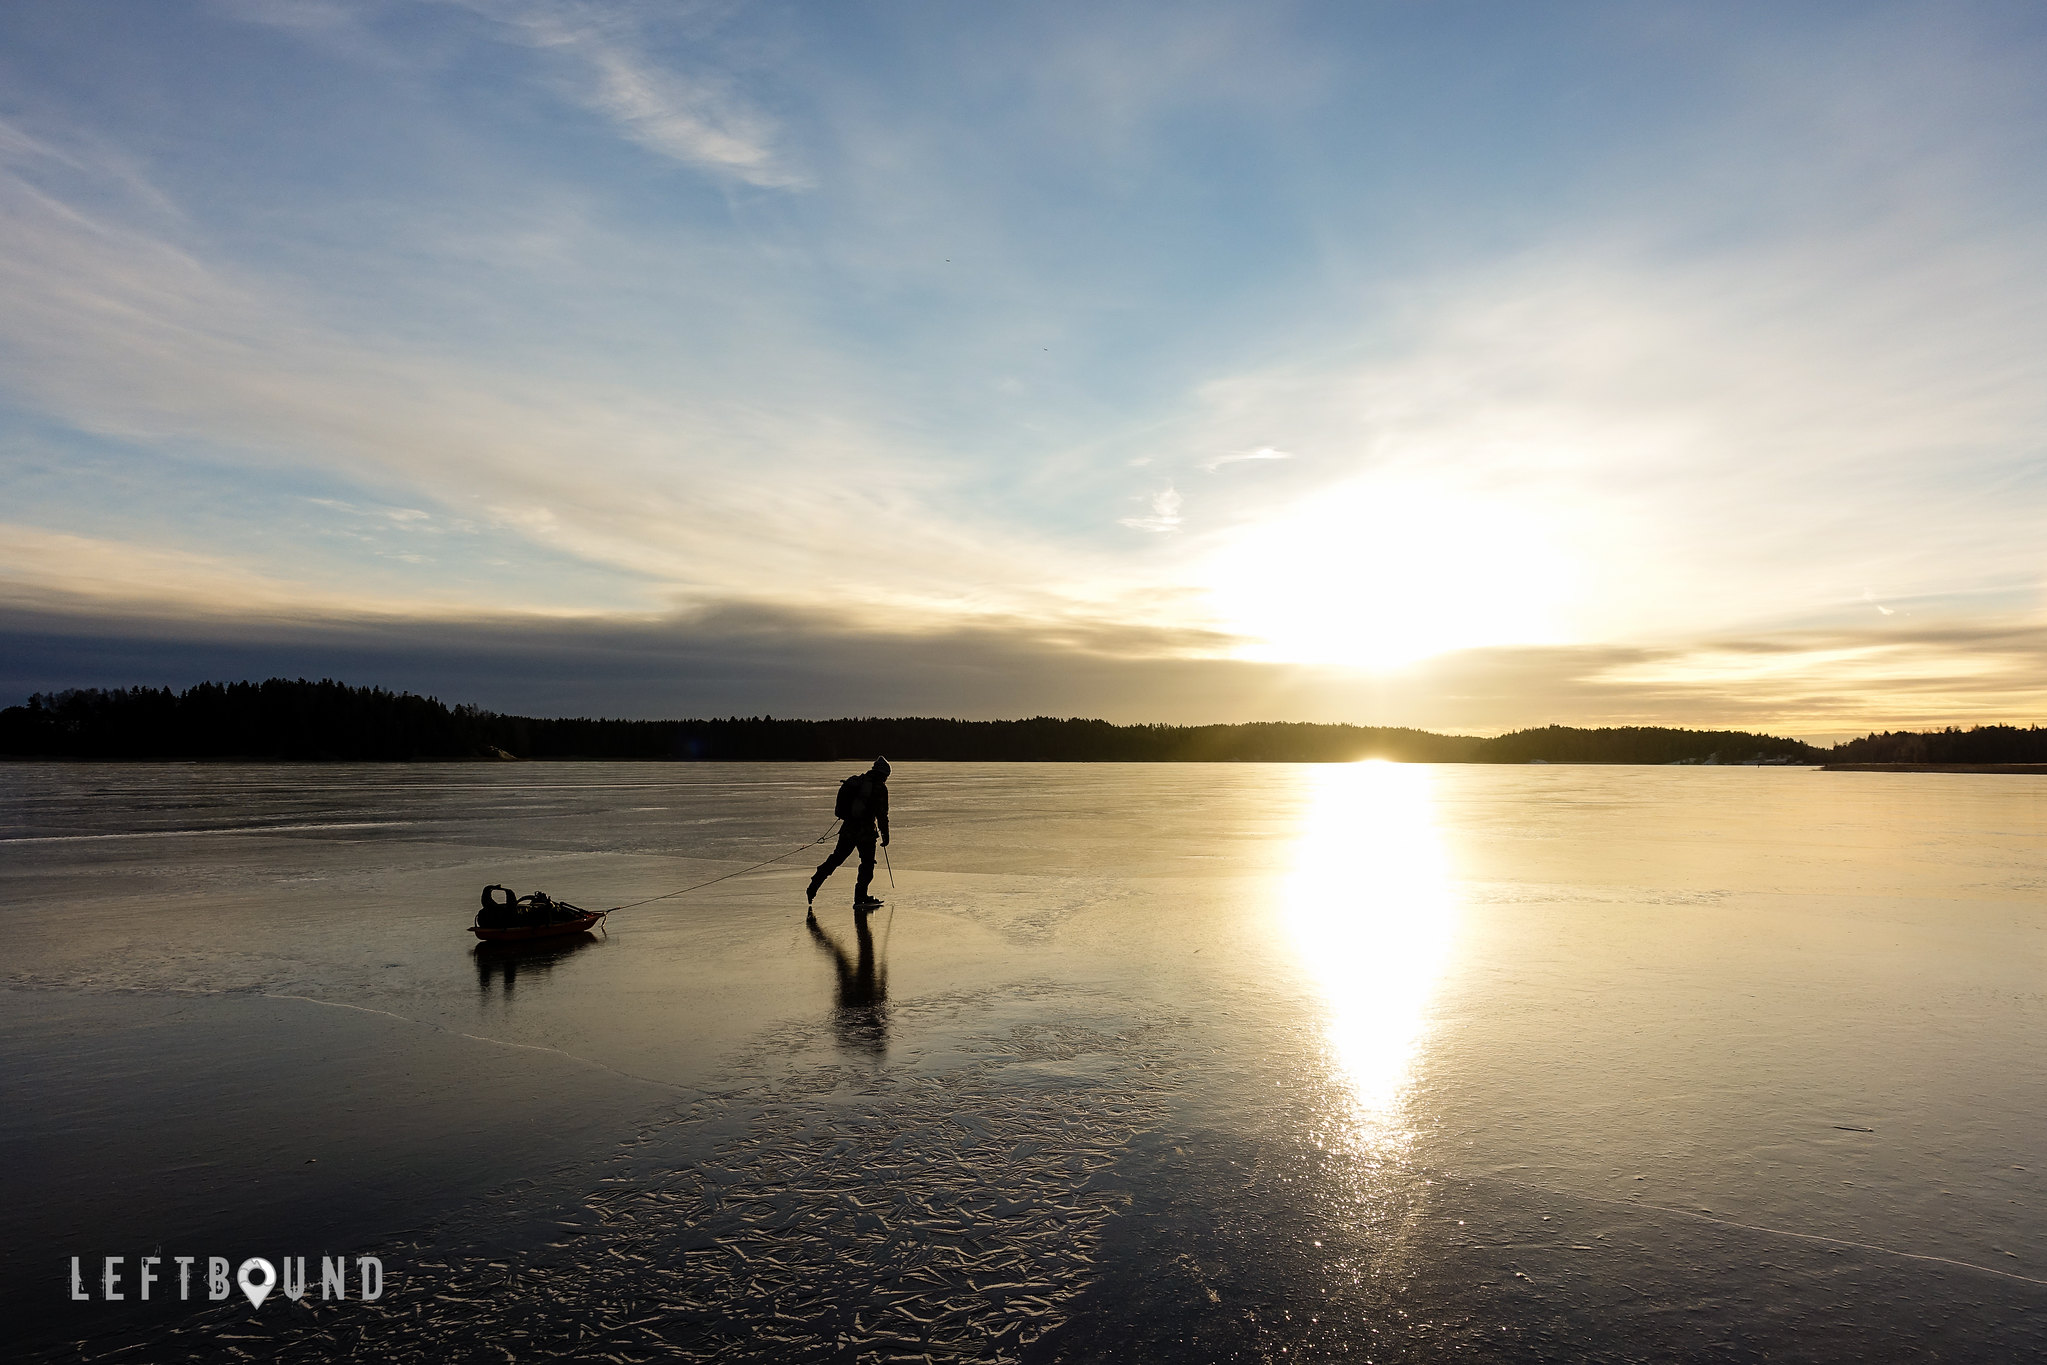
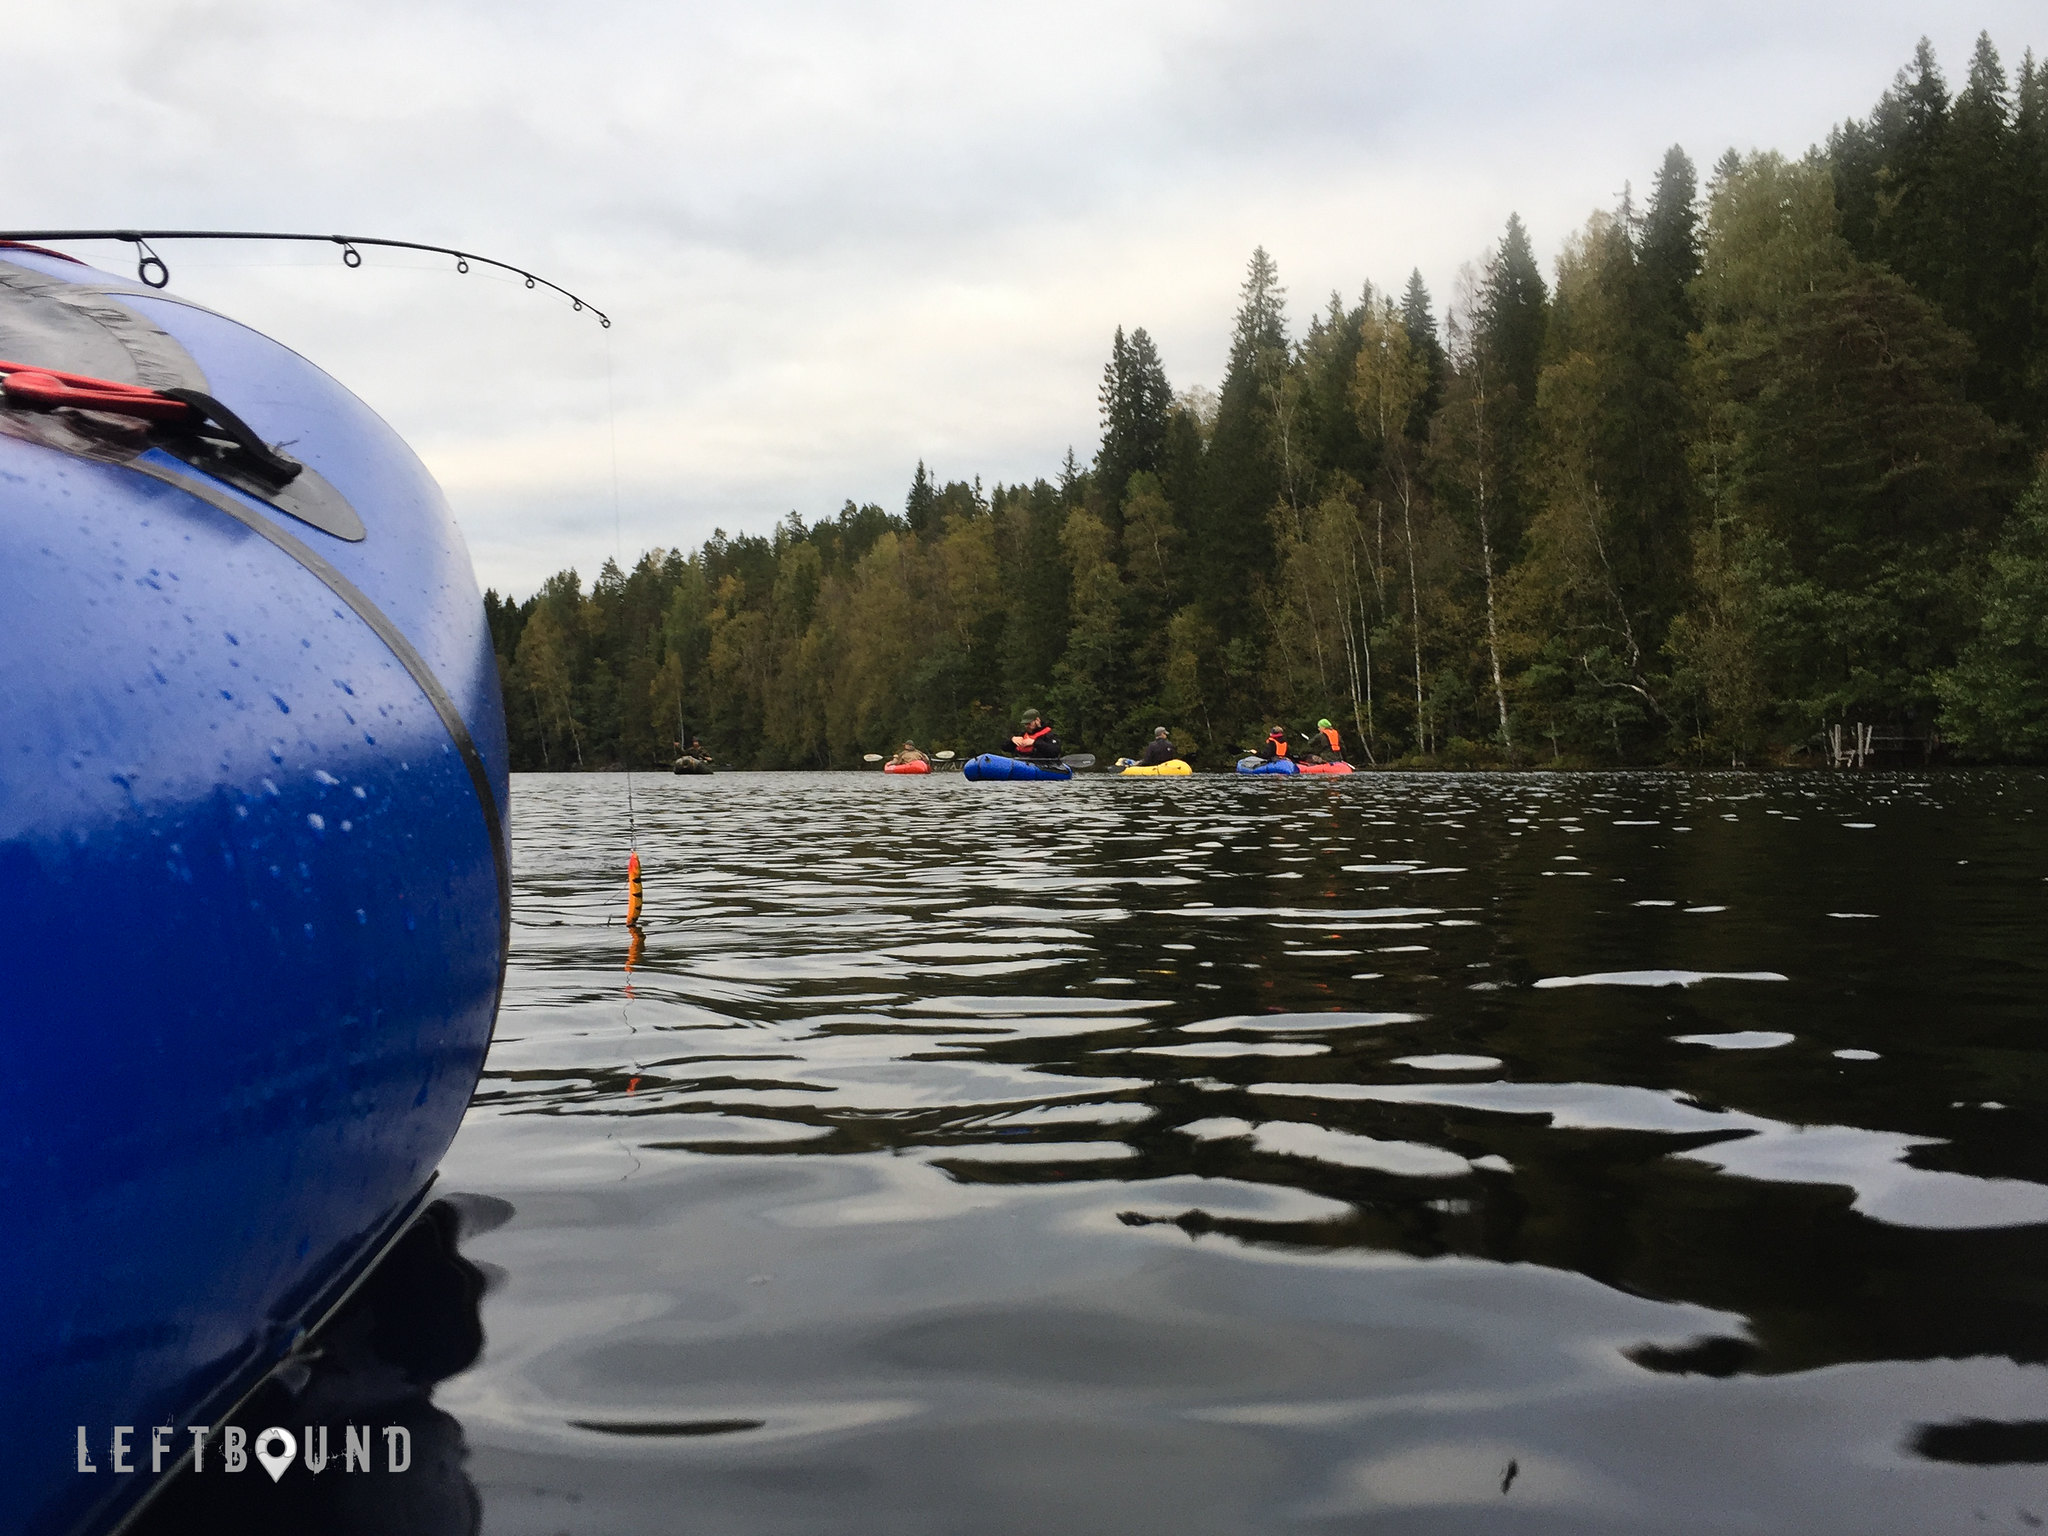
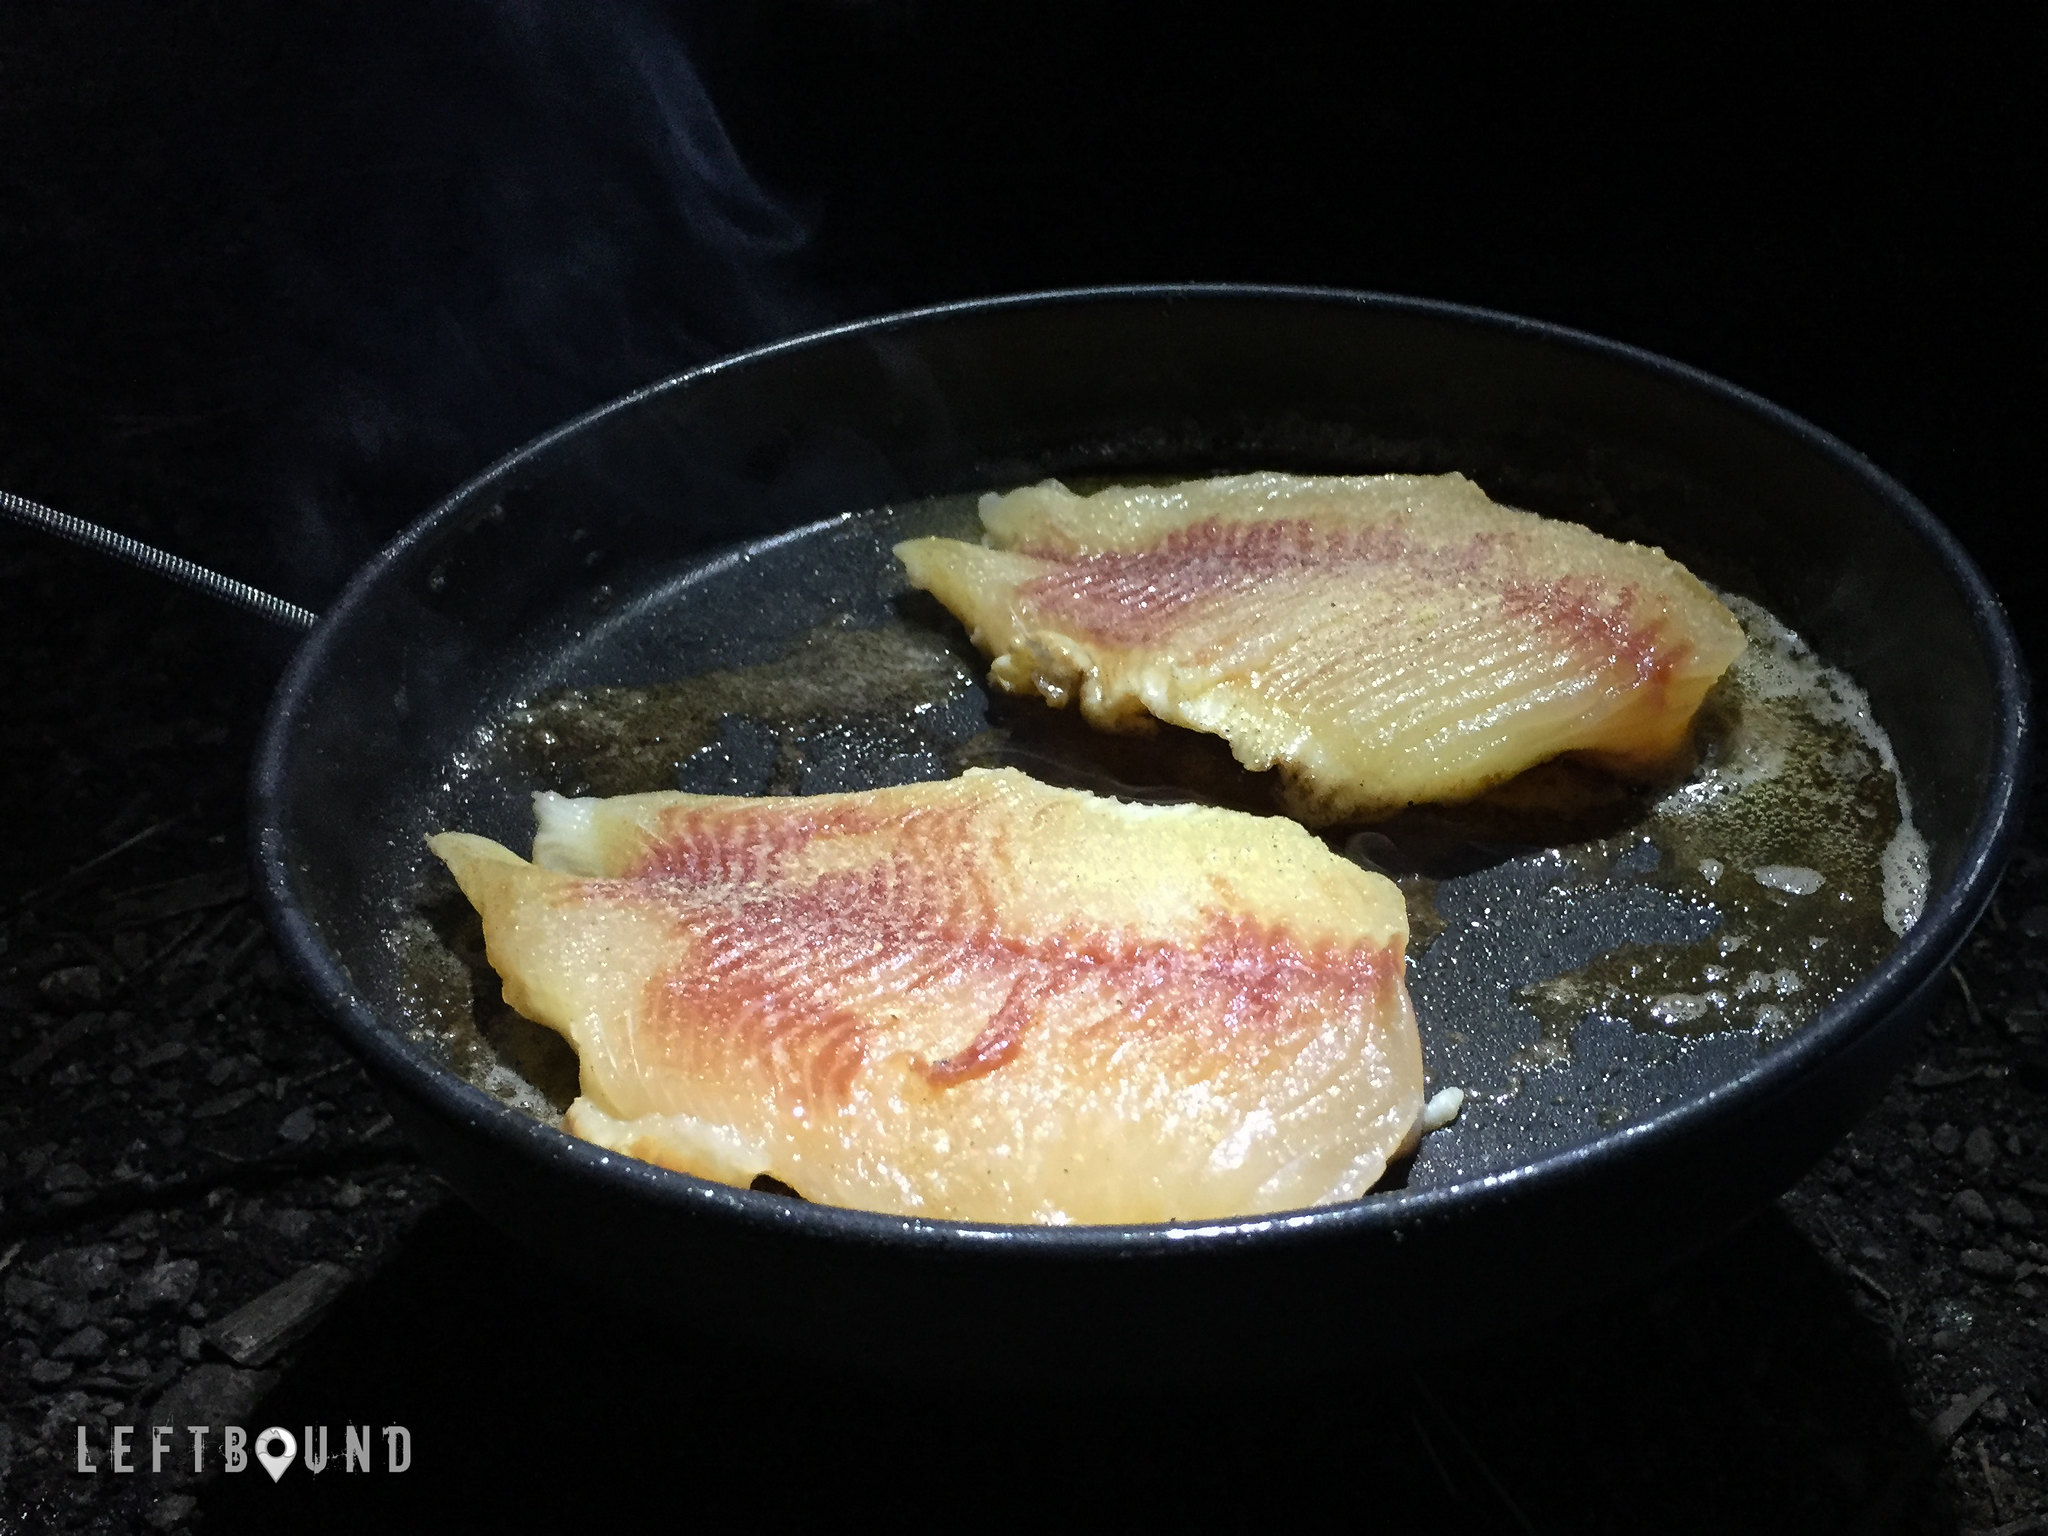
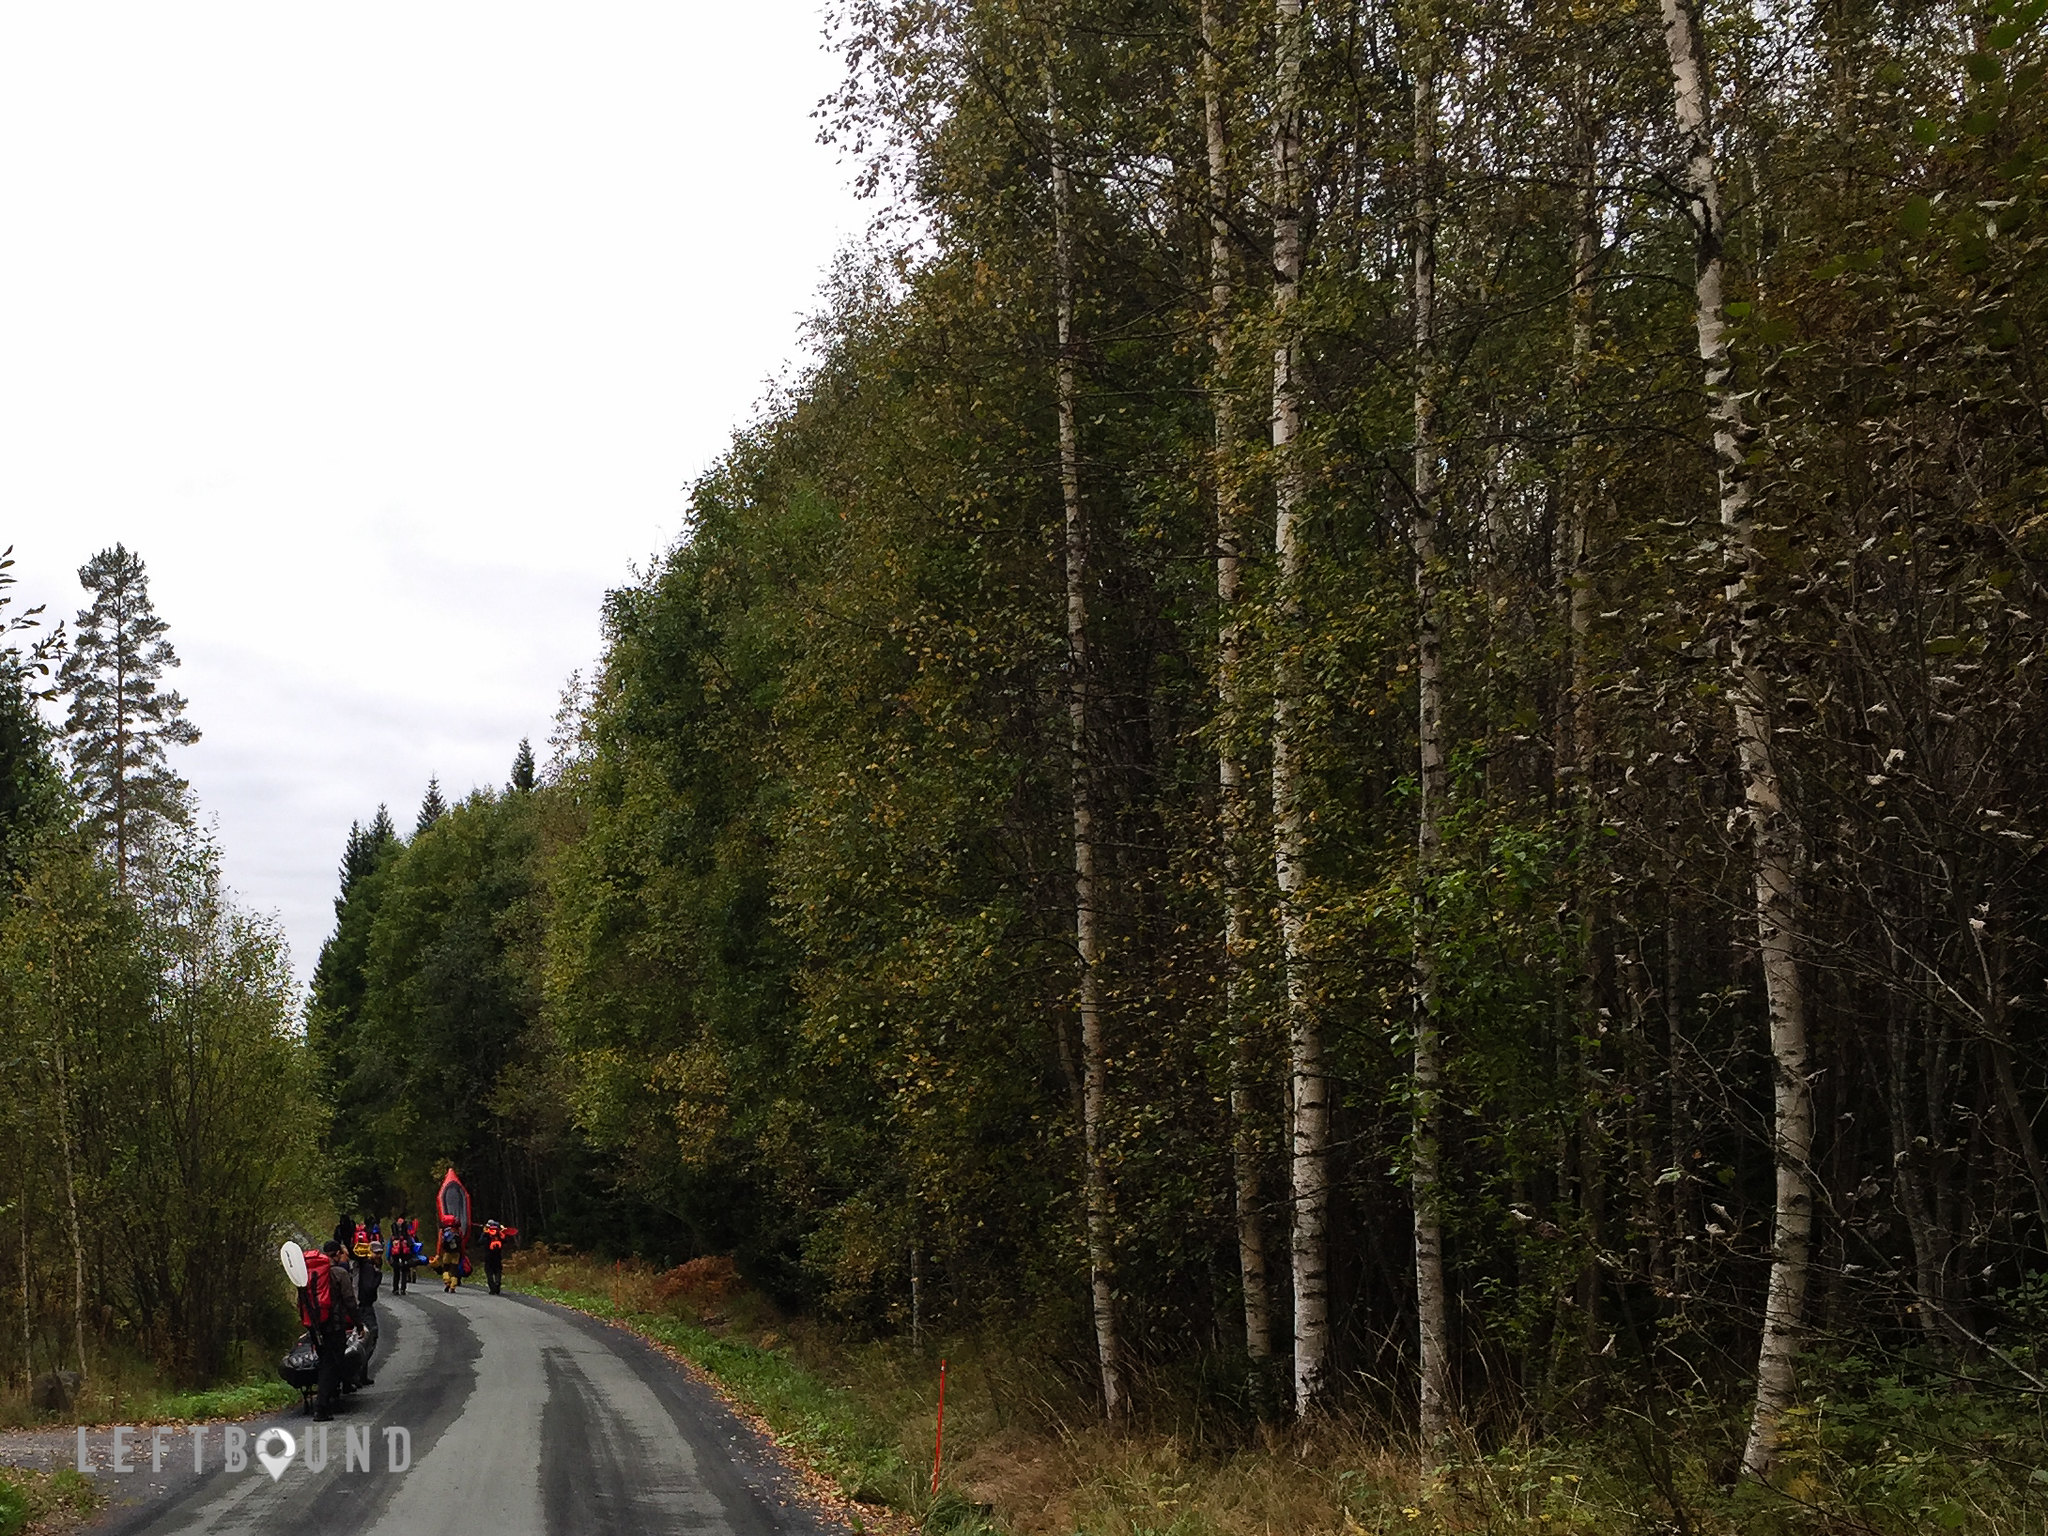
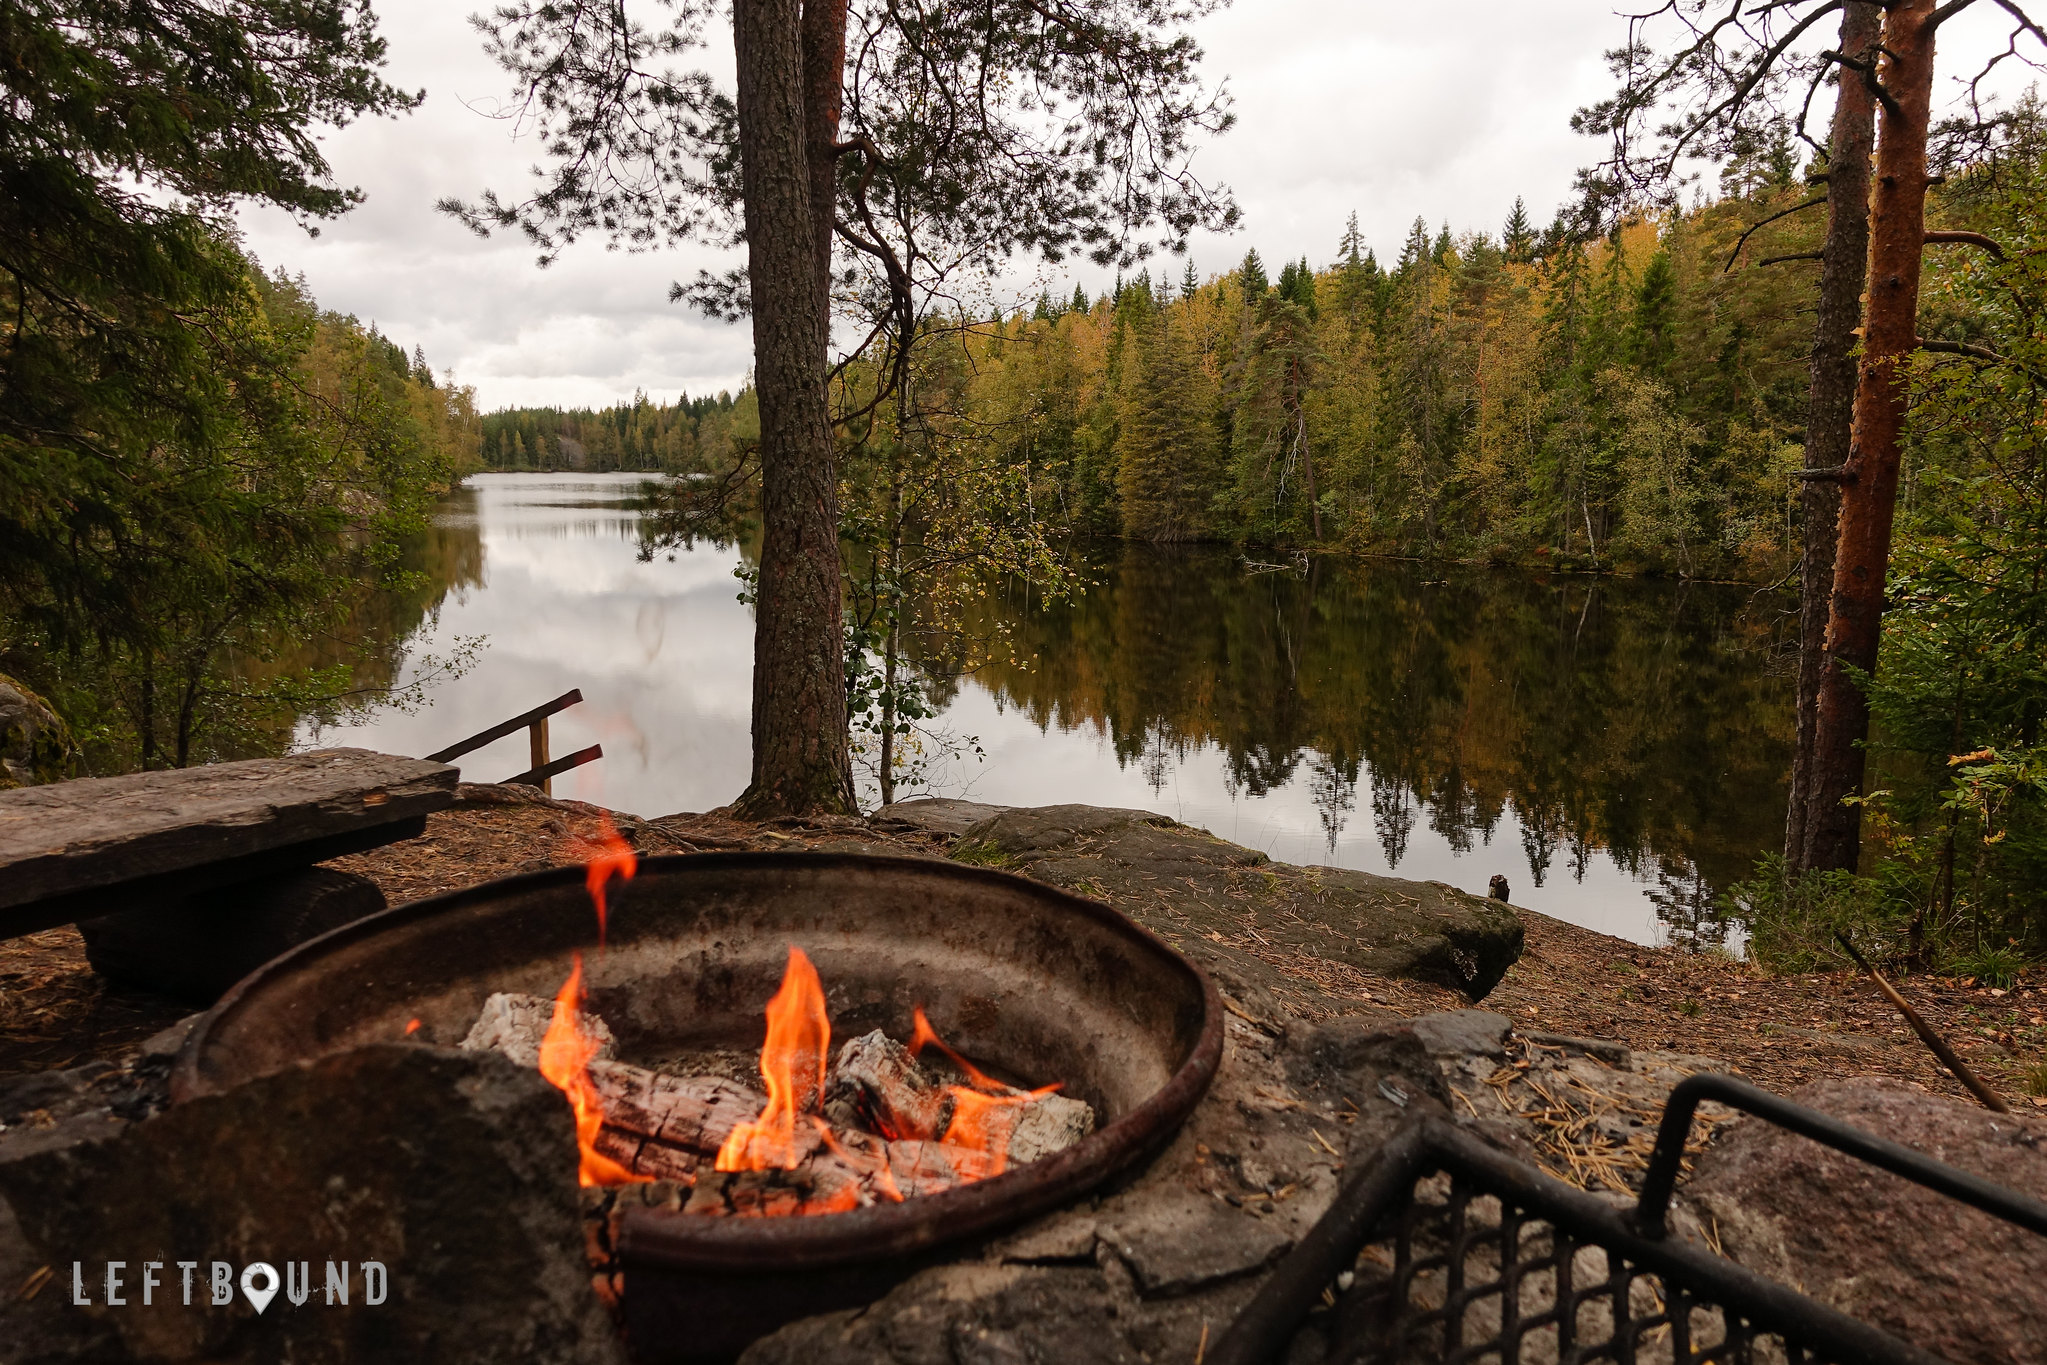
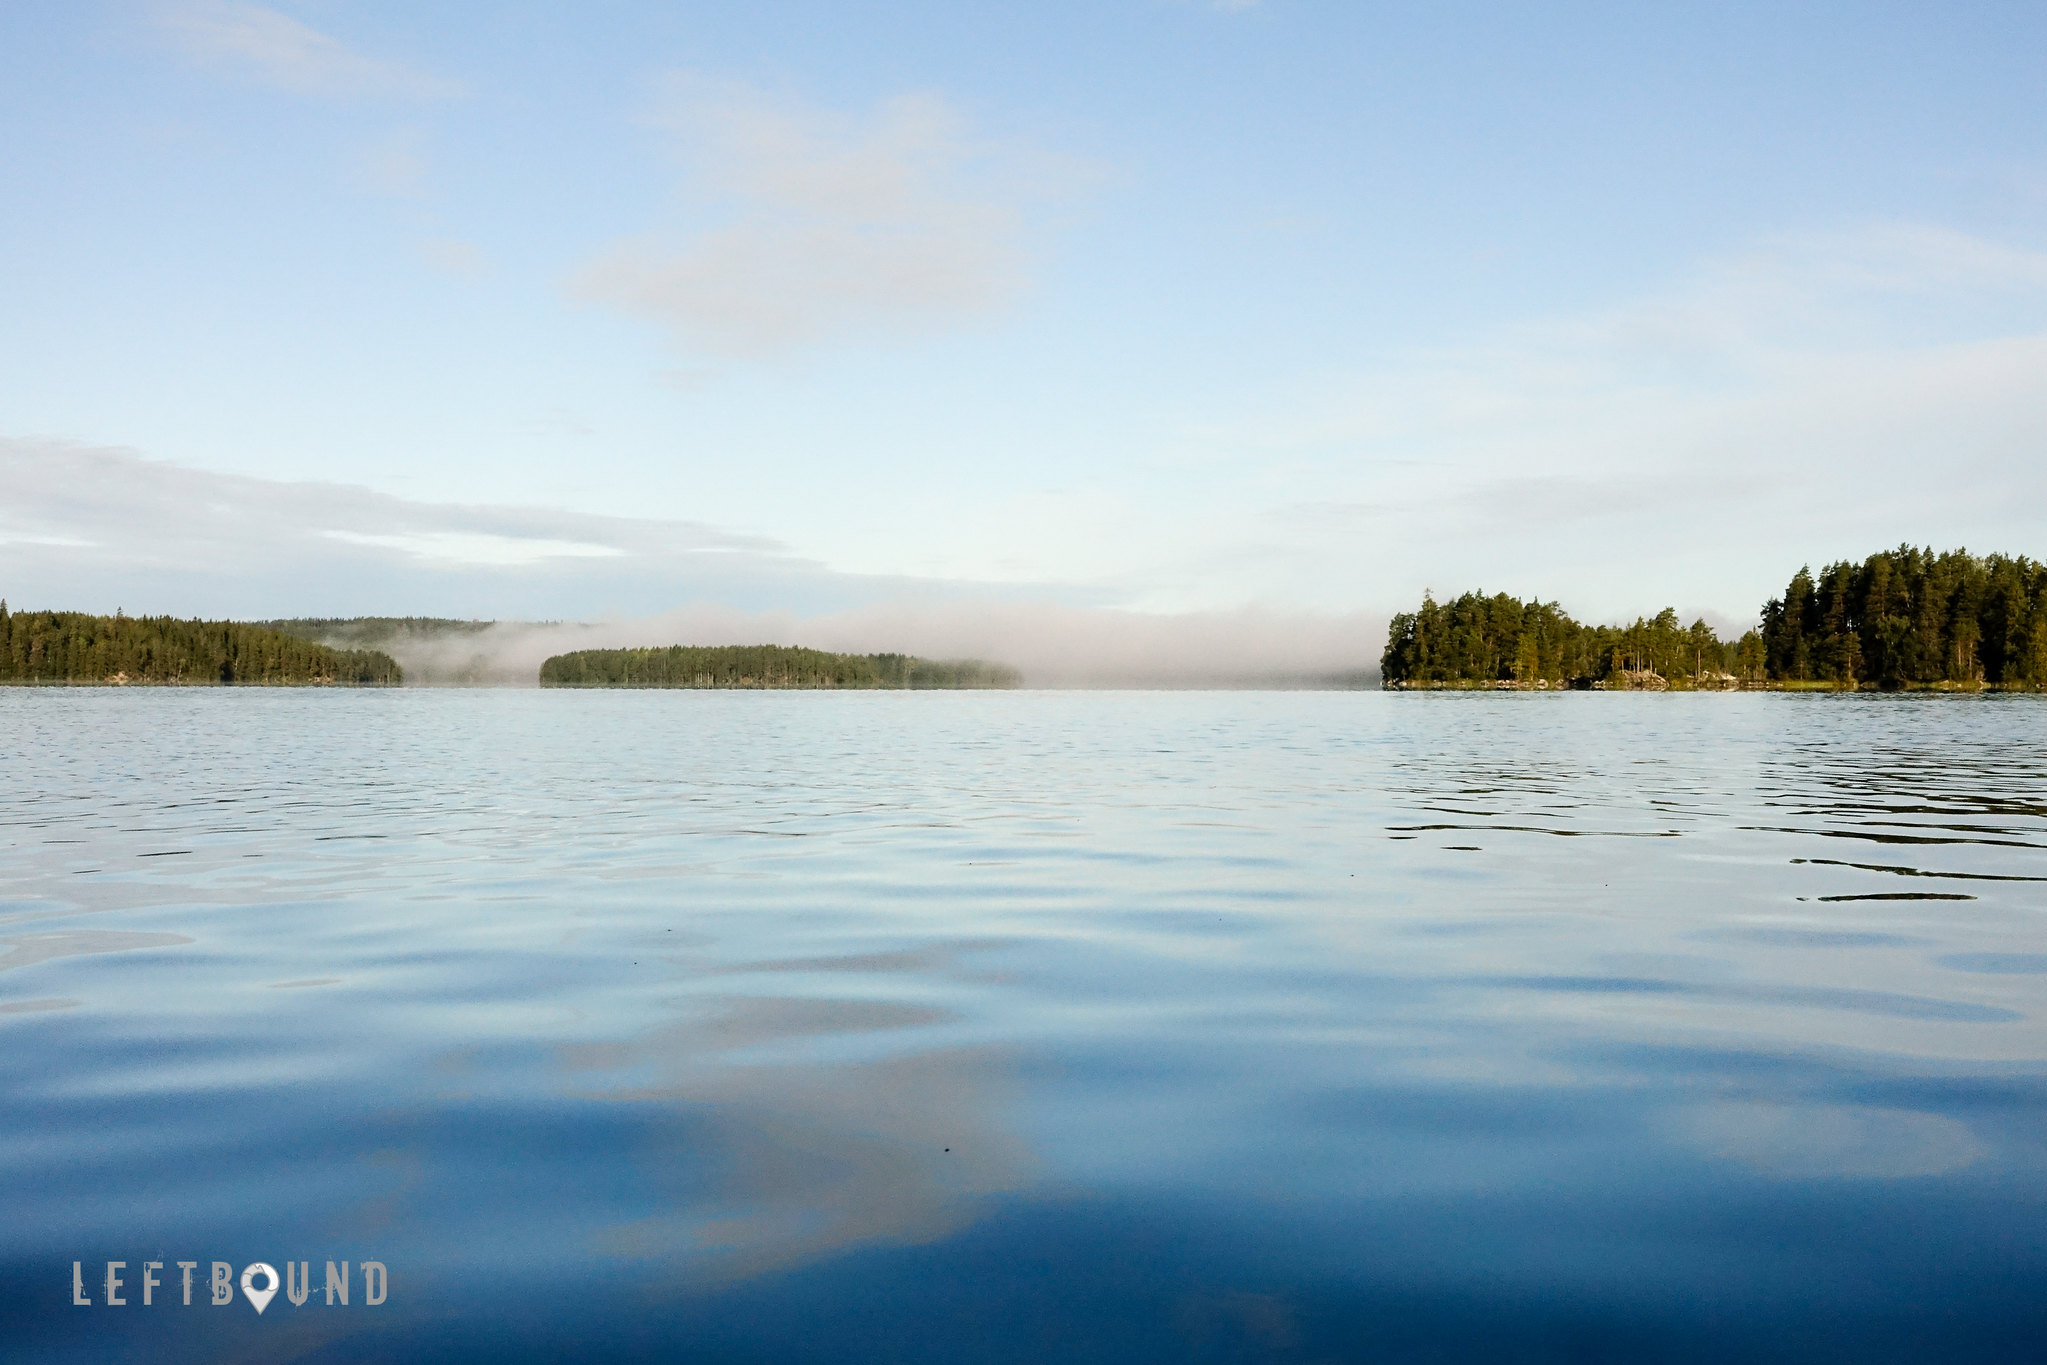
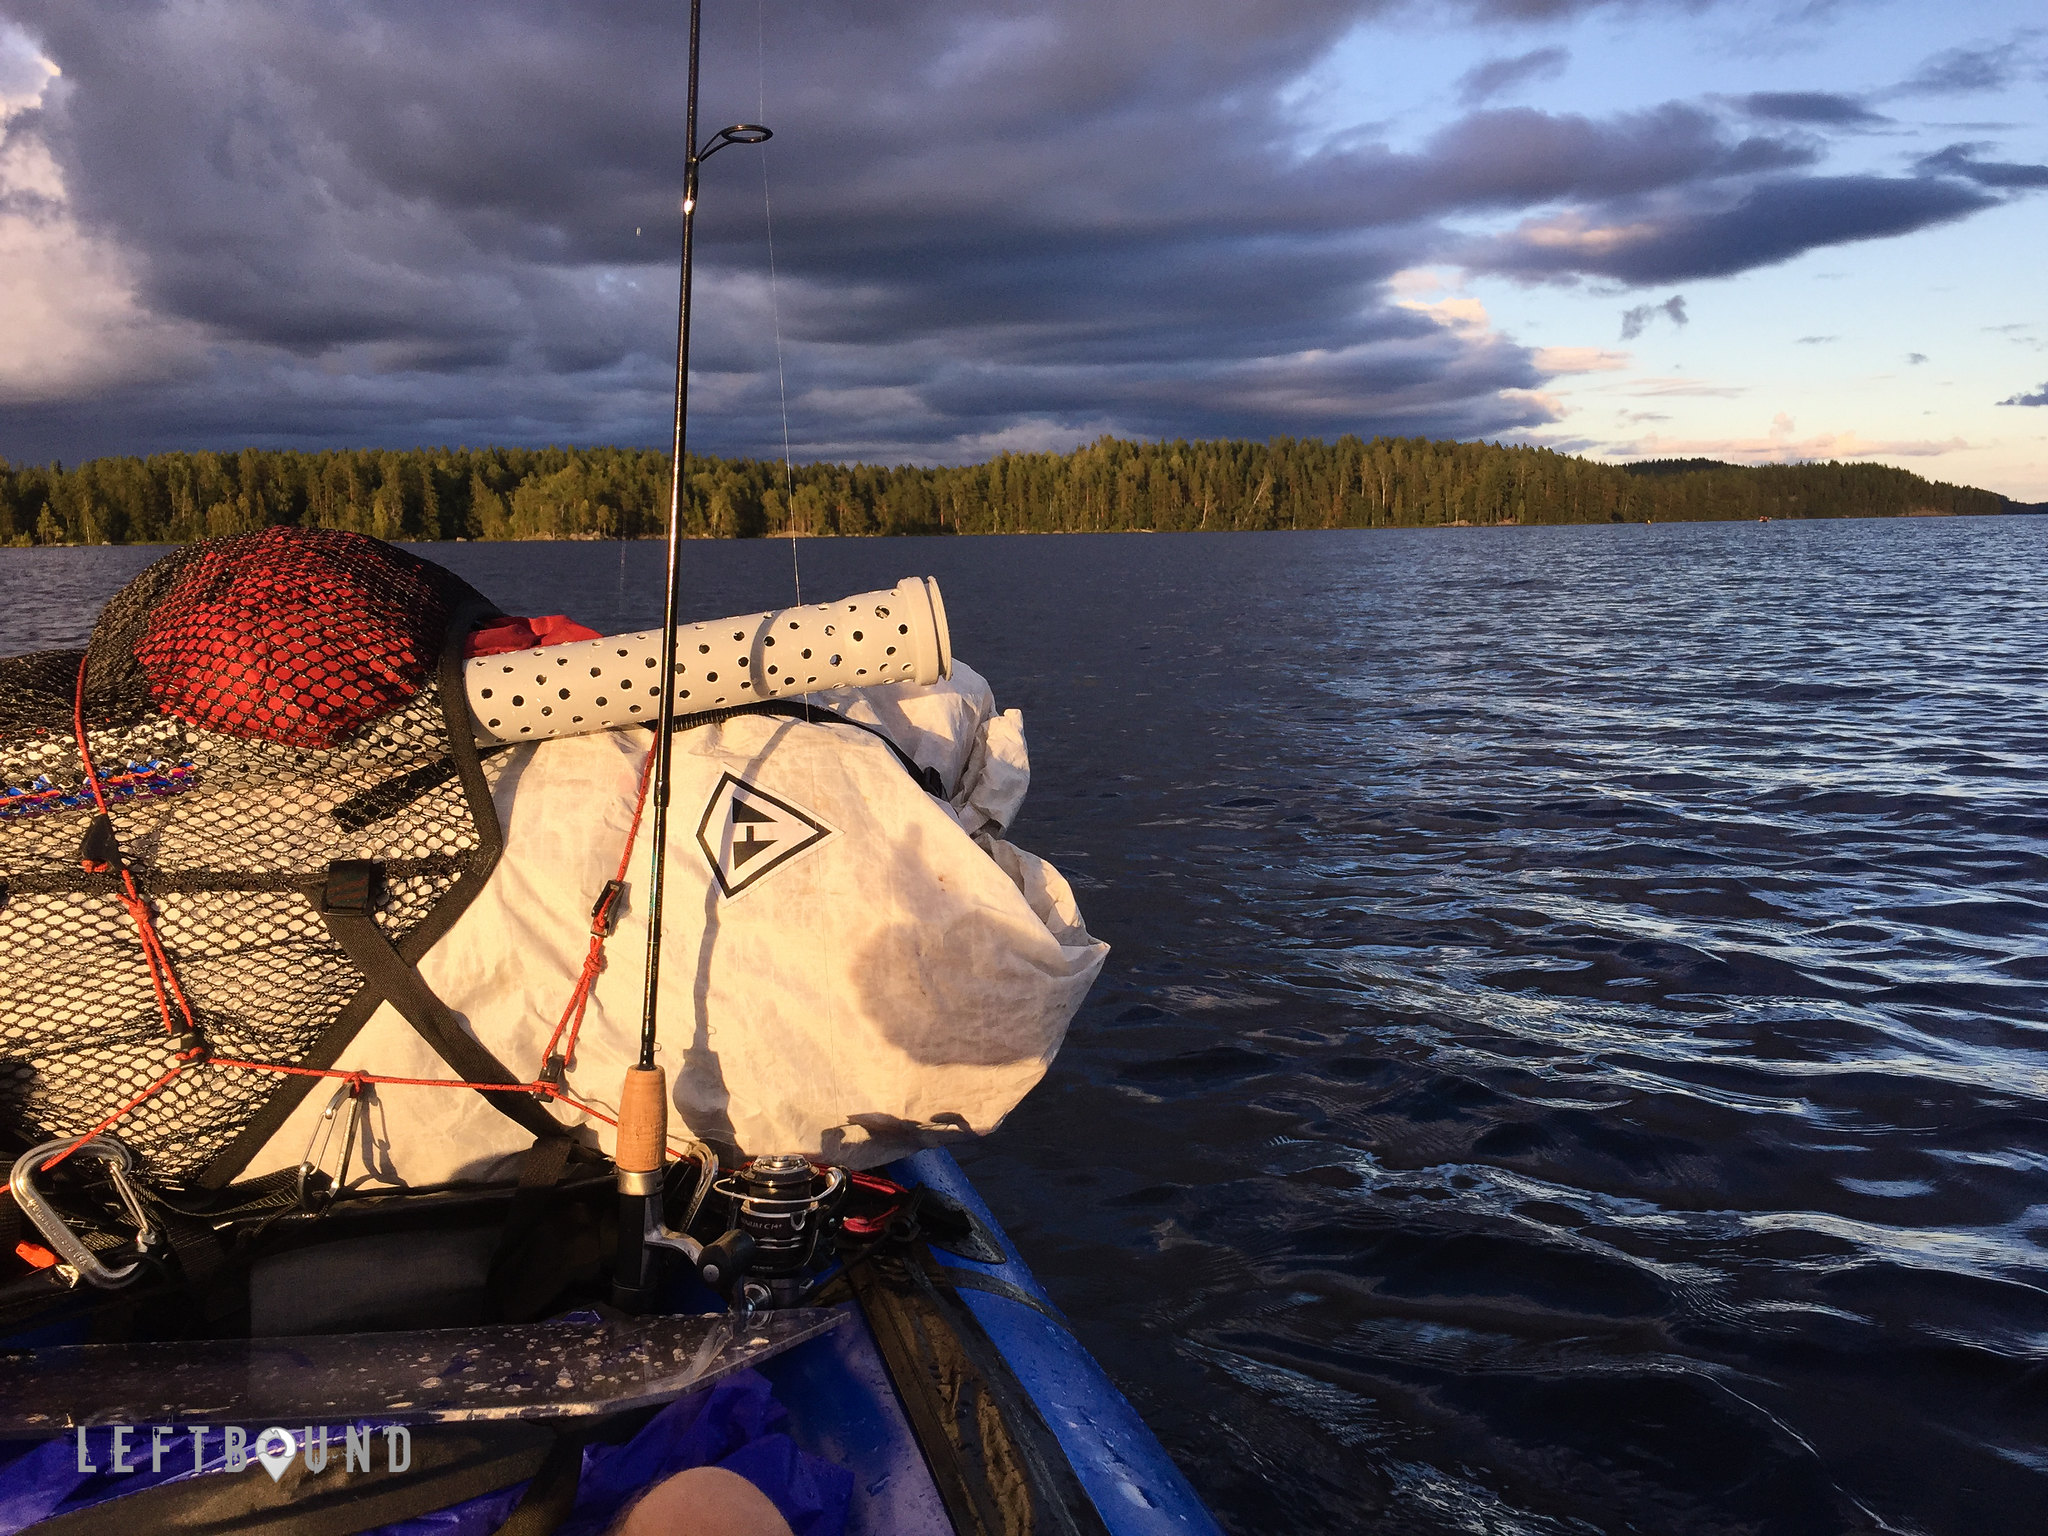
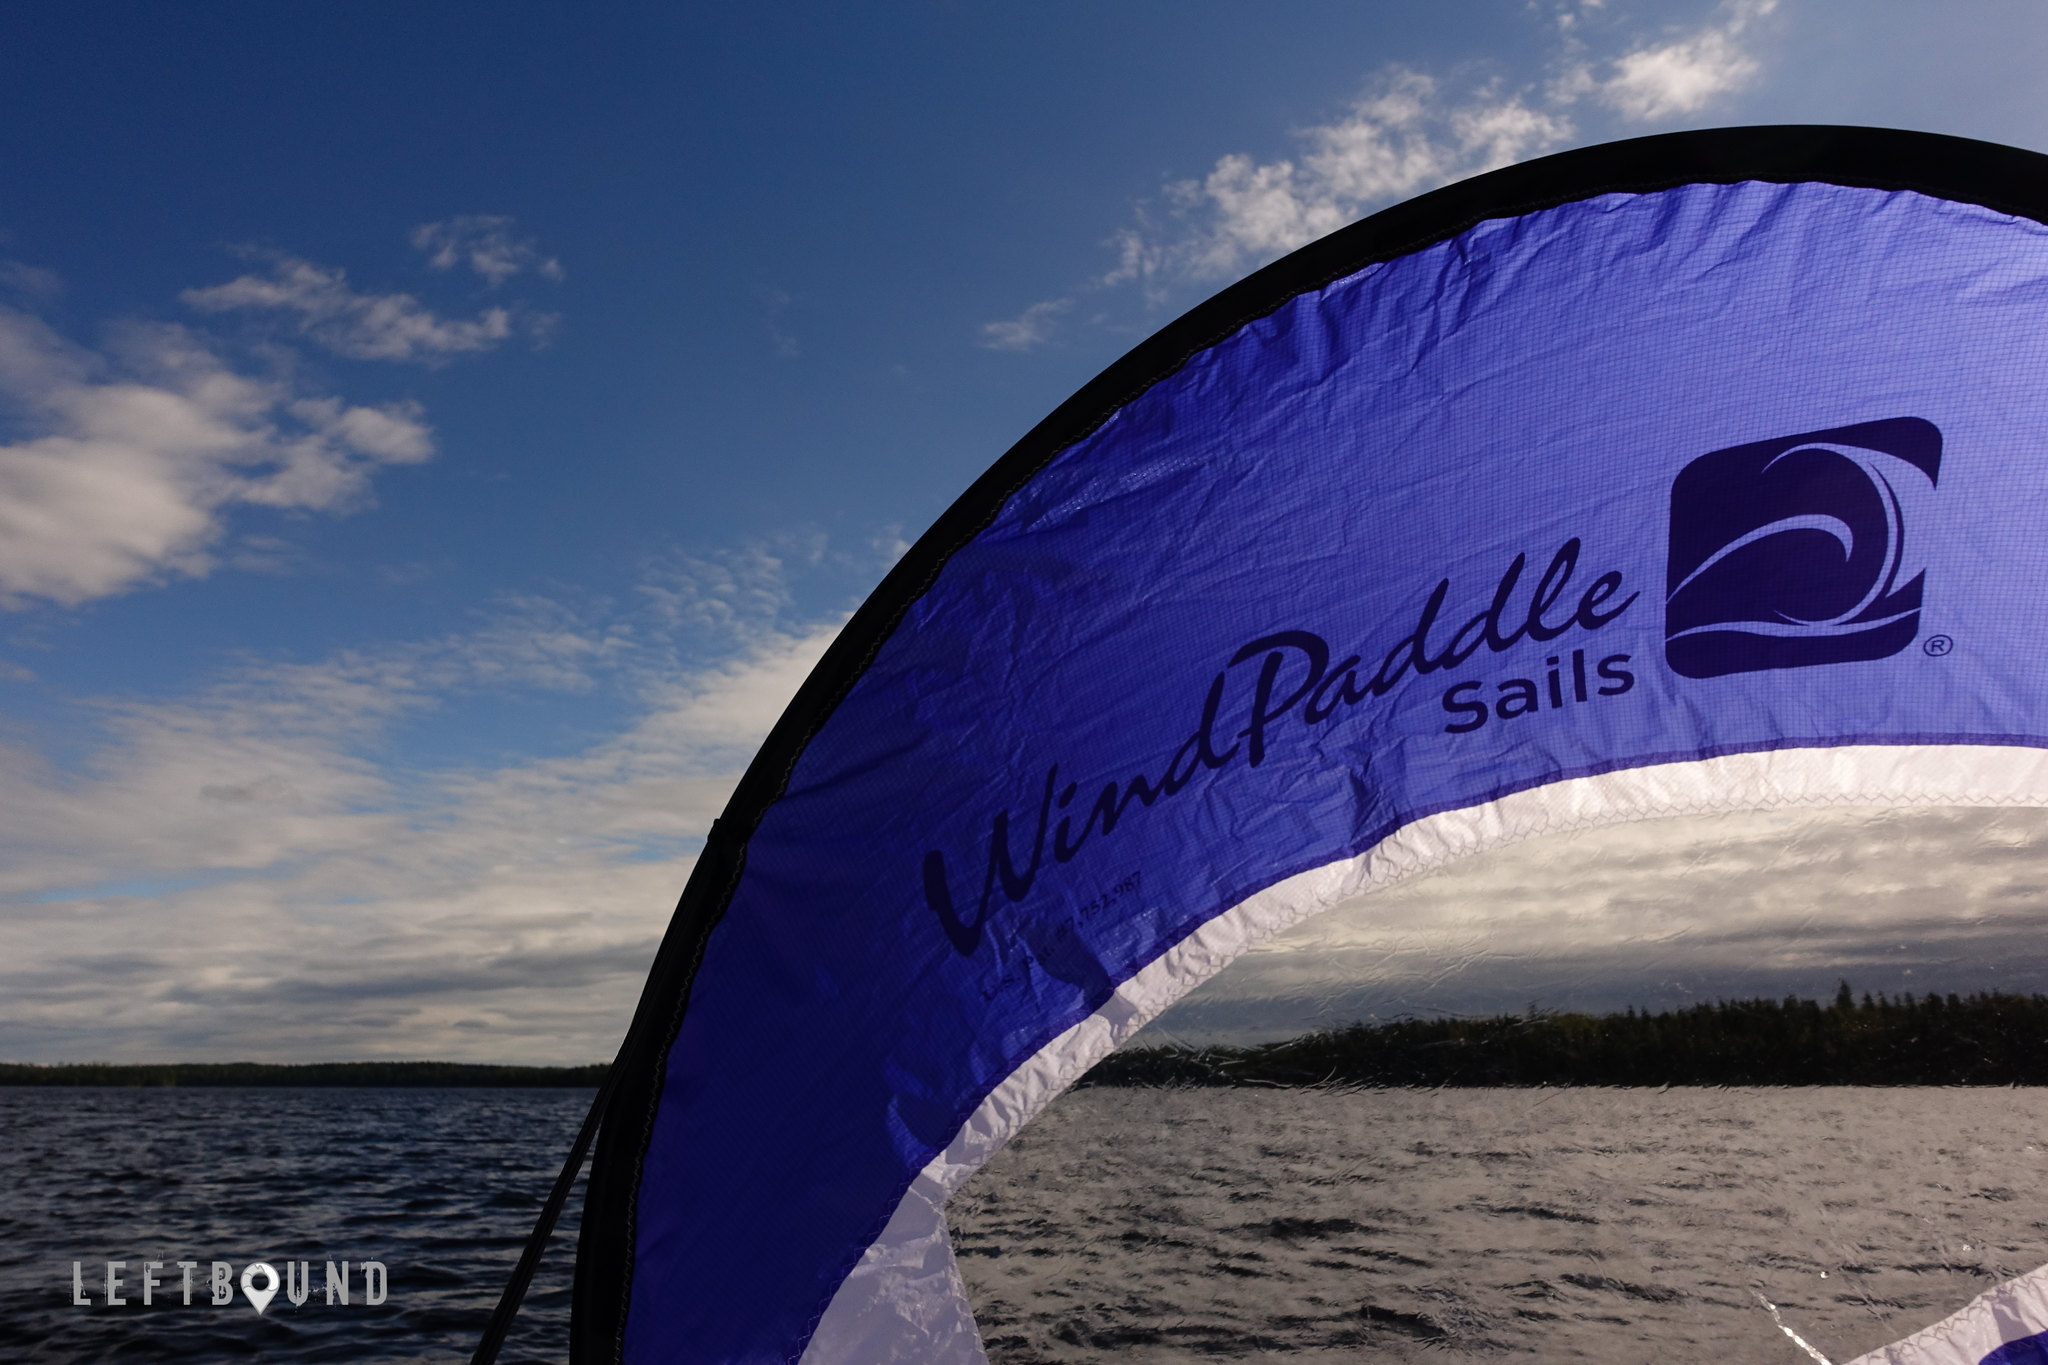
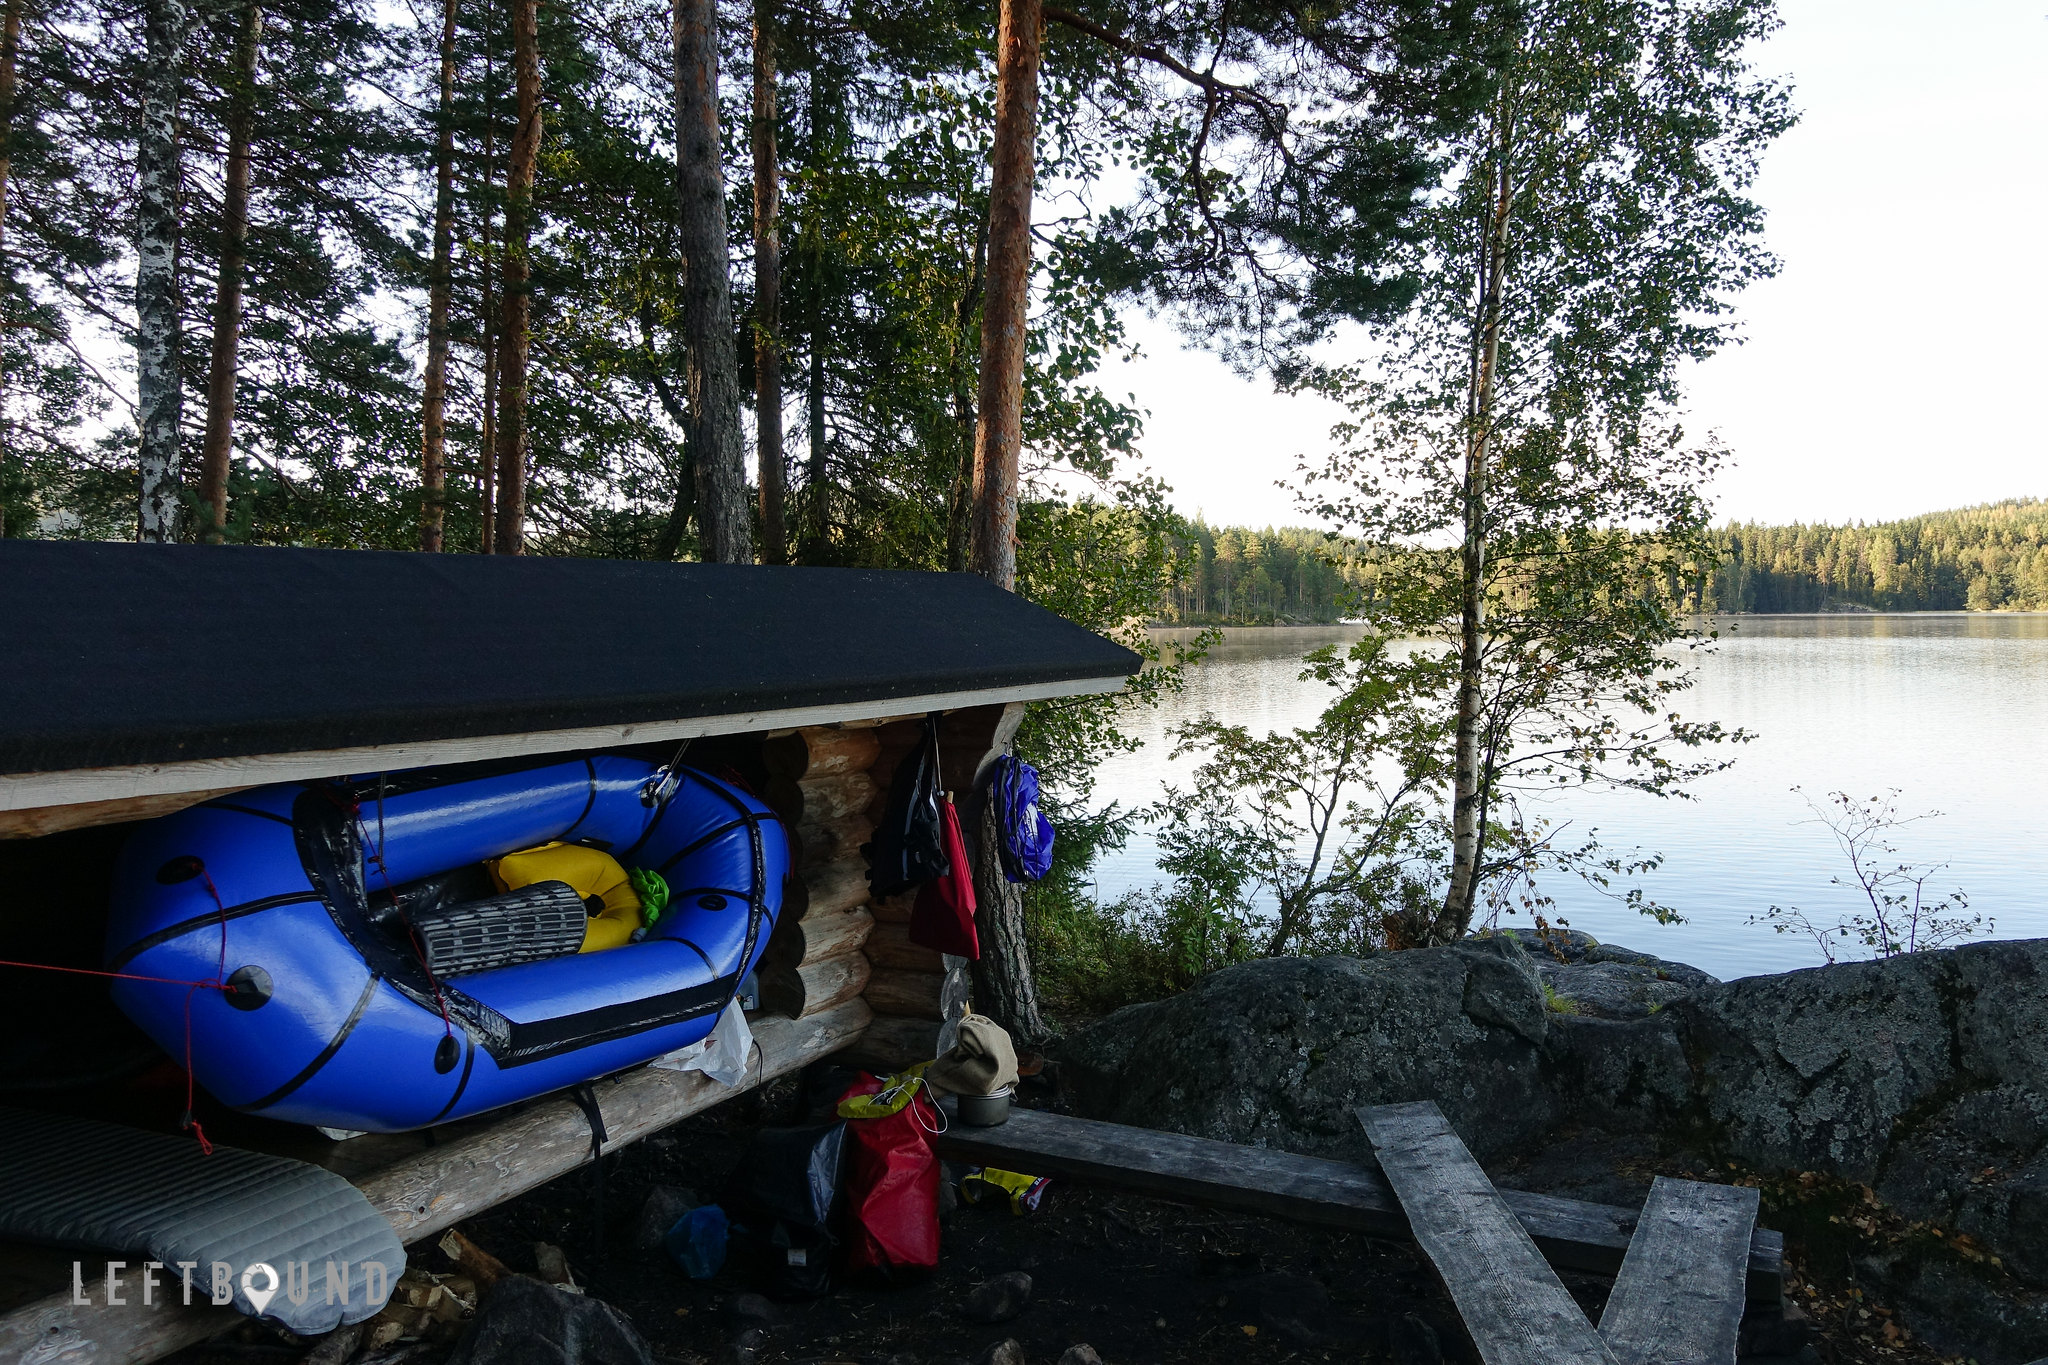
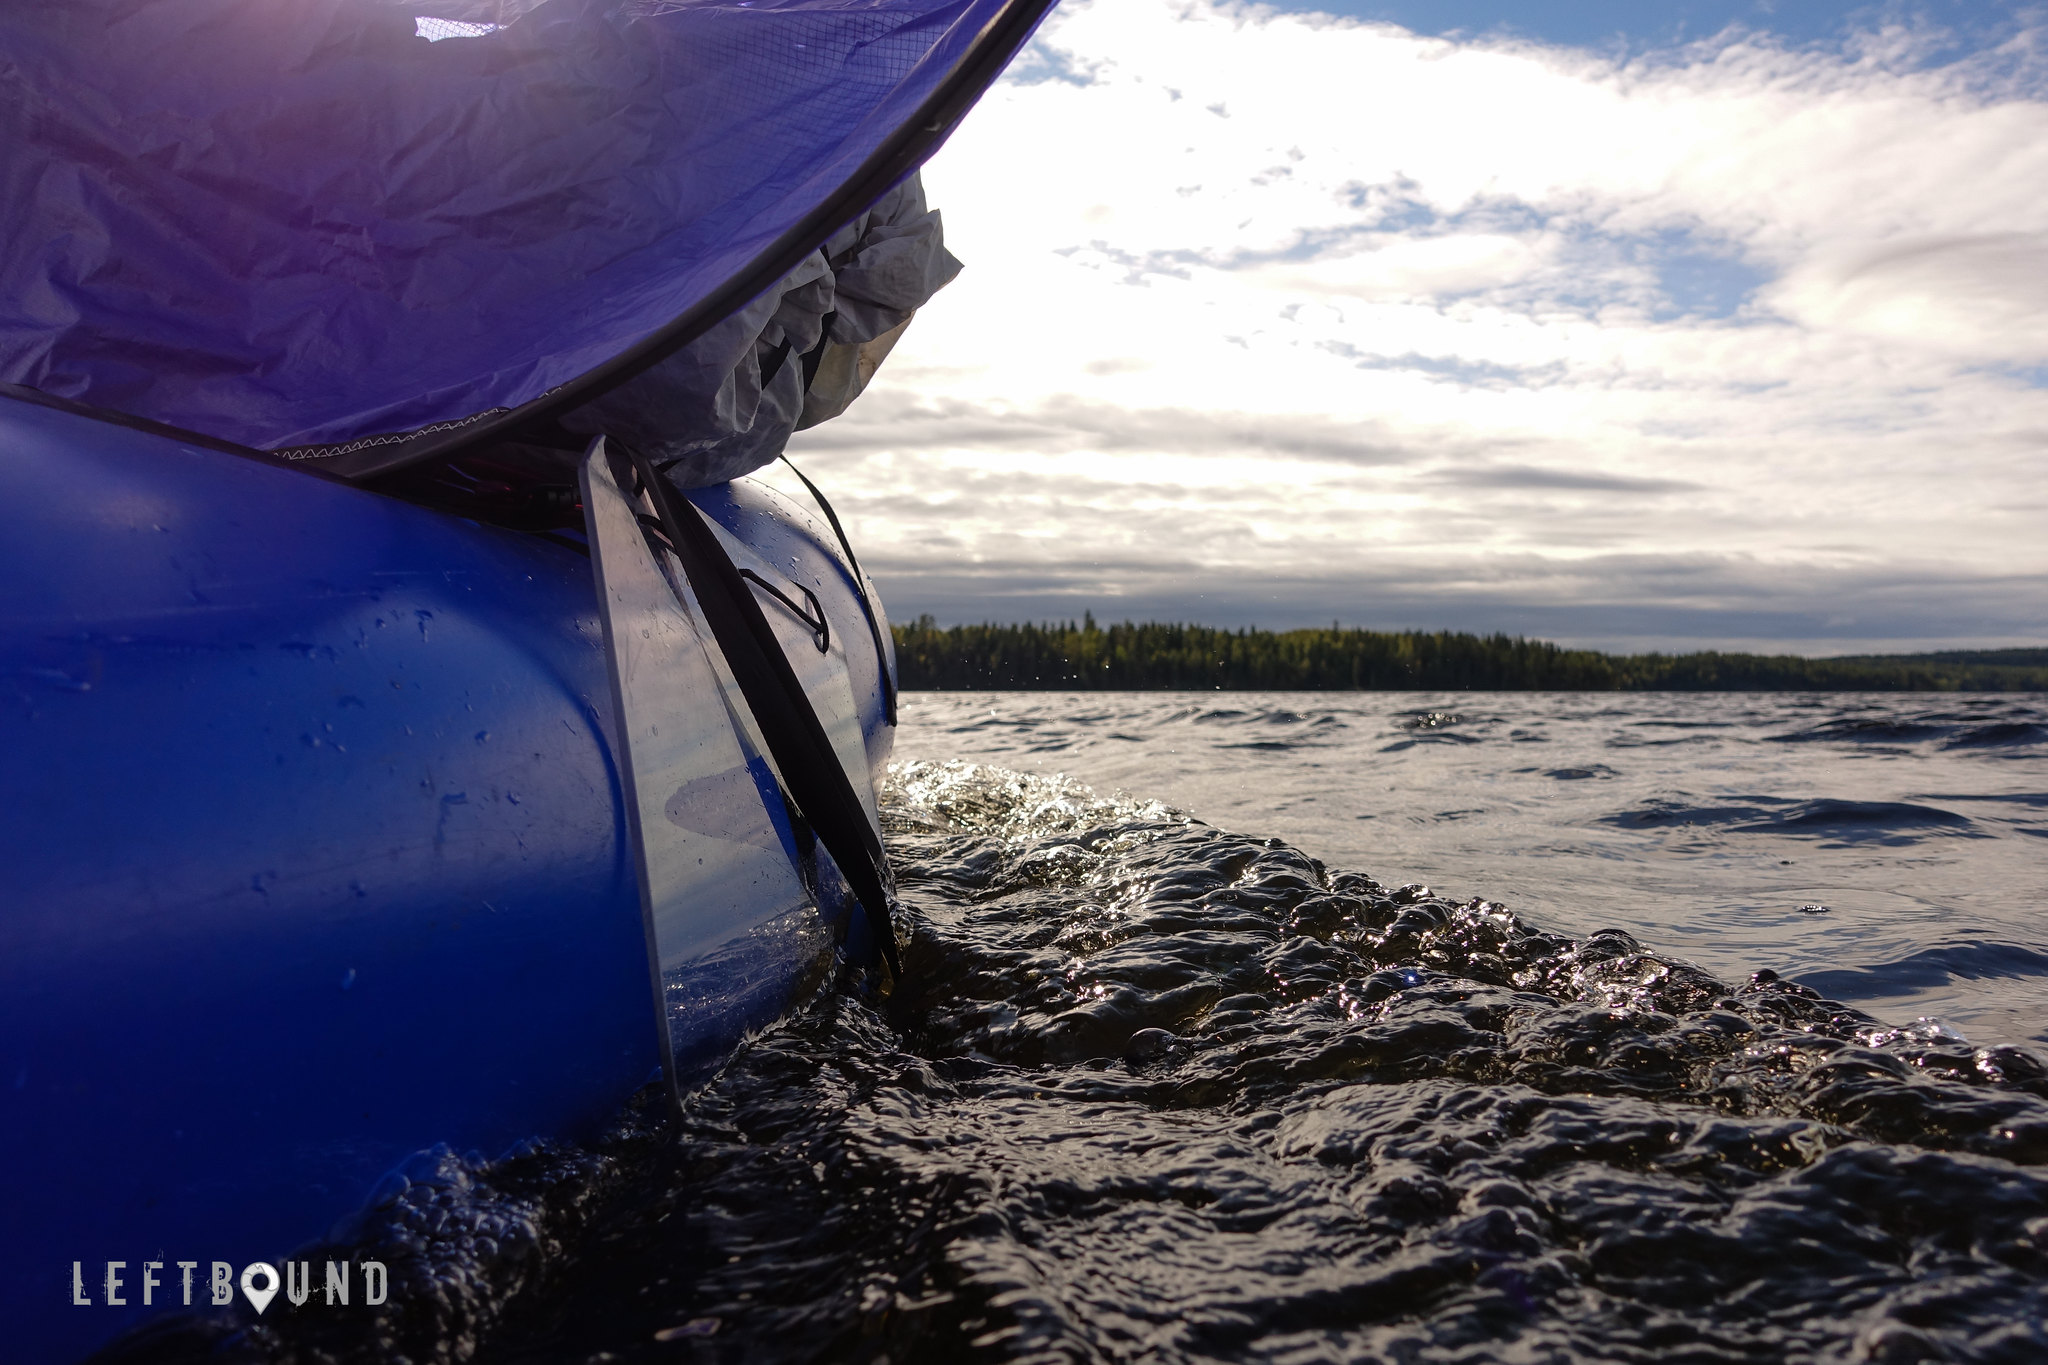
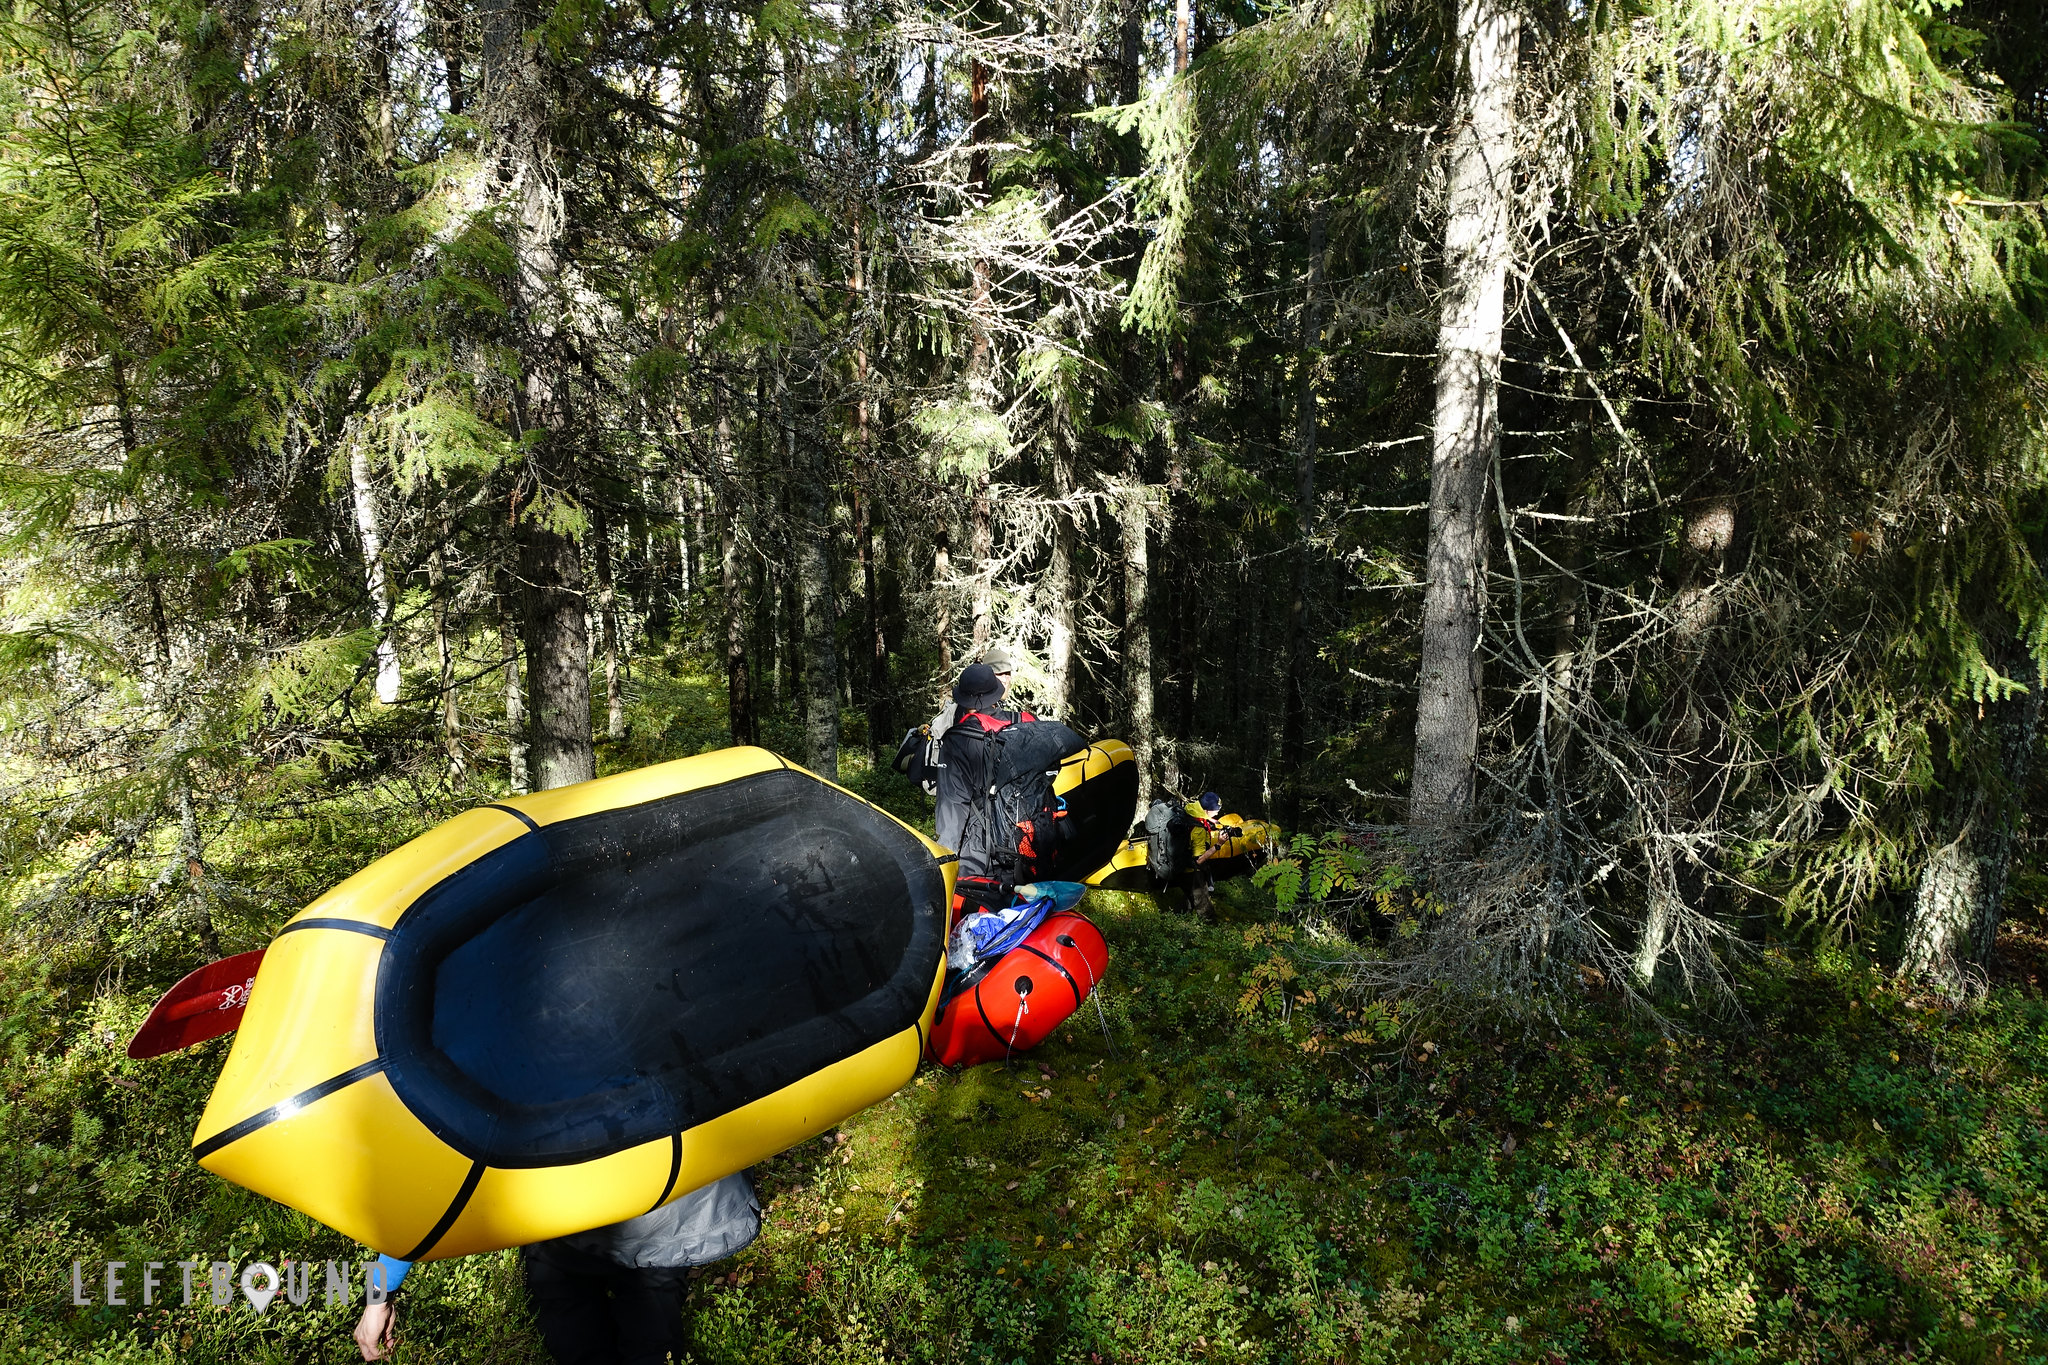
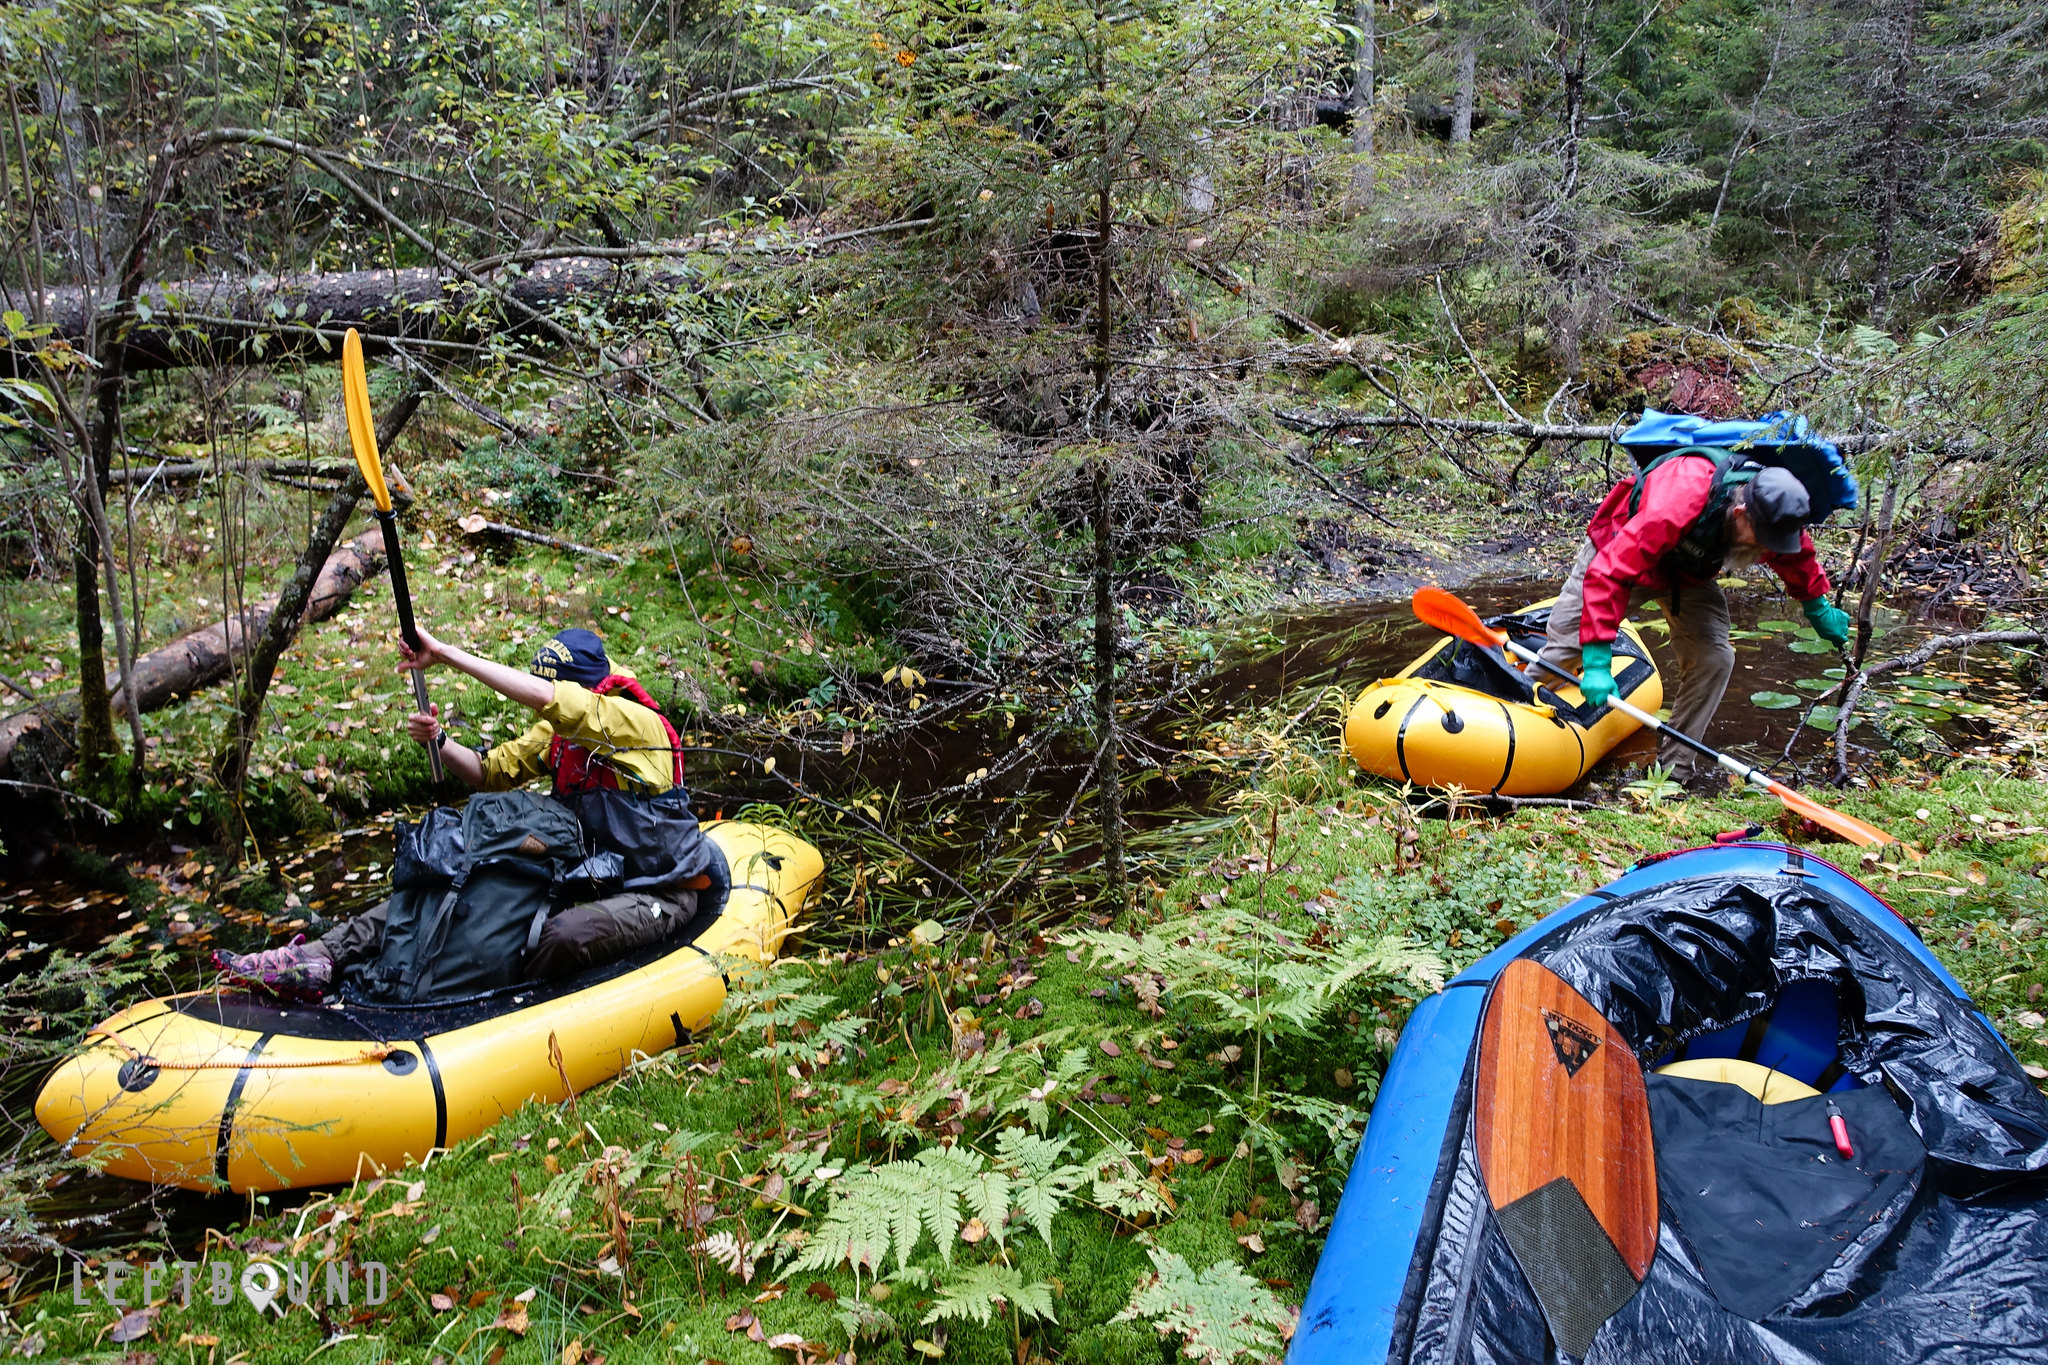
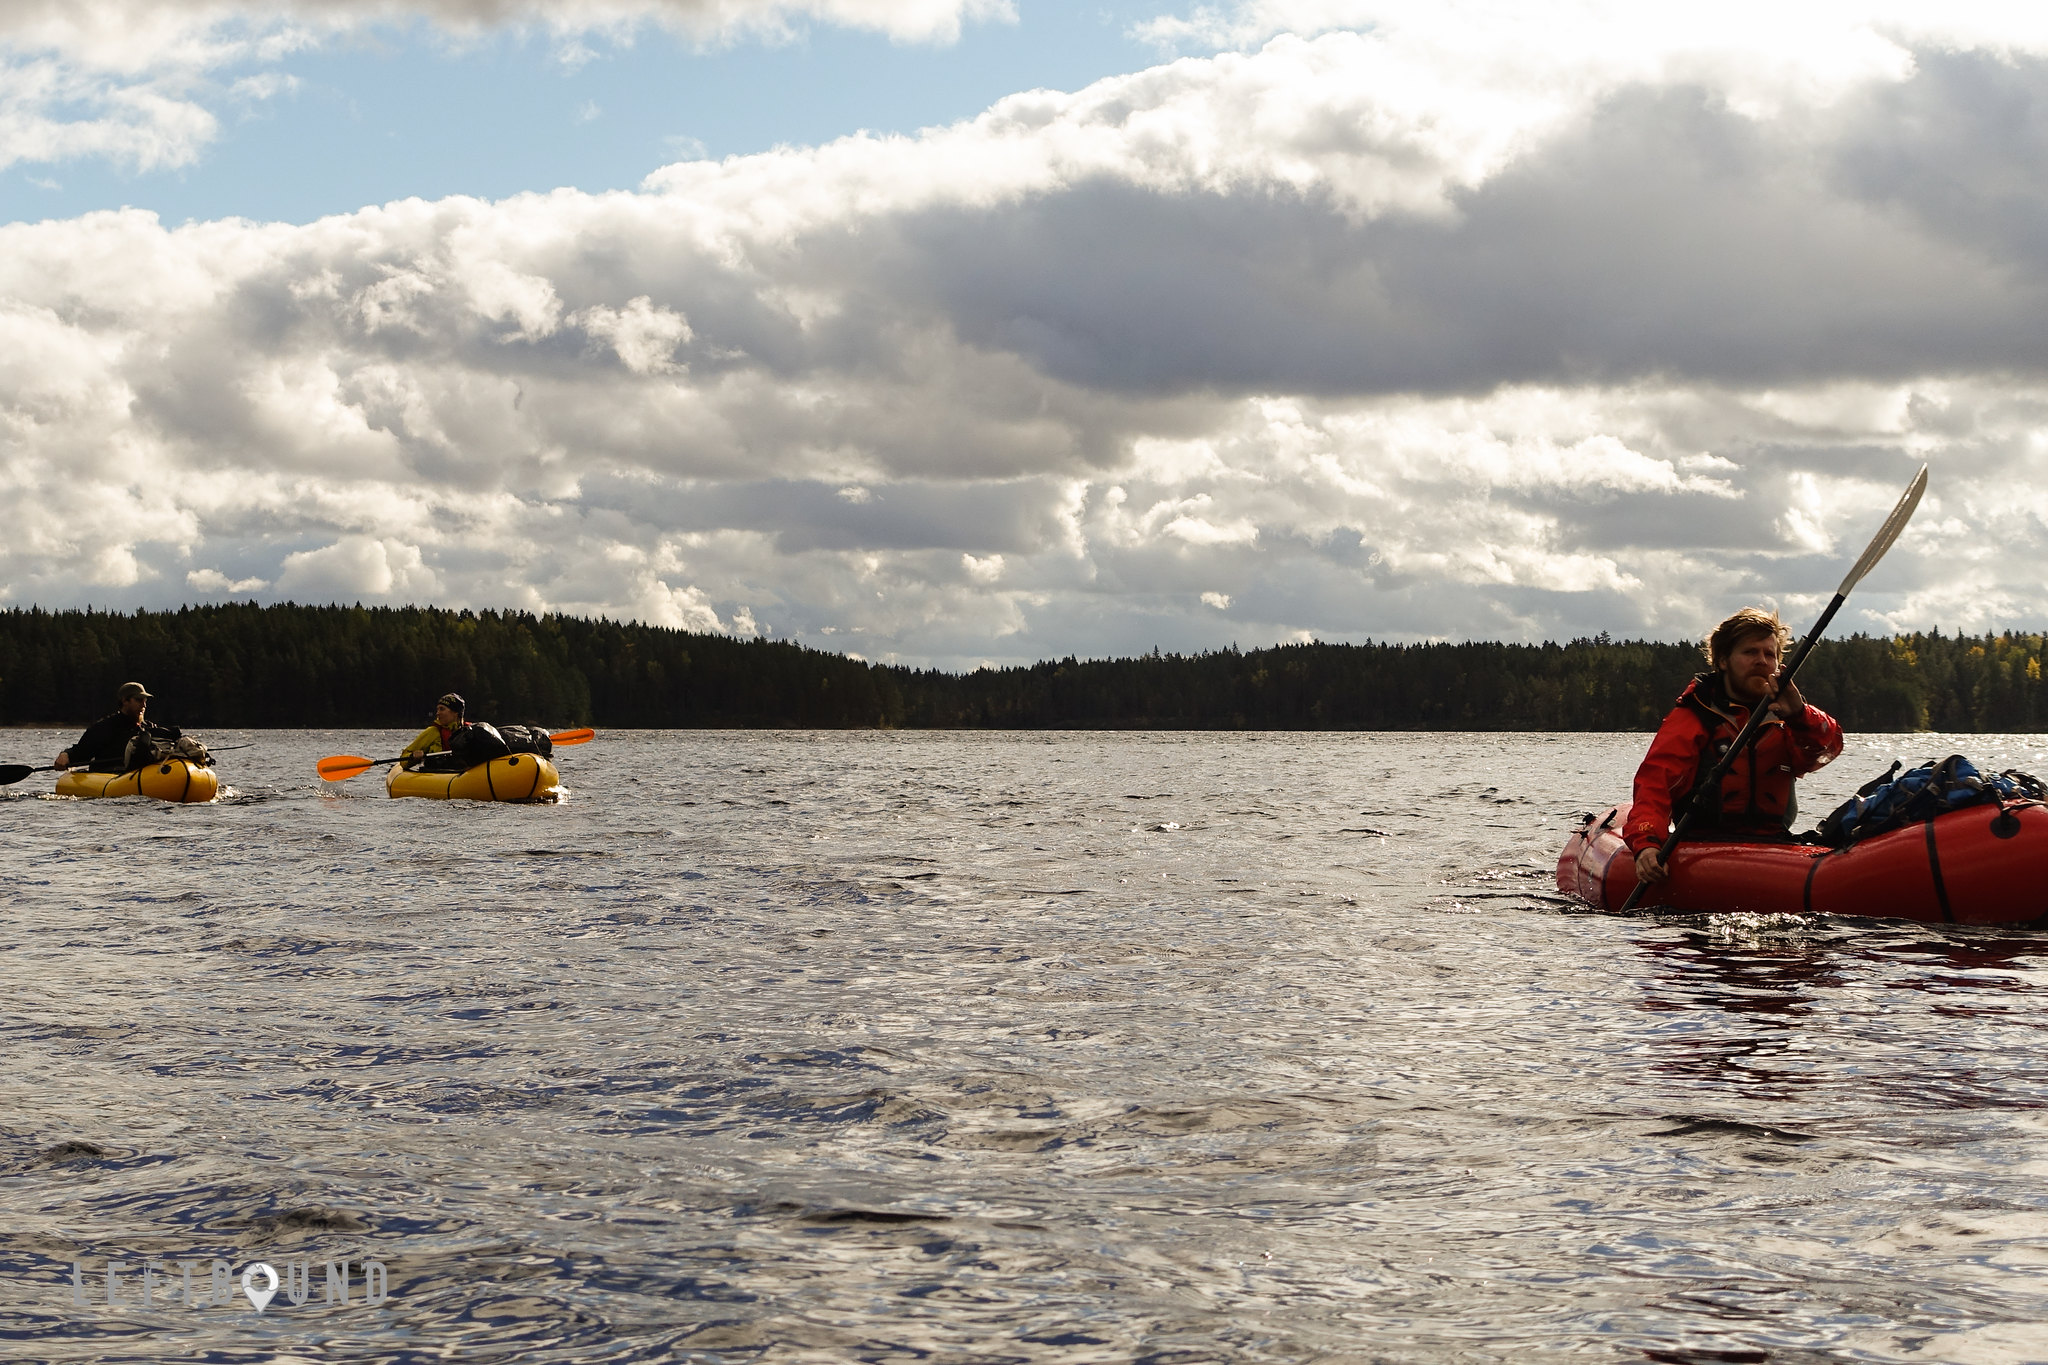
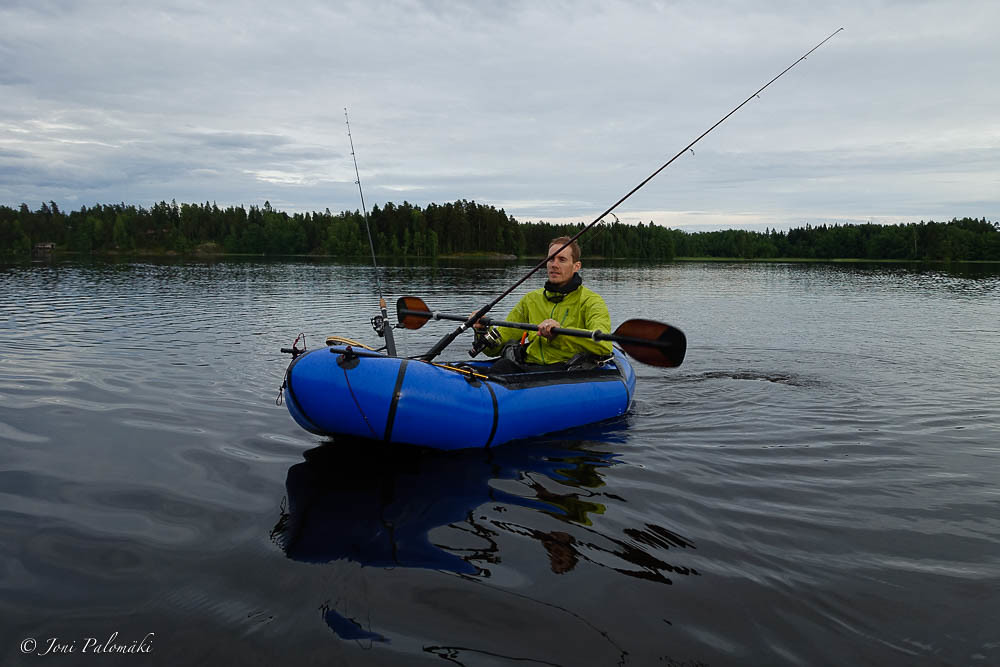
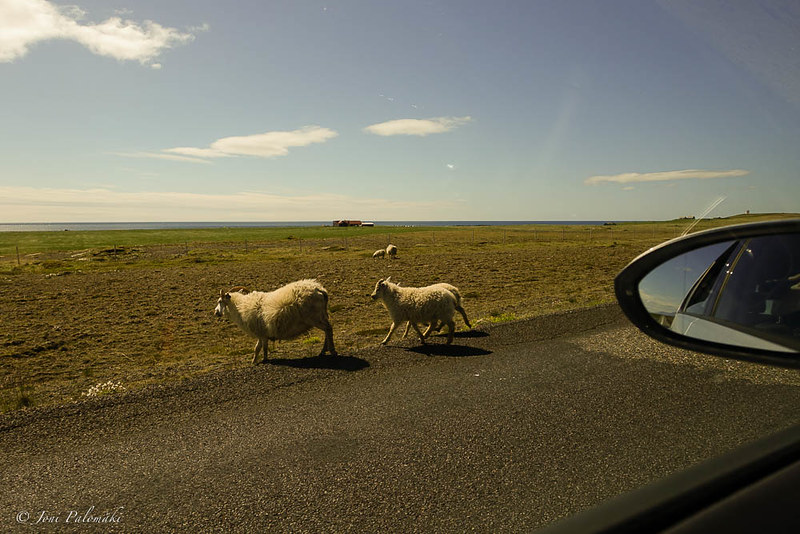
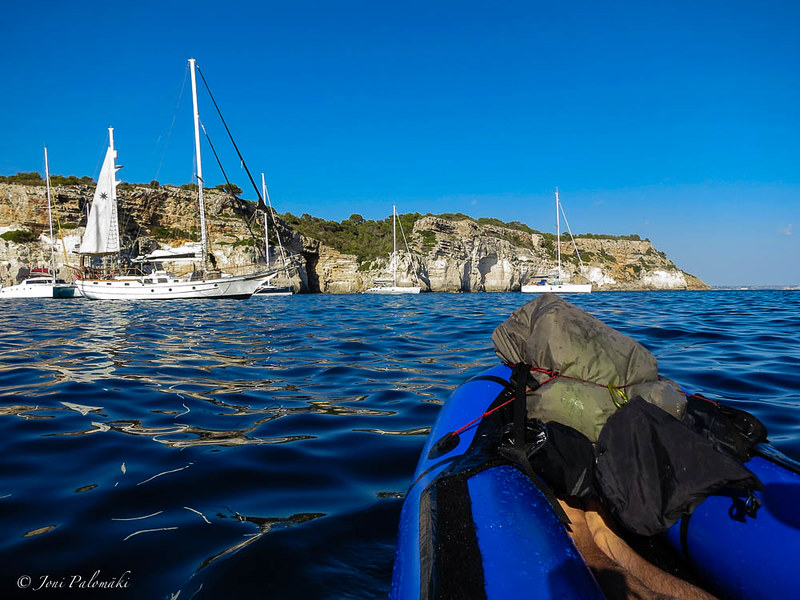
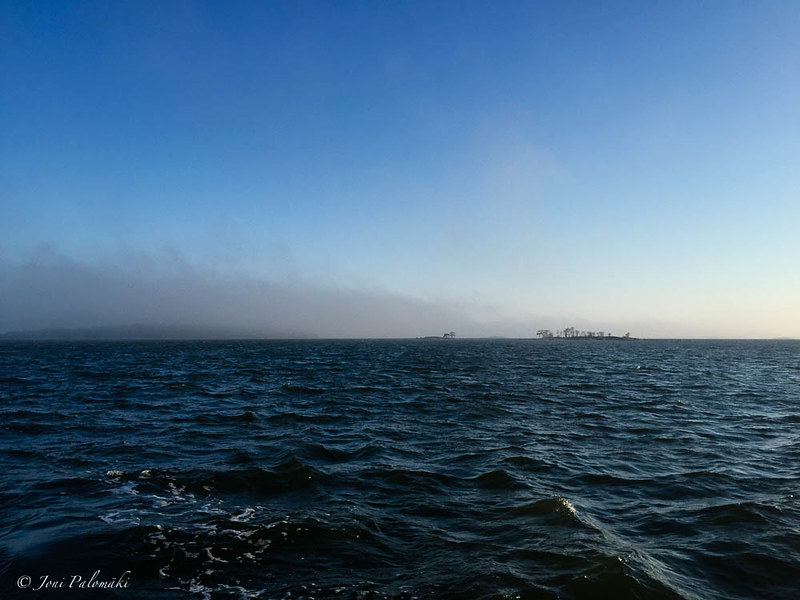
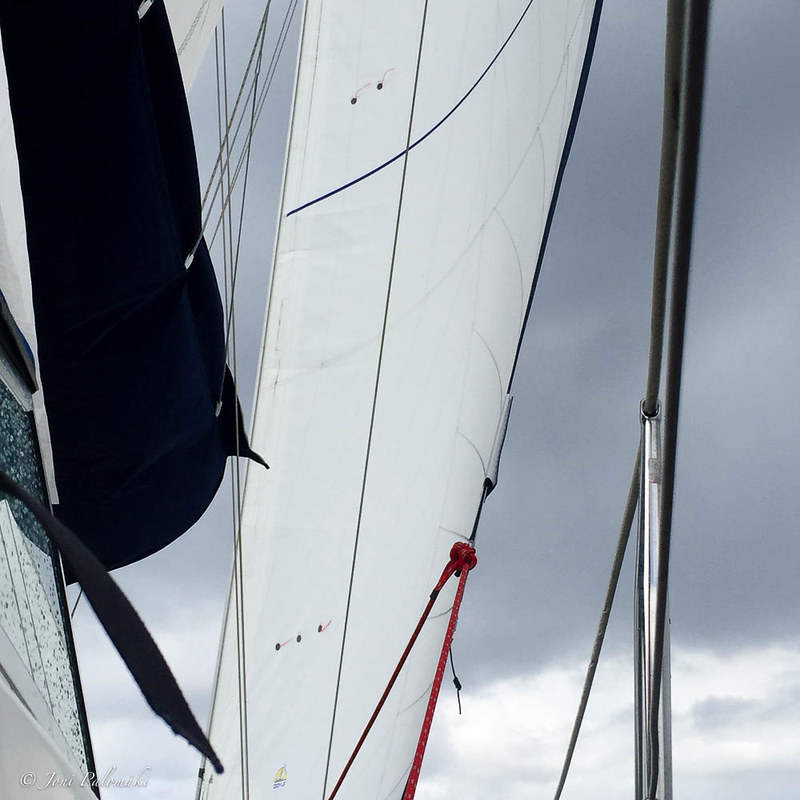
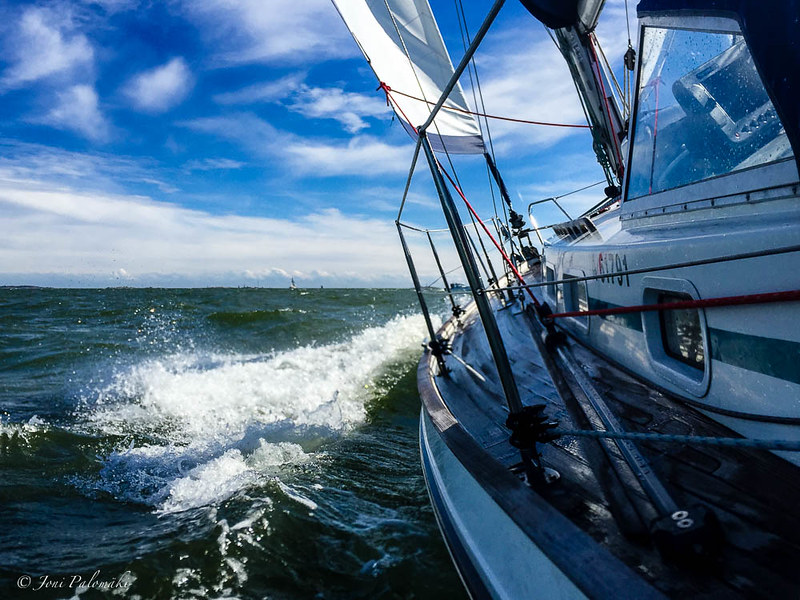
During the 4+ years I’ve had this marvelous vessel, it’s been a trustworthy tool for plenty of adventures and an enabler for a whole lot of new experiences. It has been paddled on calm lakes, maneuvered through meandering rivers, splashed through white water and slid over countless of submerged rocks. It has been dragged through bush and over obstacles on land and on water. It’s been stood on, sat on, slept on, and it’s been scraped, scratched, poked and punctured. It’s been loaded with gear, it has carried bicycles, it has been used as a sled in the winter, and it has been pulled across a lake by a large pike. I’ve sailed with it, capsized it and relied on it, without any concerns.
With packrafts gradually gaining popularity, getting into packrafting is much easier today than it was some four, five years ago. Plenty of local and regional communities, many with Facebook presense, provide forums to discuss and learn. Increasing popularity of packrafting has also bred new companies and original designs, but sadly, also copycats. As Ron Bell from Mountain Laurel Designs just the other day meritoriously called in the company’s Facebook page, copying is a problem that often goes beyond the debate of global trade, ethical and legal discussions or intellectual property rights as, and this applies very much also to packrafts, it can also be a matter of personal safety. The prices I have listed in this blog post serve a purpose of highlighting the fact that when I made my purchase, prices were significantly cheaper (some 30% or so, likely due to increase in material and labour cost and the USD exchange rates), close to what you today need to pay for a Chinese raft.
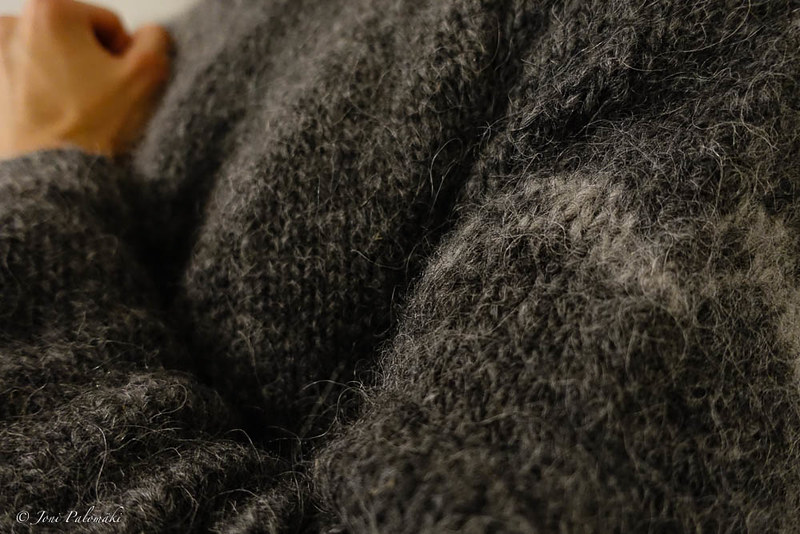
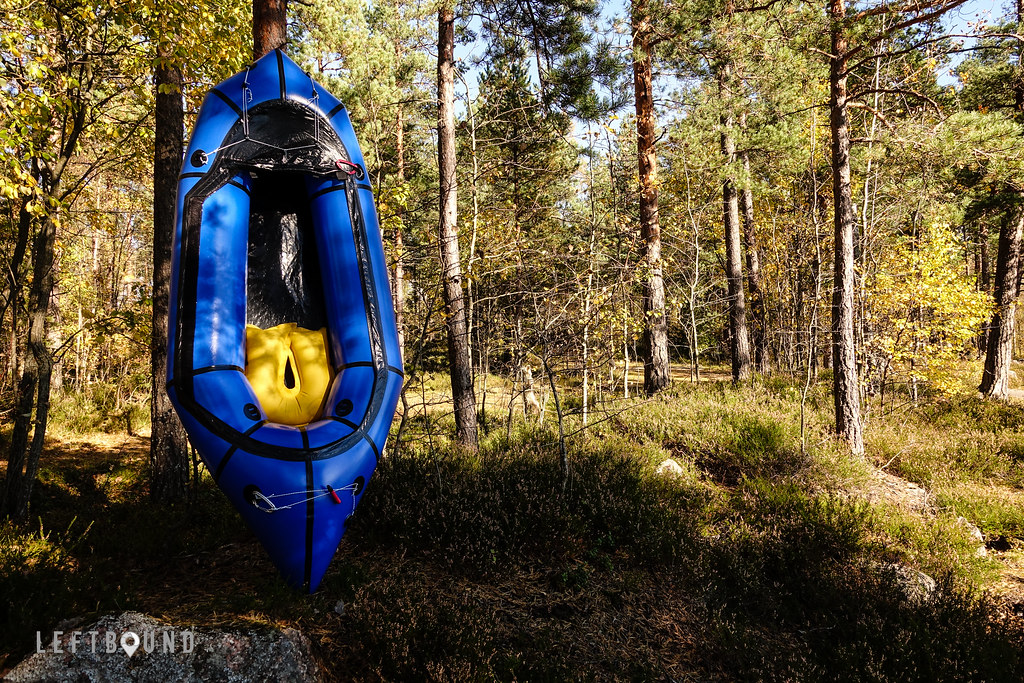
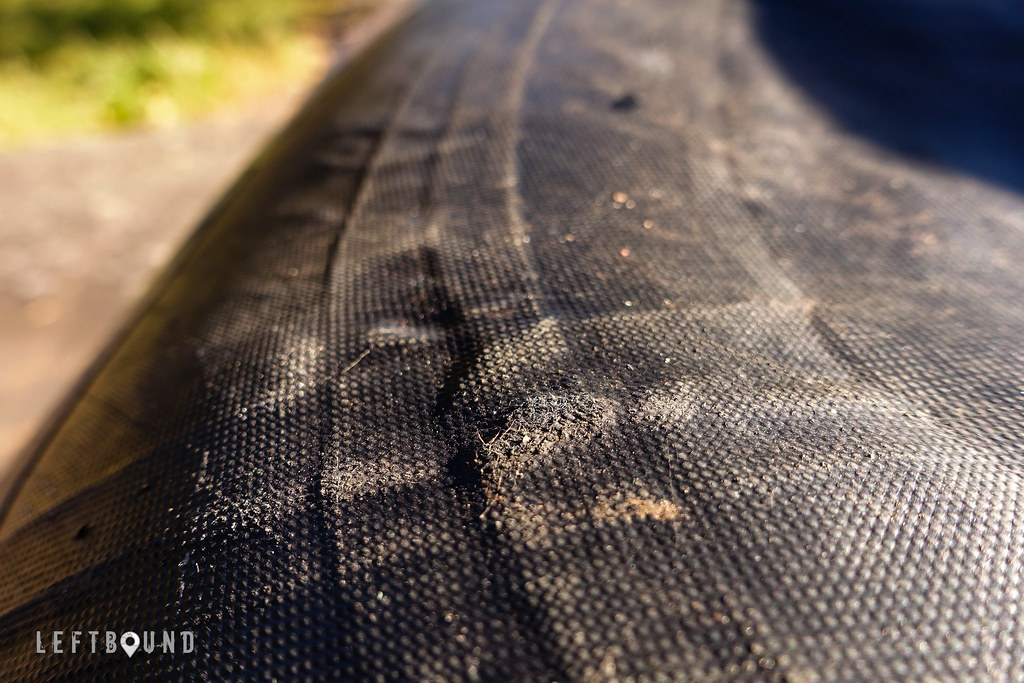
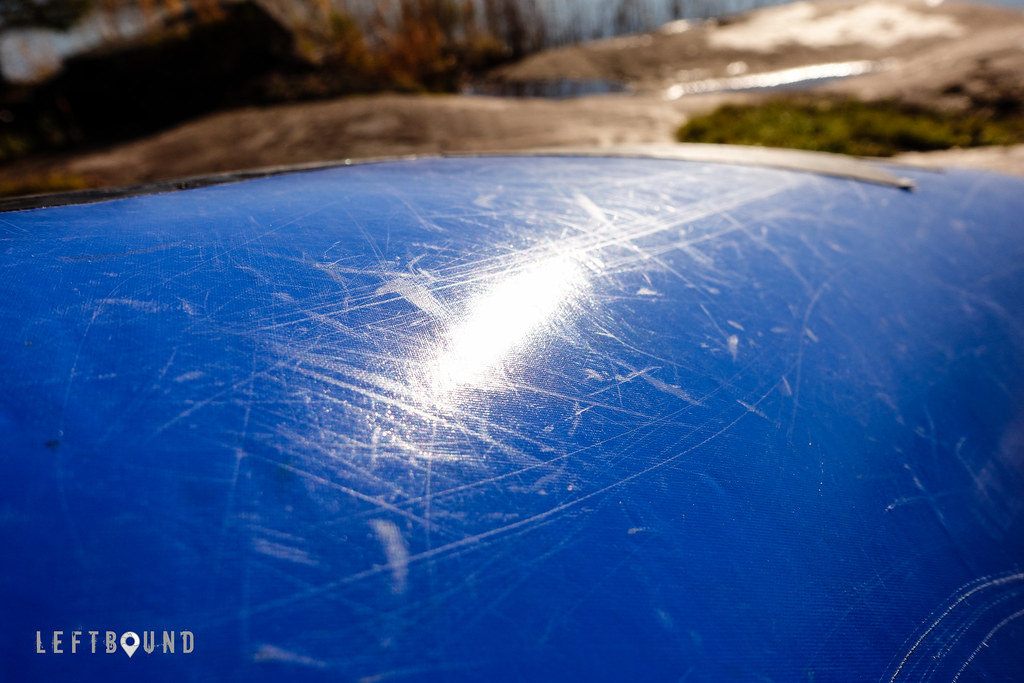
Now, whether any of the available mimics of Alpacka Raft’s packrafts are of inferior quality or not, I cannot attest, as I have no personal experience on them. And hence I leave it to that. But what I can say, from the experience with Alpacka’s, the quality and reliability of these packrafts are second to none. Despite the continuos heavy use, my Llama has no significant damage, and any wear and tear seen also in the photos here is plainly cosmetic. Being a lightweight vessel, initially holding it in my hands, I was almost certain it would not survive long, and that I, as a person who does not pamper gear, would quickly wear it out, or break it, beyond reasonable repair. I was obviously proven wrong, and as of now would not hesitate to recommend these rafts to anyone interested in getting into packrafting. And should I ever need to replace my raft, I would be strongly inclined to purchase another Alpacka Raft. Since my purchase, they have further lengthened the stern and also offer the innovative Cargo fly as an option. Neither of these induce gear aquisition syndrome for me, but could tip the scale for someone else.
A given product is rarely a perfect fit for everyone, as we all have our own preferences and priorities for gear we use. Of course, some products also have flaws that anyone can (and will) agree upon. Where for some user a given feature is mandatory or considered working perfectly, for another user that same feature can be redundant or seen as flawed and unusable. While the Llama has proven to be a great product for its intended use, and I am overly satisfied with it, there are few caveats I hope Alpacka Raft would address in some way, going forward.
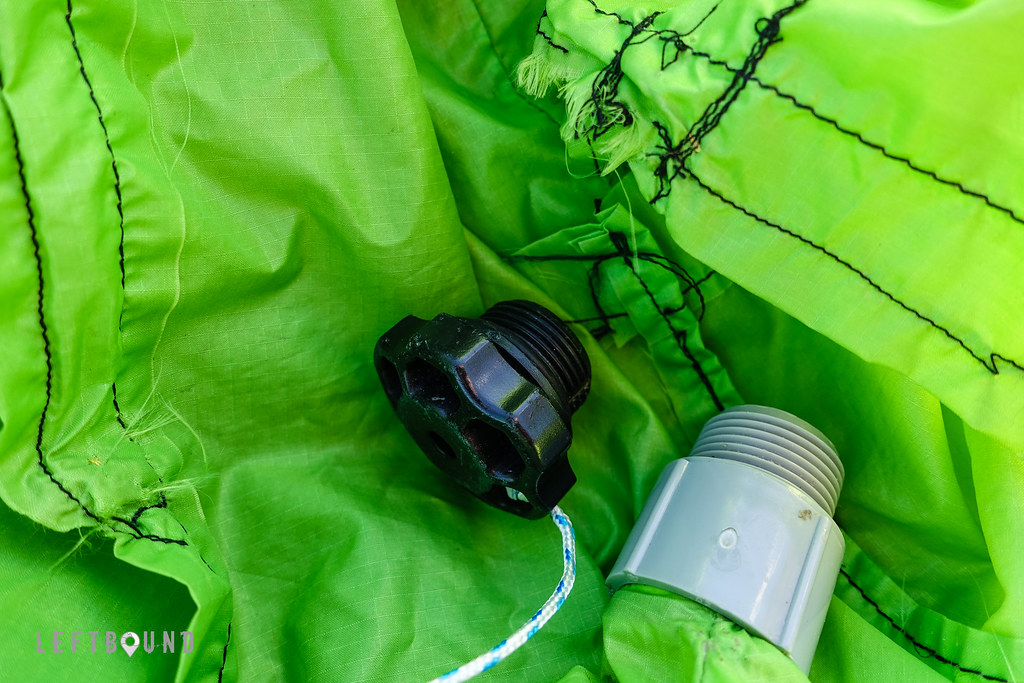
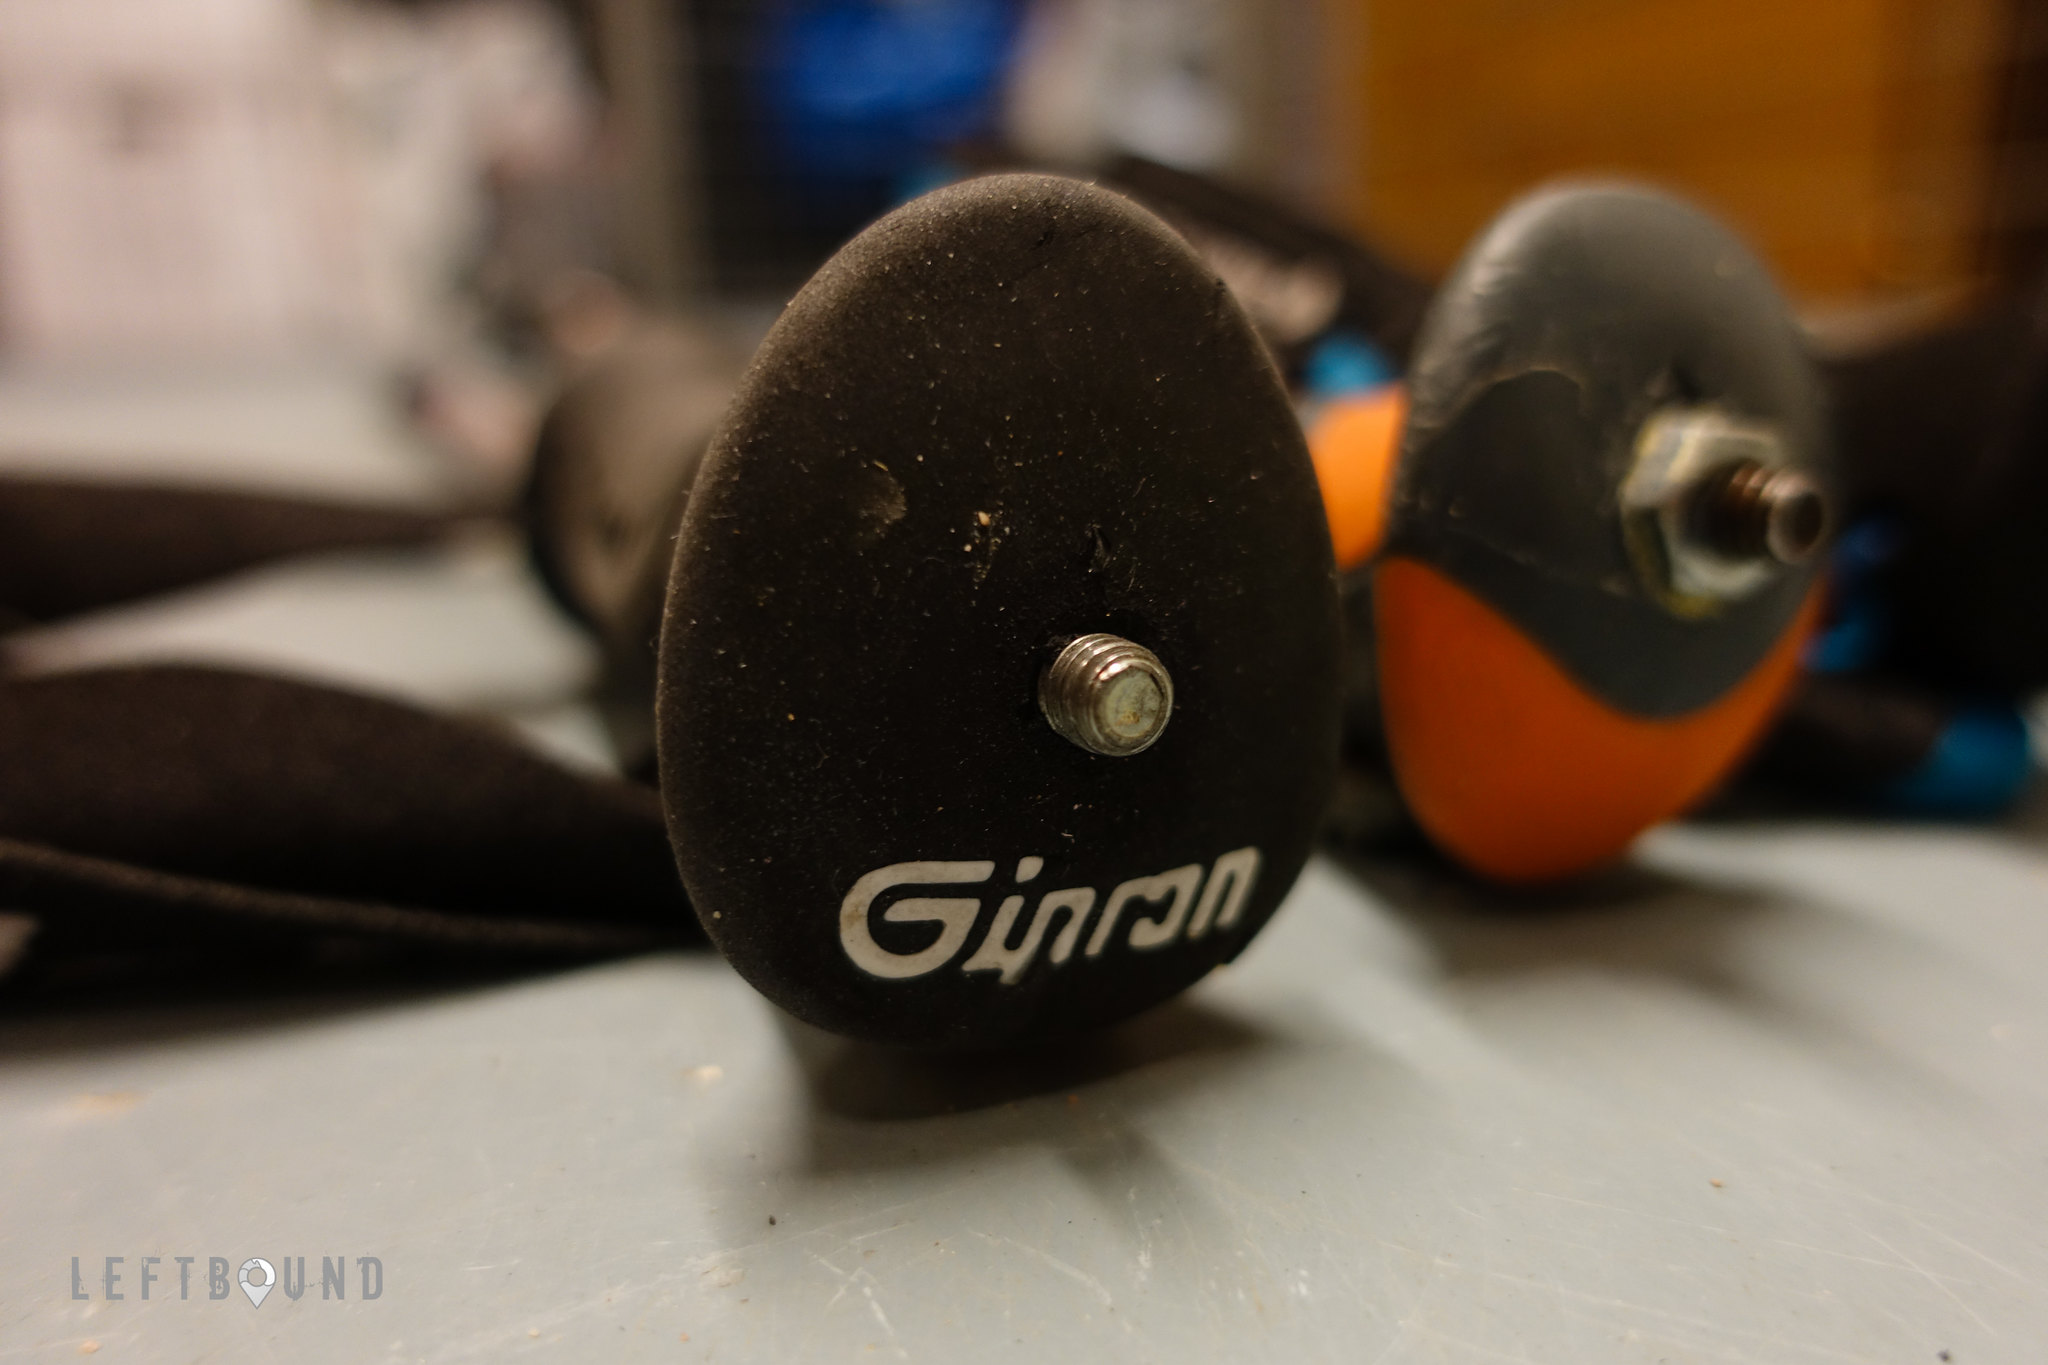
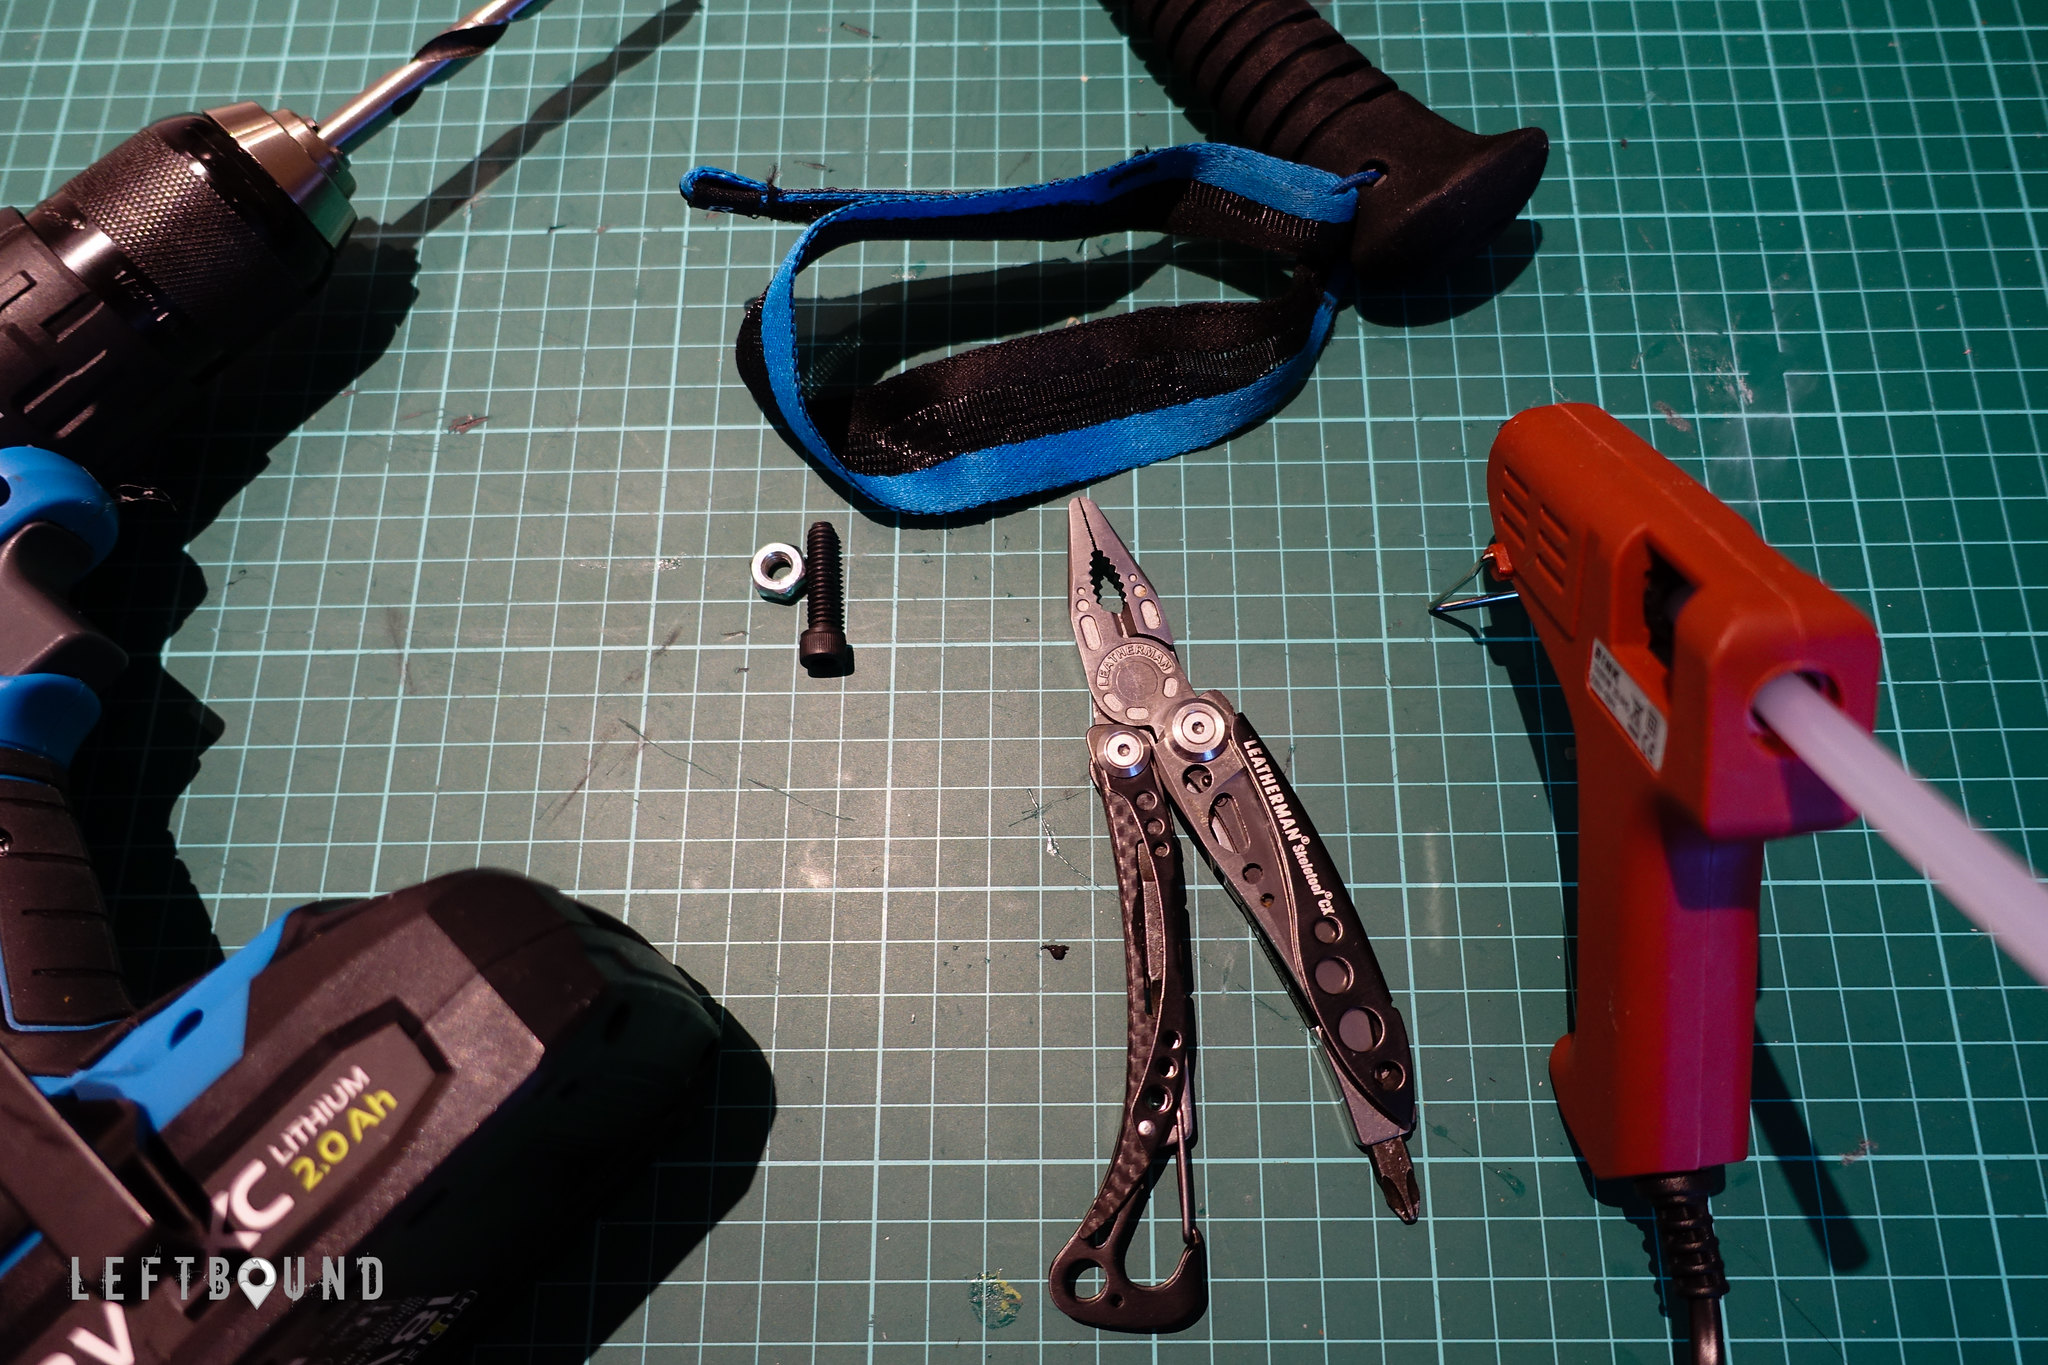
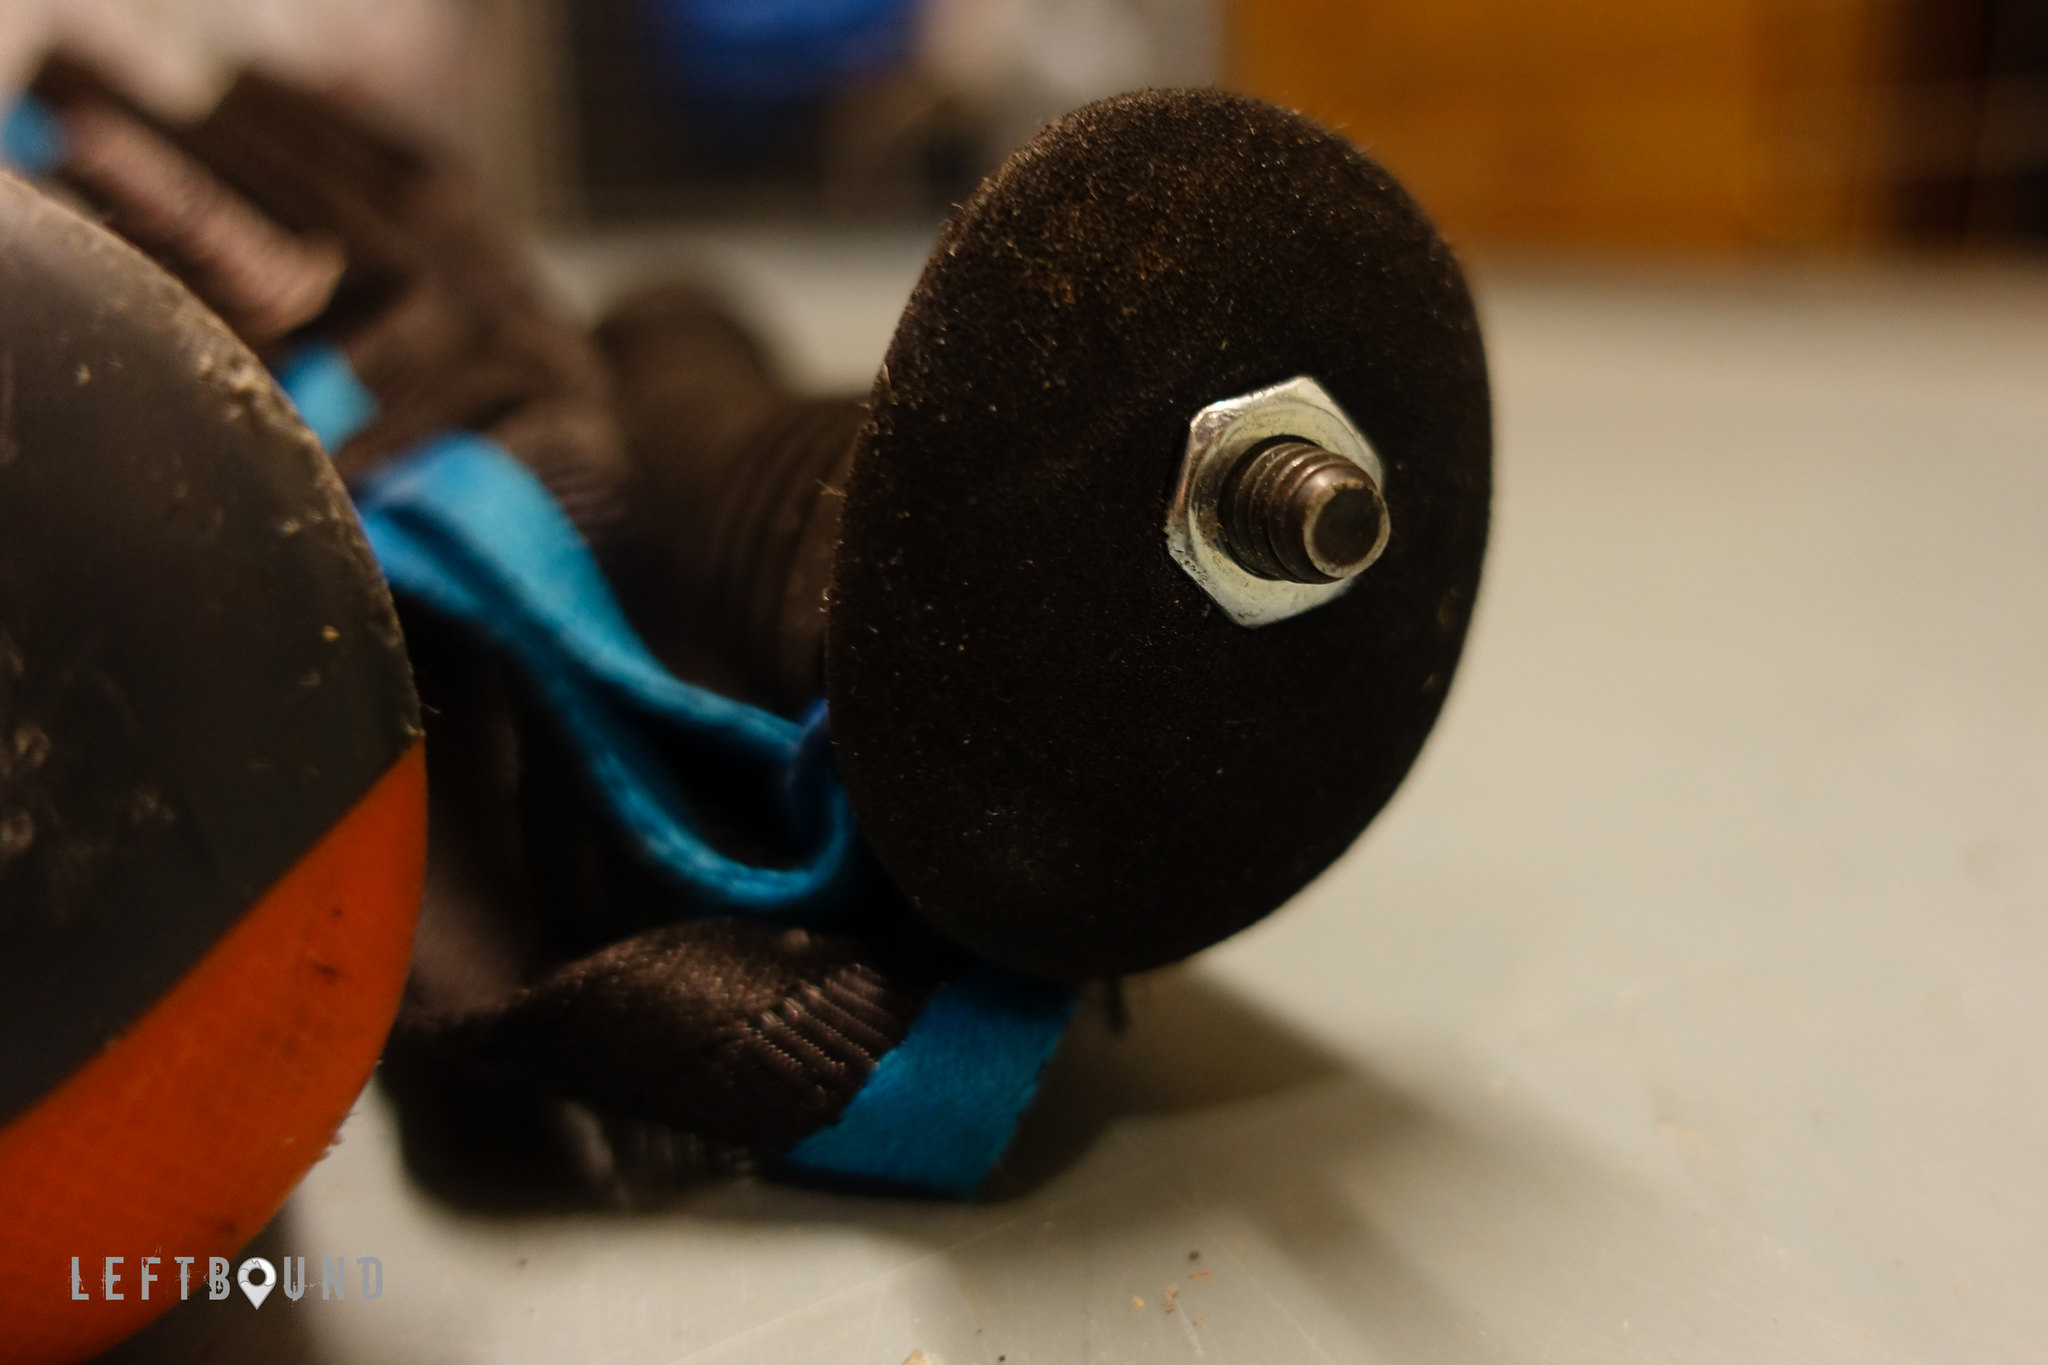
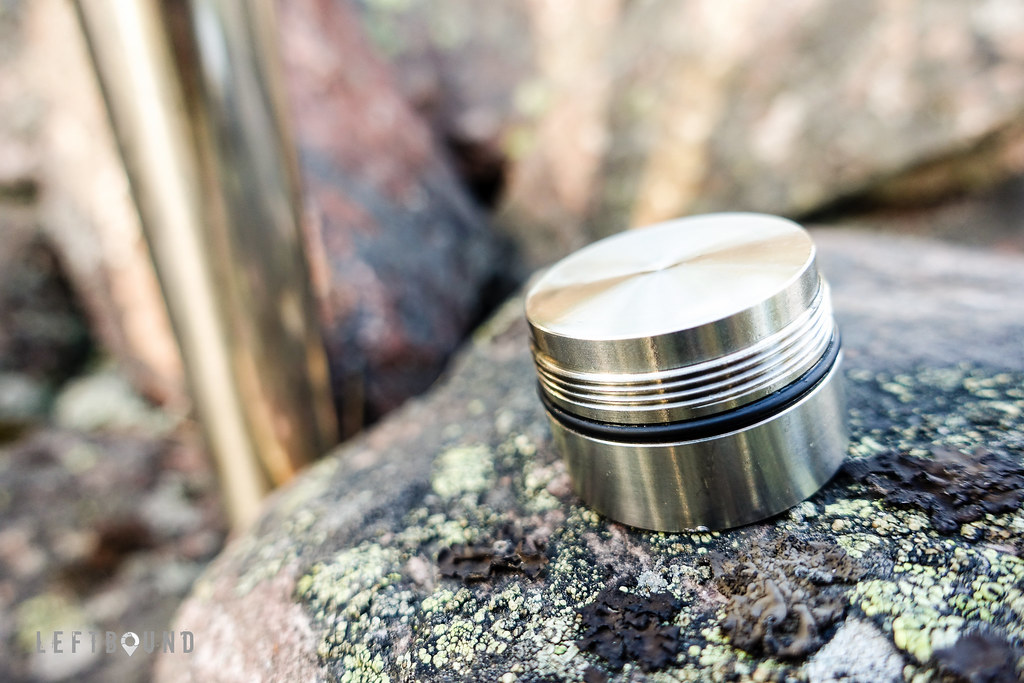
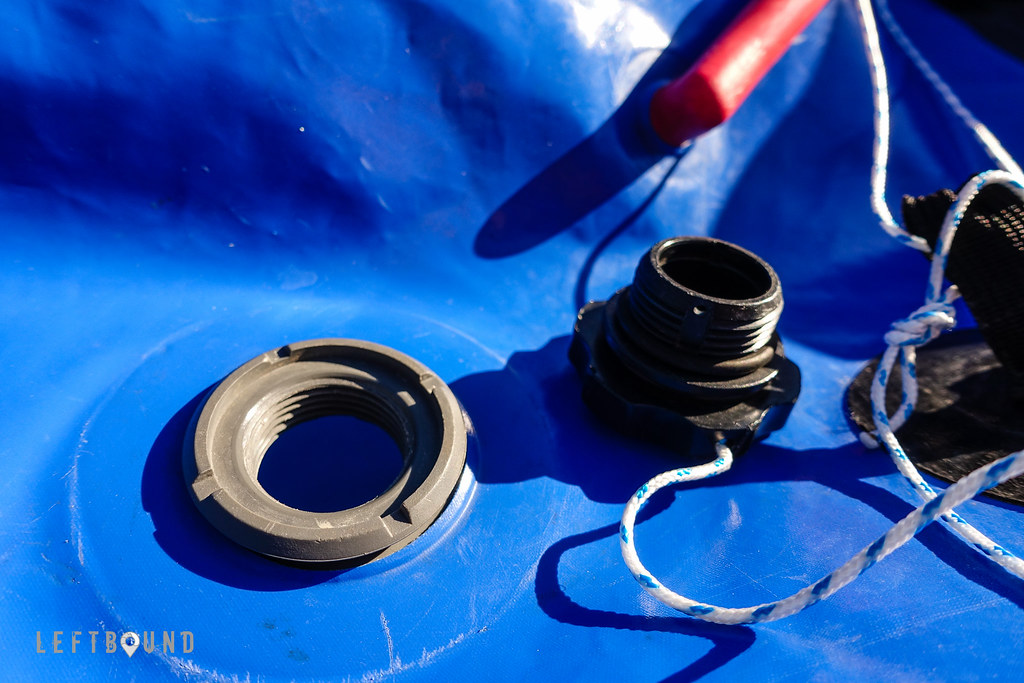
First one would be the inflation bag and the large valve on the raft. Most of the people using inflation bags, based on what I’ve discussed, end up having the supporting struts (on mine they were made of bamboo) ripping through the sleeves quite quickly. I continued to repair mine, sewing them in over and over again, and finally ditched them completely. The inflation bag actually doesn’t really require them, as one can still inflate the raft relatively easy. But I would still like to see some improvement there. When I forgot the bag home once this summer, huffing and puffing through the small valve to inflate the raft, I played with an idea of an integrated inflation bag, that would be screwed in to the valve and stored stuffed inside the raft. This would require a larger valve and some minor engineering with nested threads, but Alpacka Raft, if you read this, feel free to look into that option!
A more notable inconvenience is the raft’s main valve, or actually the cap on it. While the nozzle on the inflation bag threads easily on the main valve, the cap refuses to thread easily and every time it’s an unnecessary struggle to try to screw in the cap fast, without loosing at least few puffs worth of air. It’s been like this from the very beginning, so it’s not simply worn out. Turning the cap first counter clockwise helps a notch, but it is really no match made in heaven, valve and the cap. Inconvenient at most, better cap would still be very welcome.
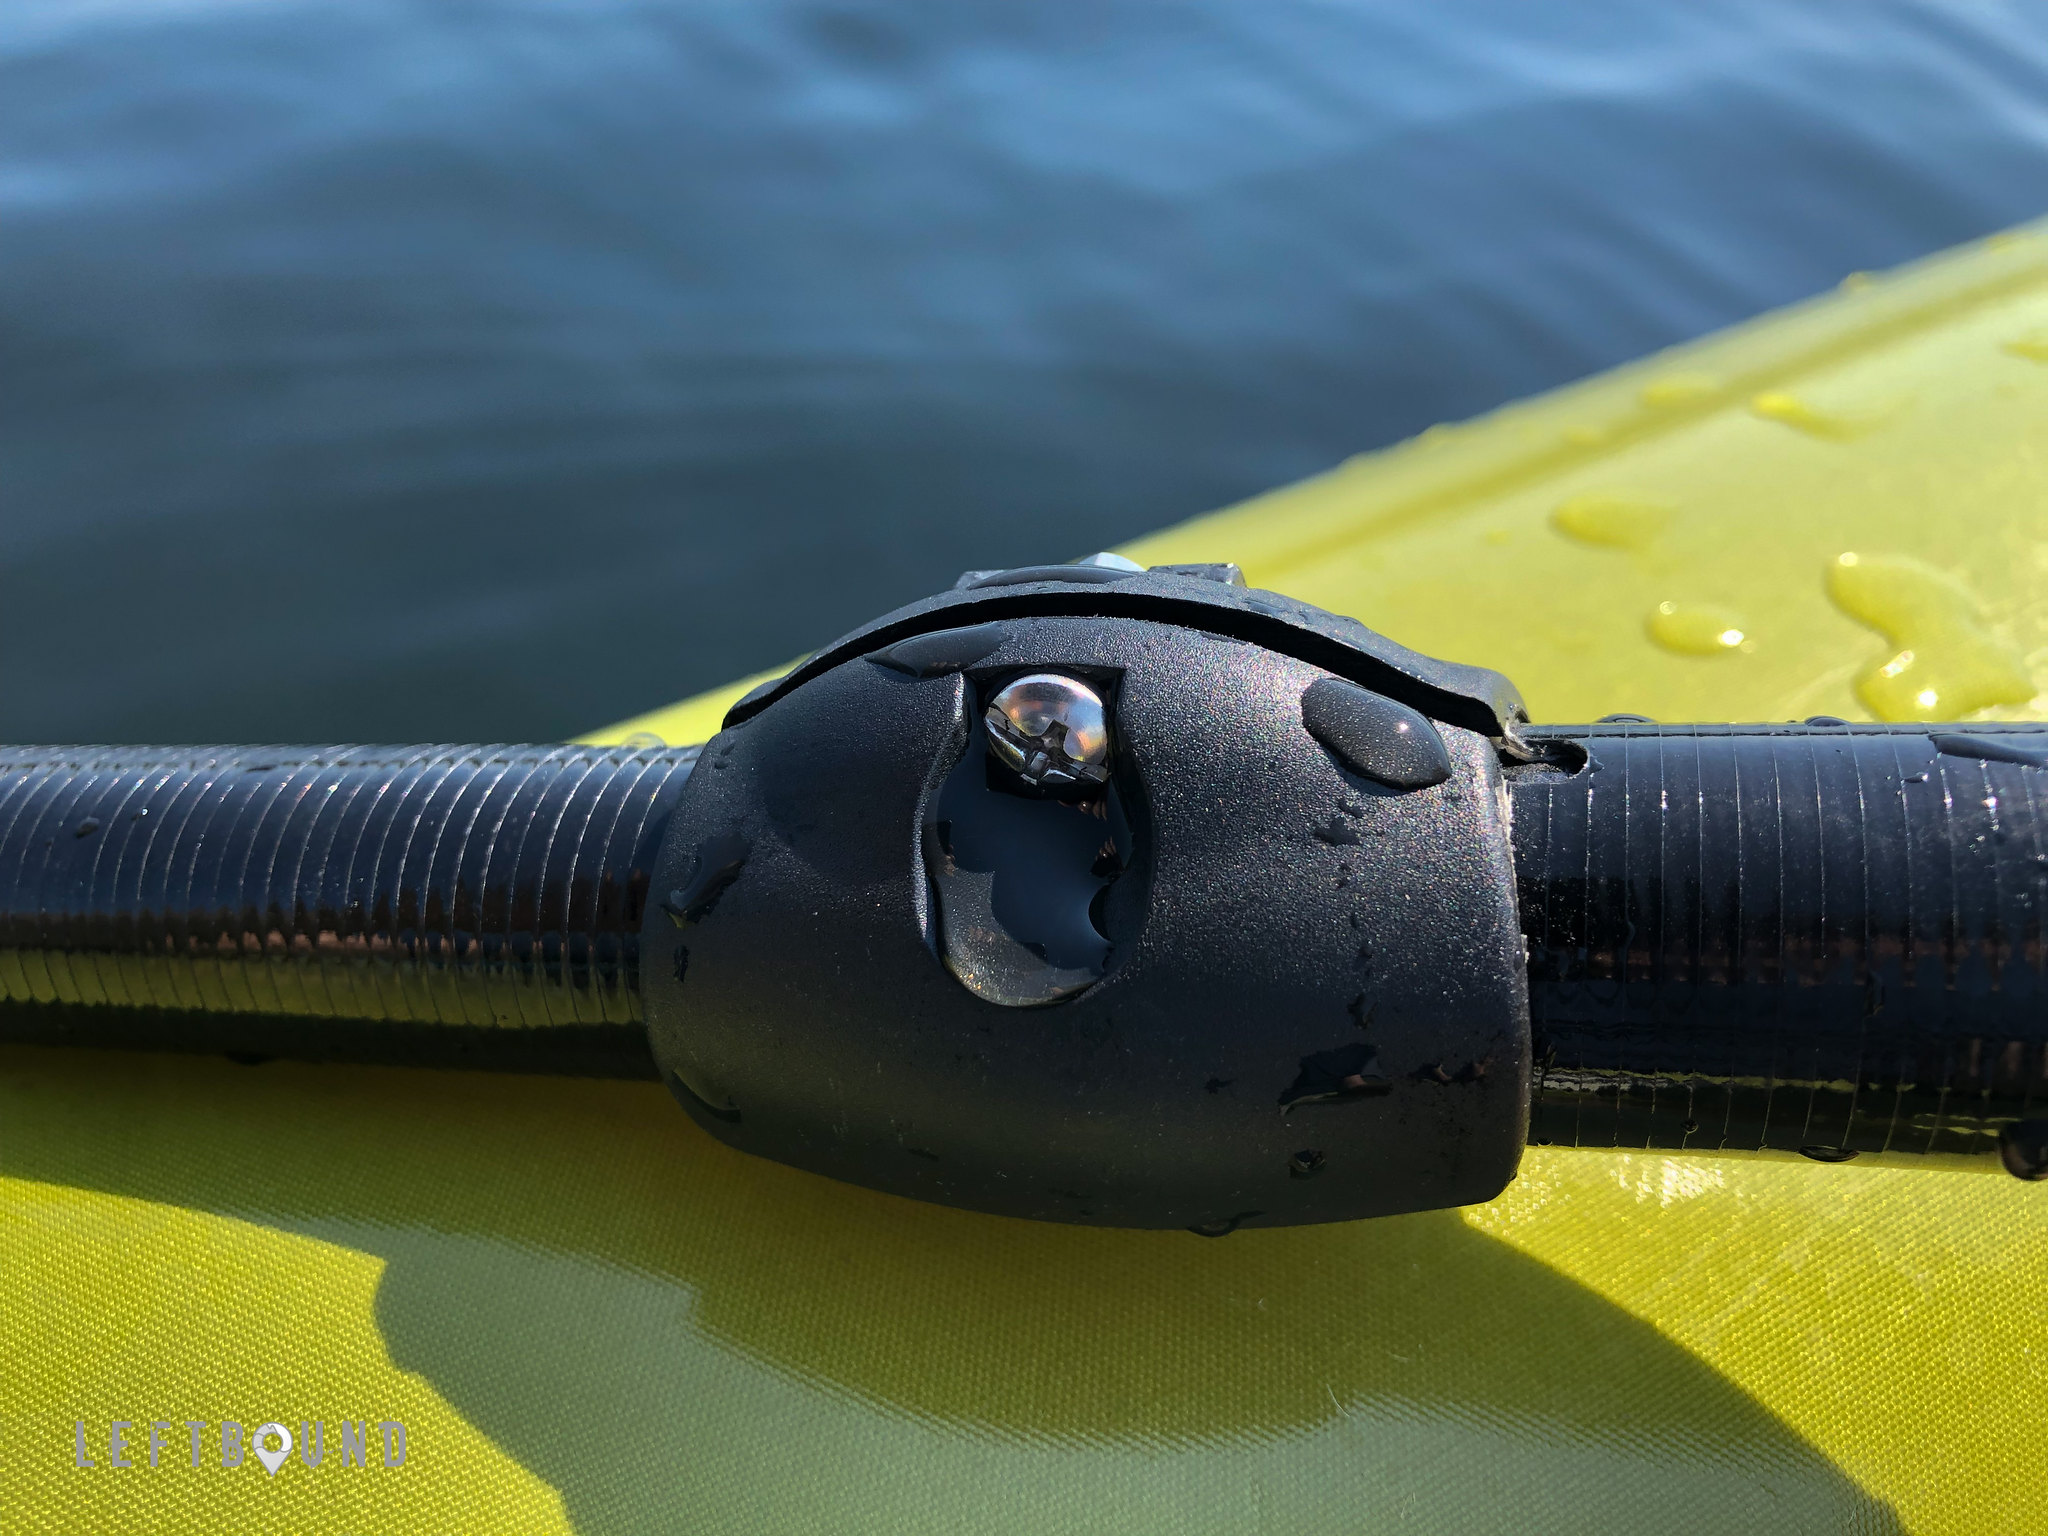
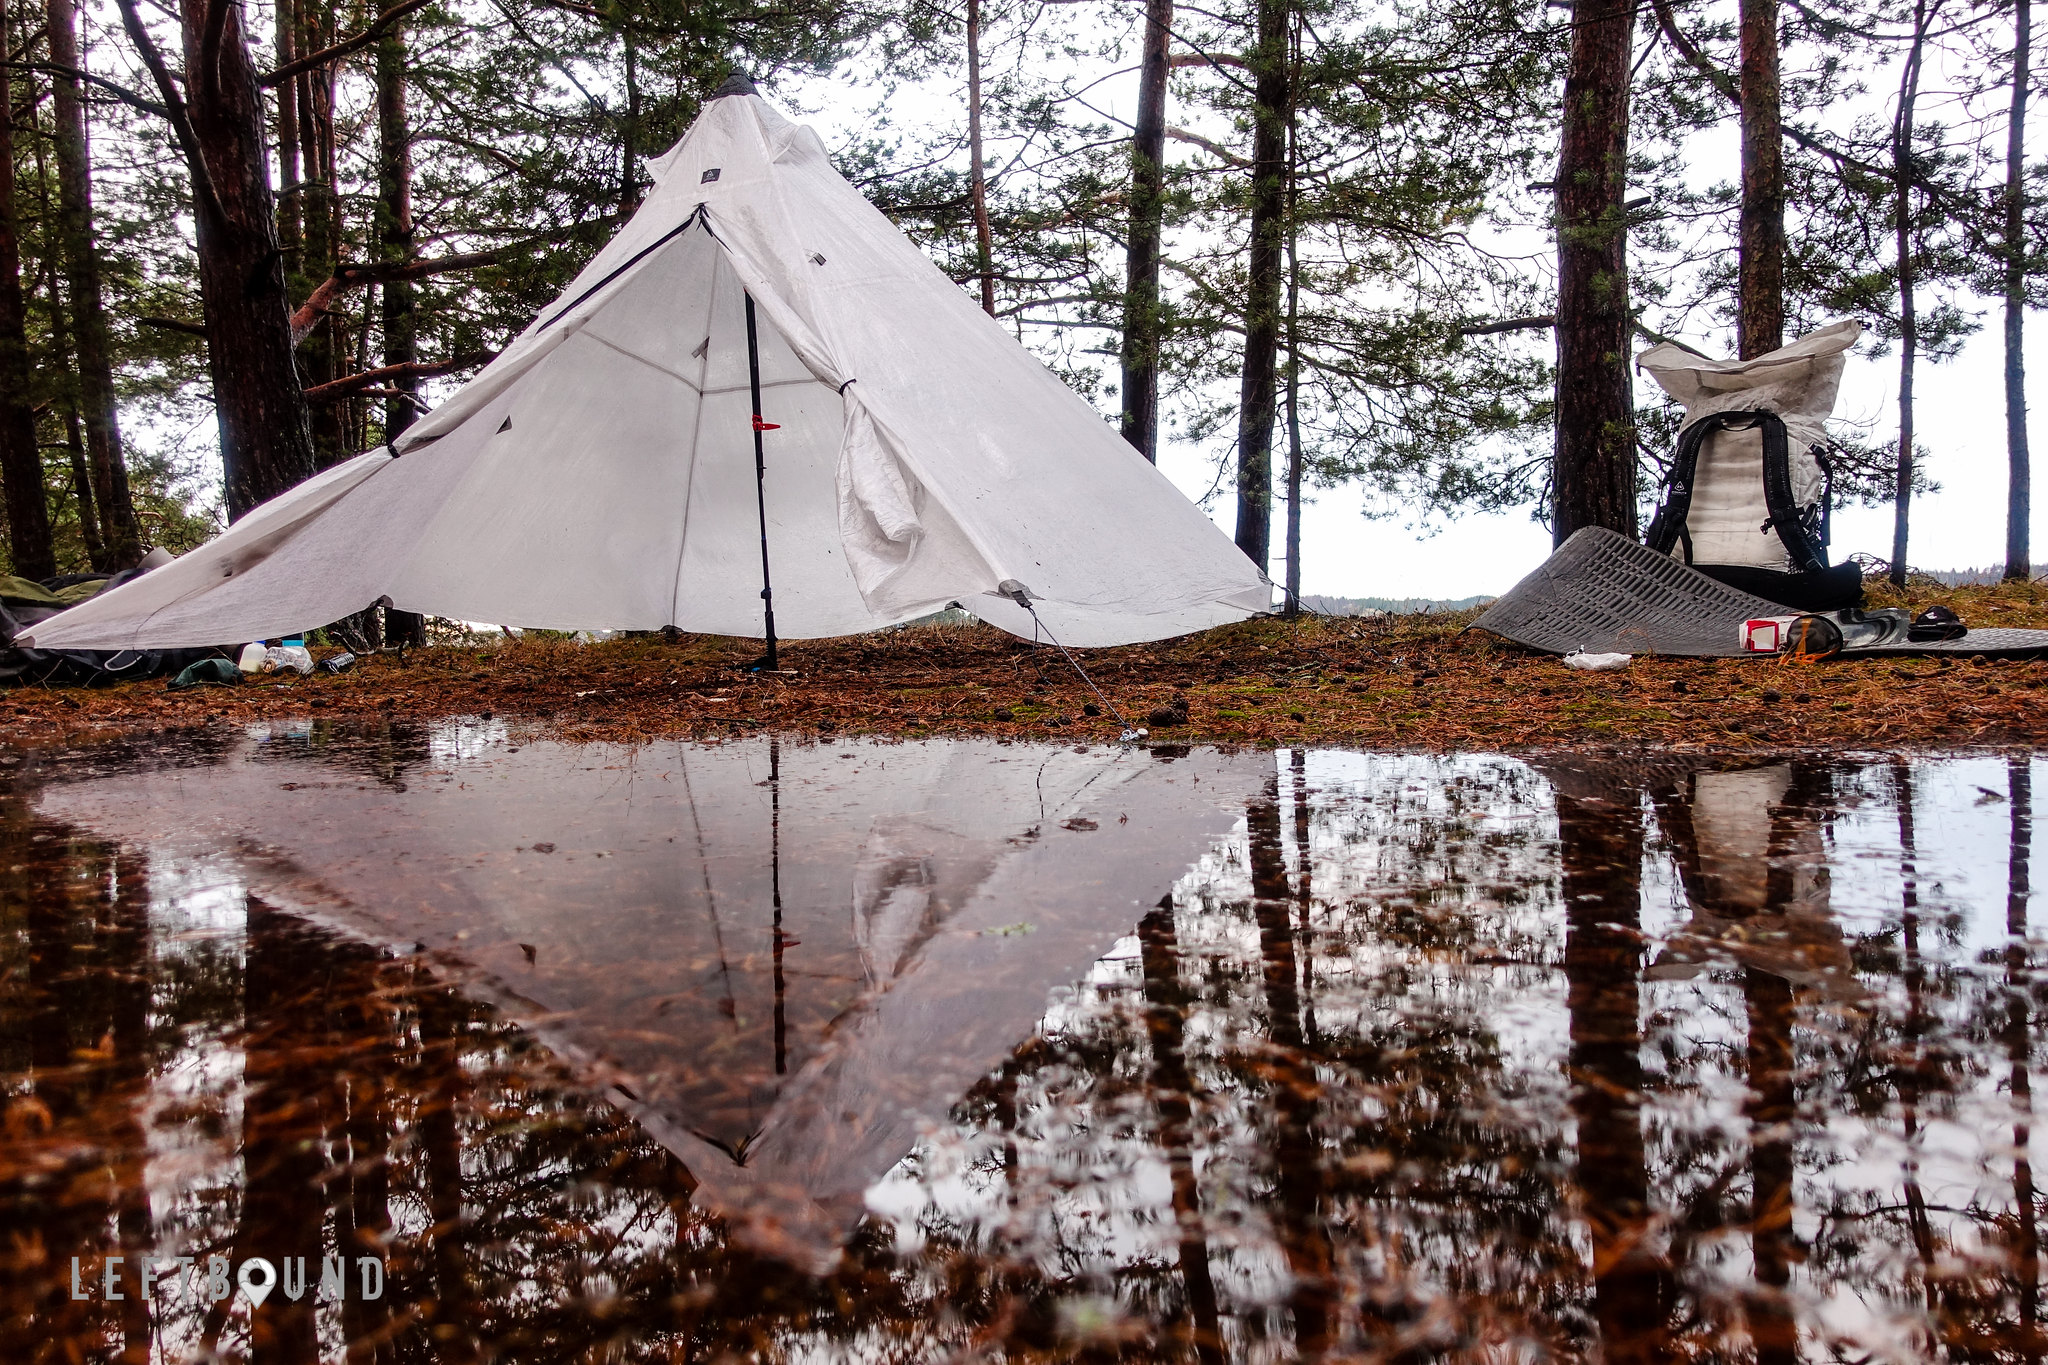
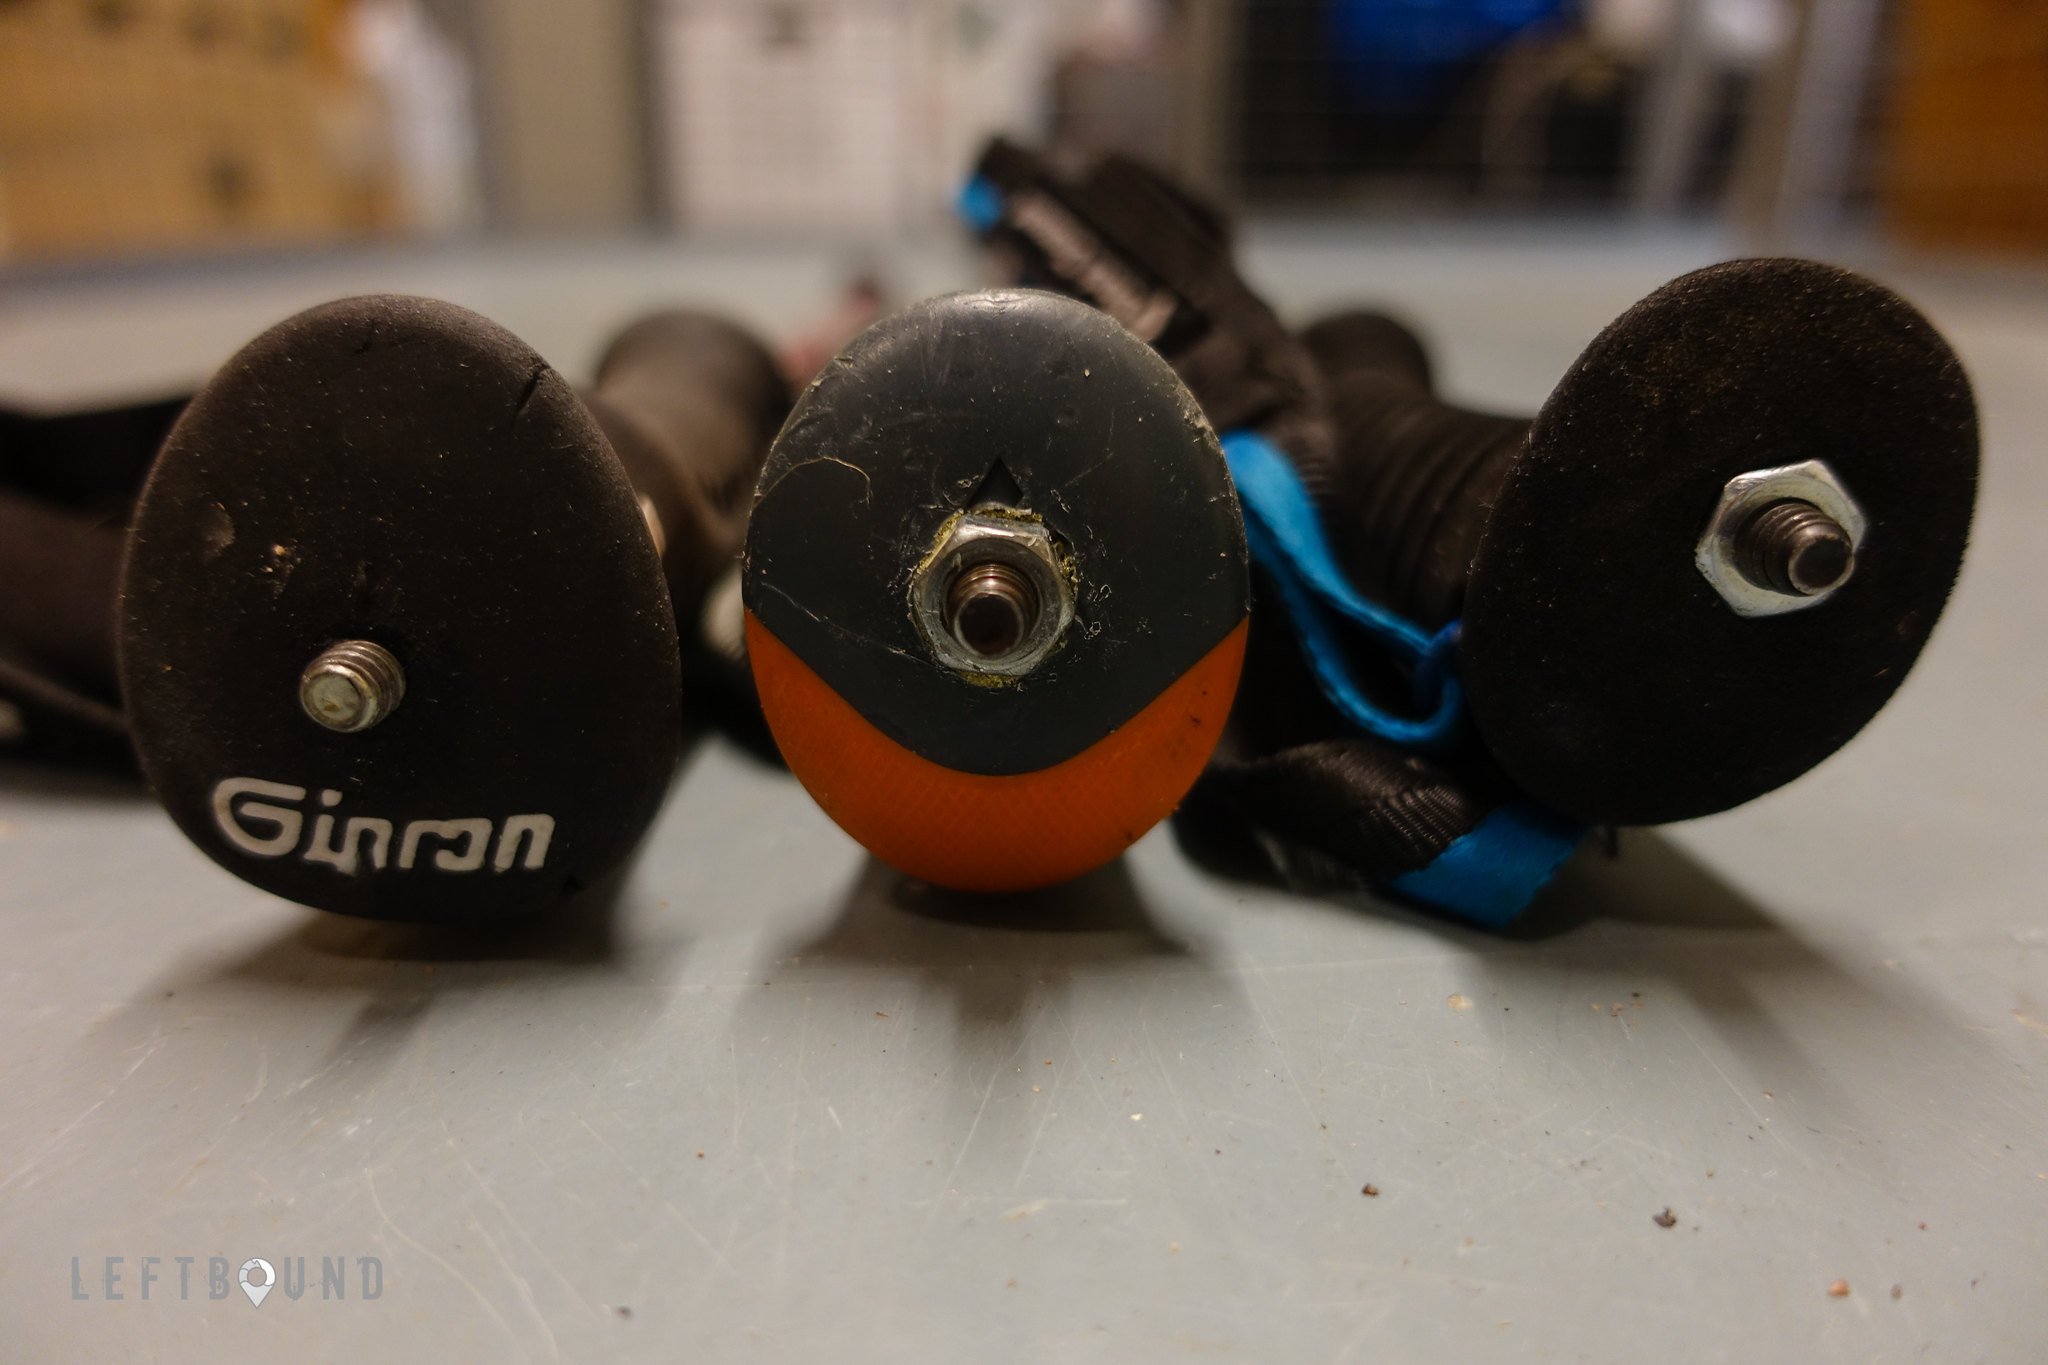
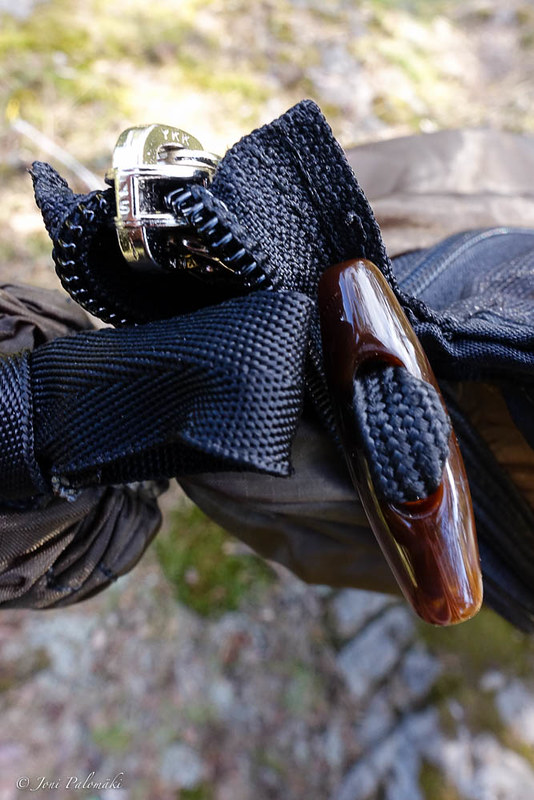
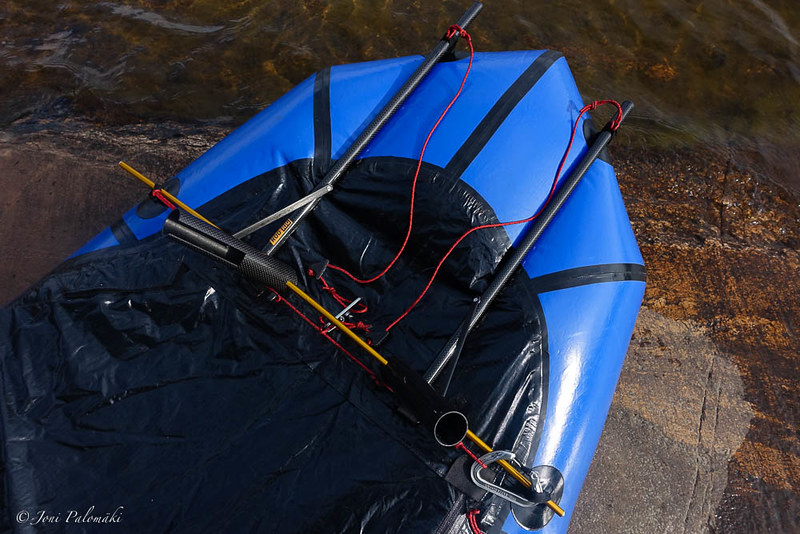
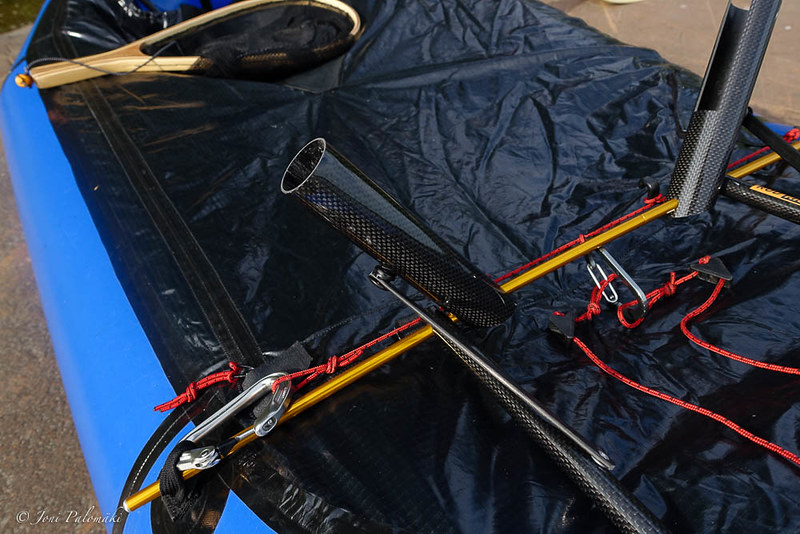
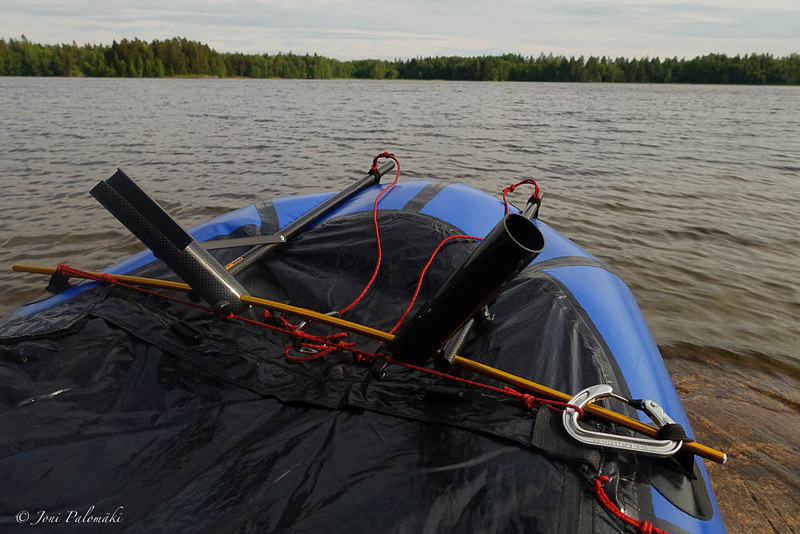
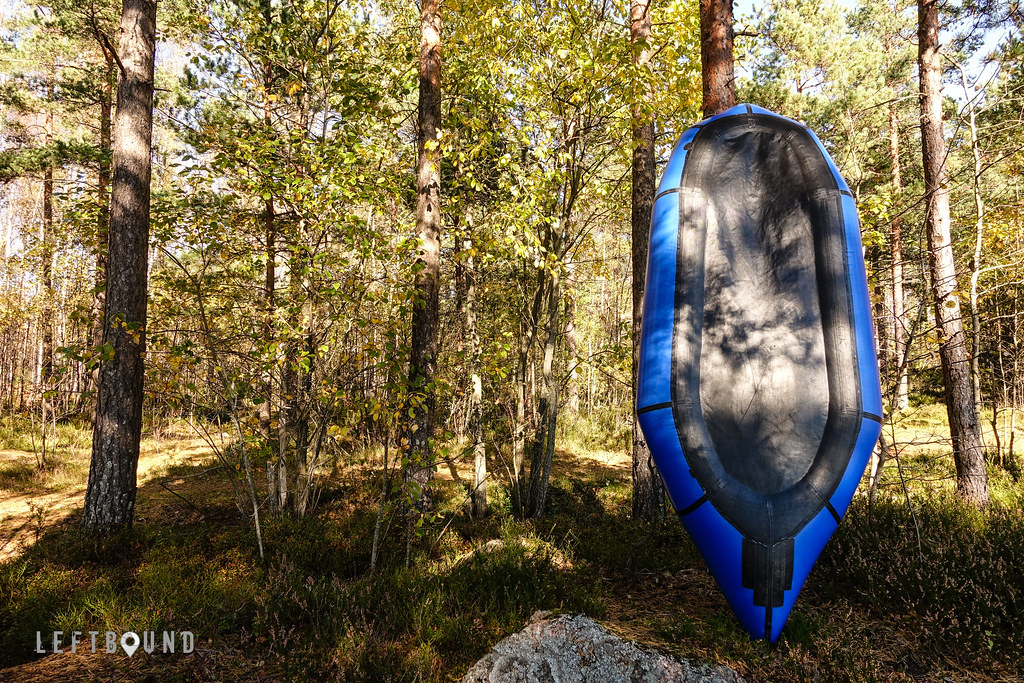
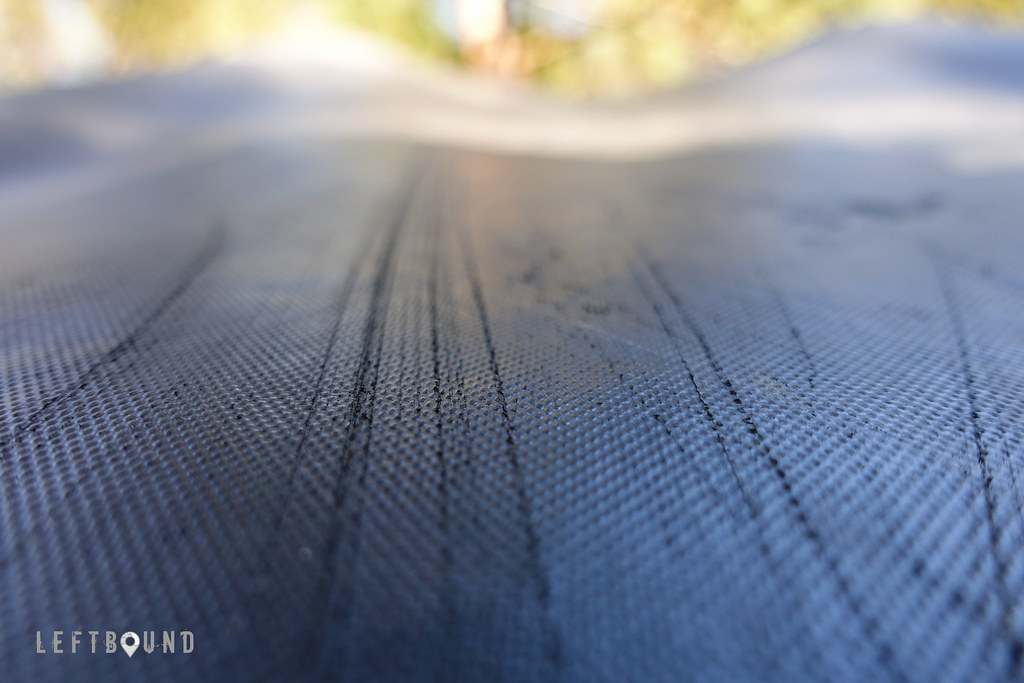
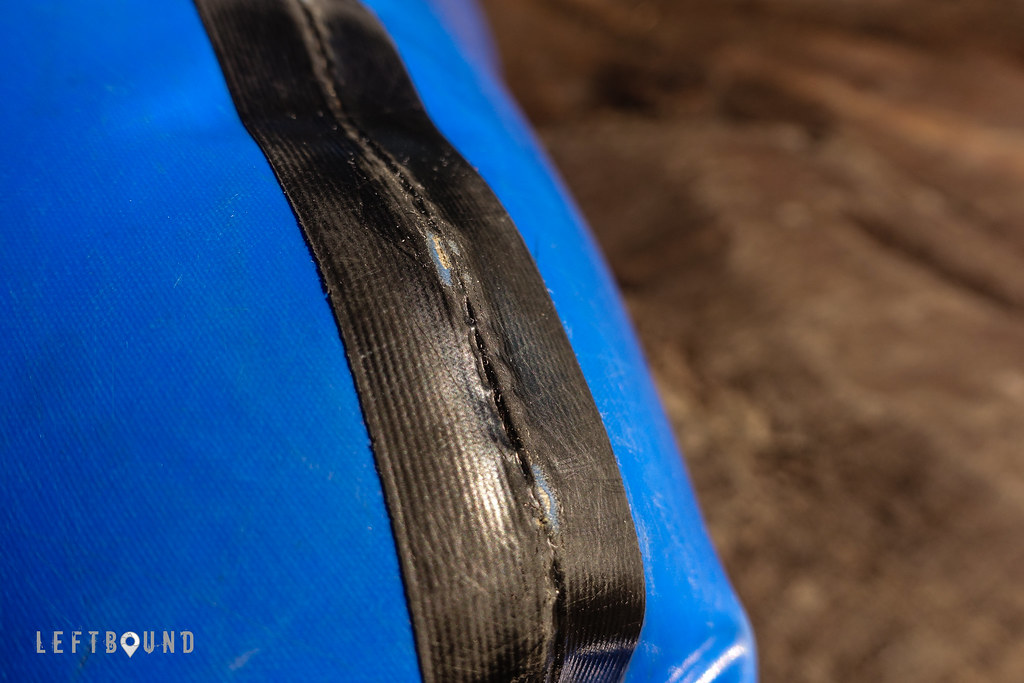
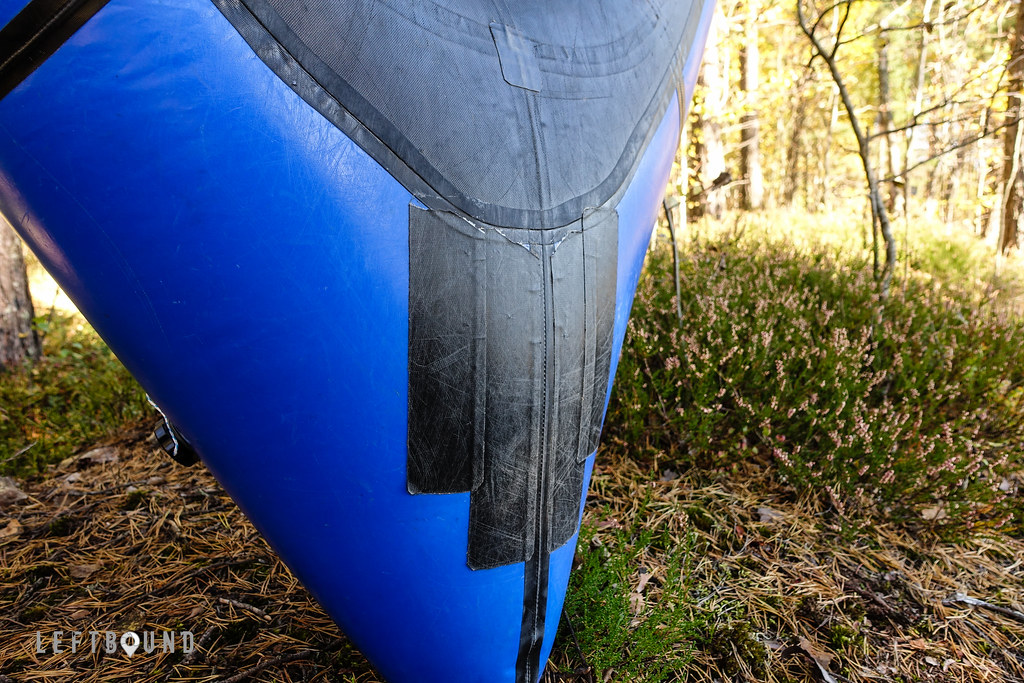
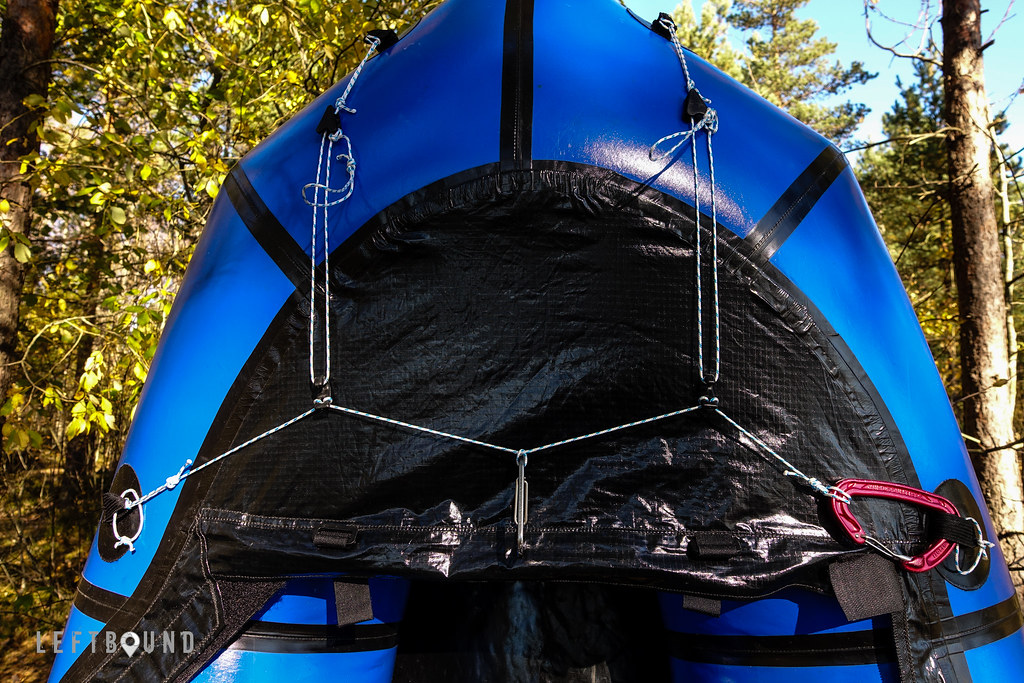
Second one is about bottom wear. While the standard width and length of the bottom, made out of more robust material than the tubes themselves, is perfectly acceptable, in my own experience I would extend it backwards quite a bit, as the stern gets pretty beaten up. Again, this has not caused a failure yet, but just thinking of maximum longevity, I would appreciate it. It has also to do with the way you enter the raft, since wet entries would not cause any extra stress on bottom of the stern. I however do almost exclusively dry entries (and exits), which means often a loaded raft, with me and gear, gets slid down a river bank or a waterfront rock or a cliff, often scraping the bottom of the stern against ground, sometimes above water, at least momentarily. With repetitive touch downs, there is some visible wear, though no leaks or holes. But in order to prevent further damage, I have now, since this summer, addedd few rows of Gorilla tape on the stern, as shown in the photo below.
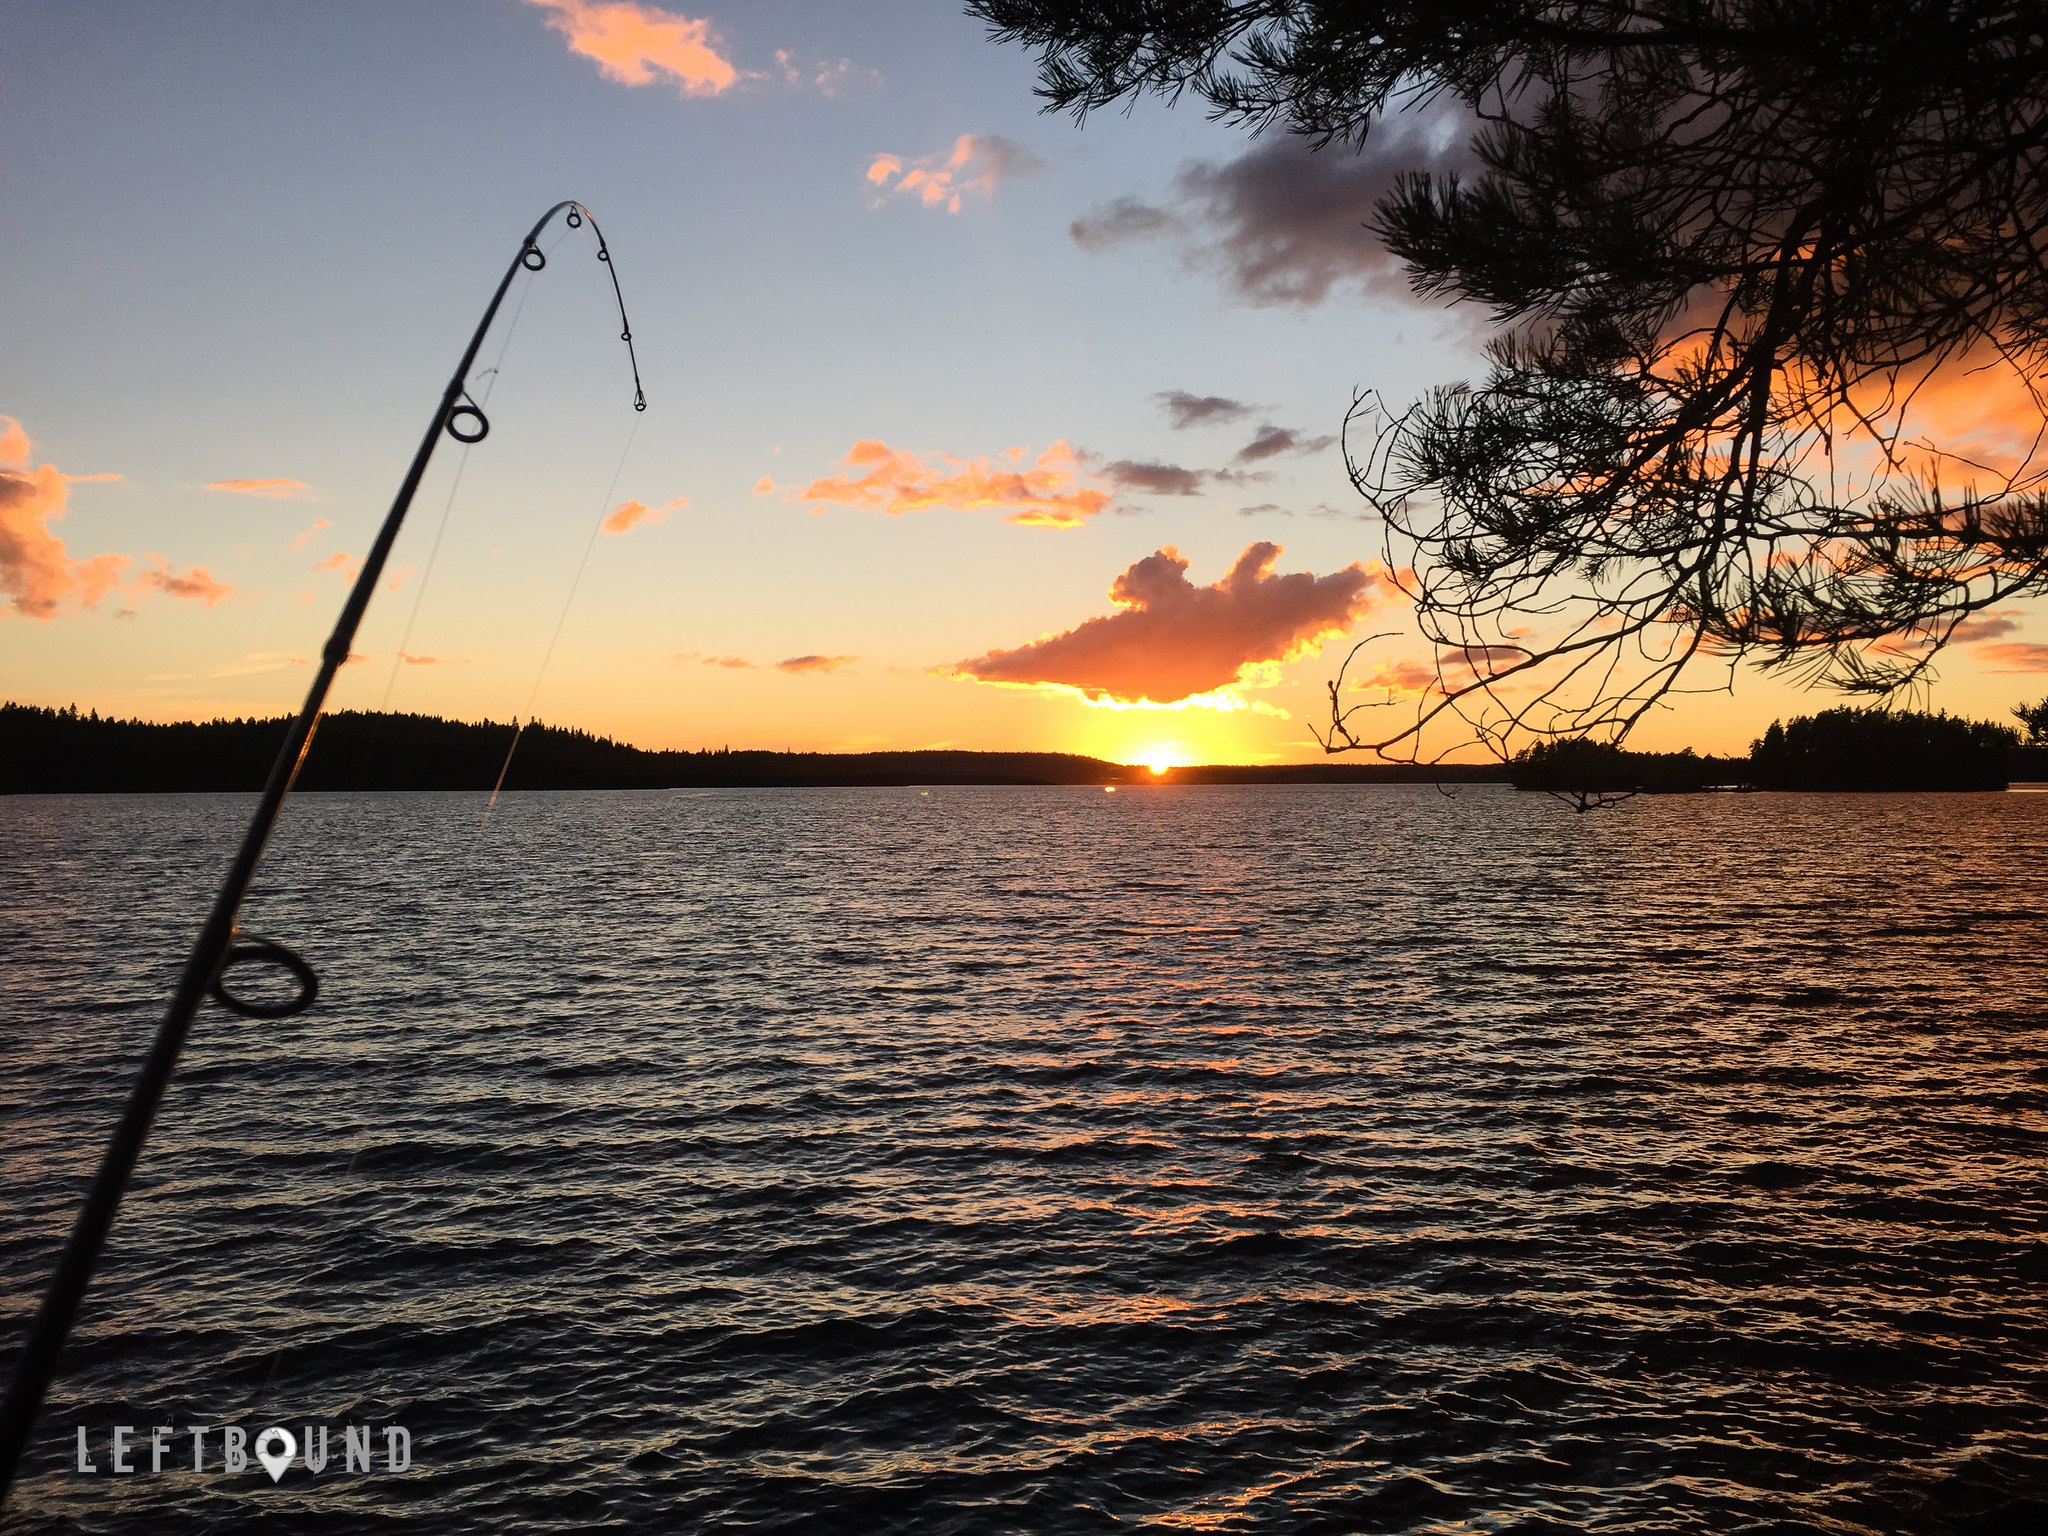
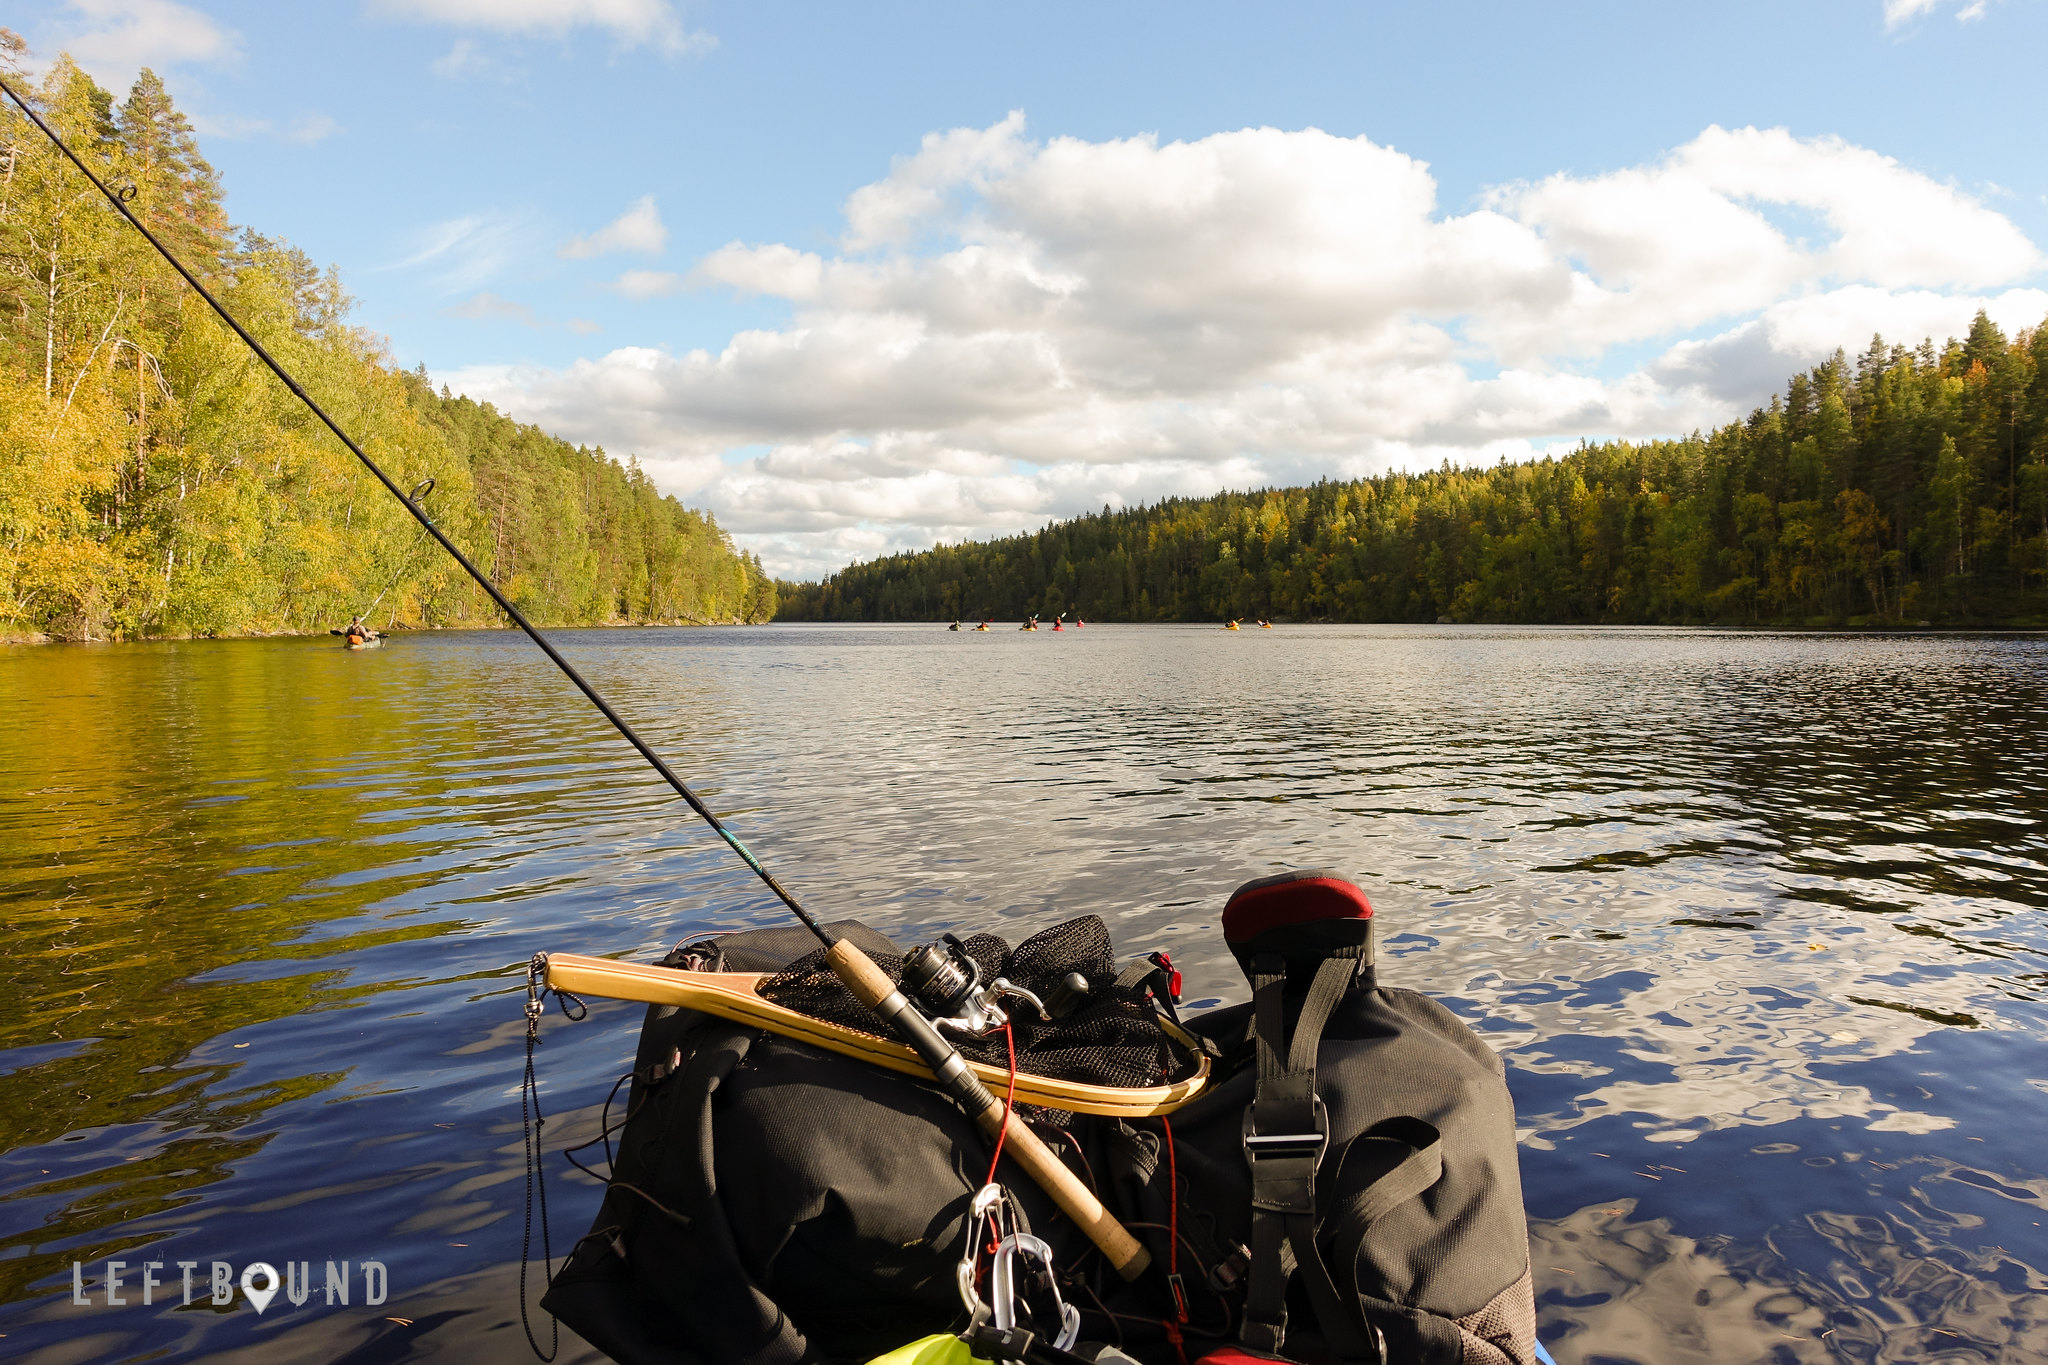
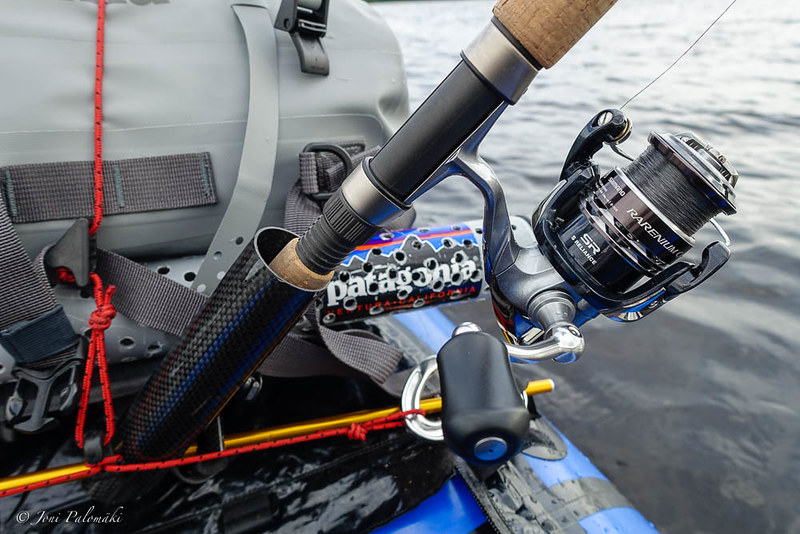
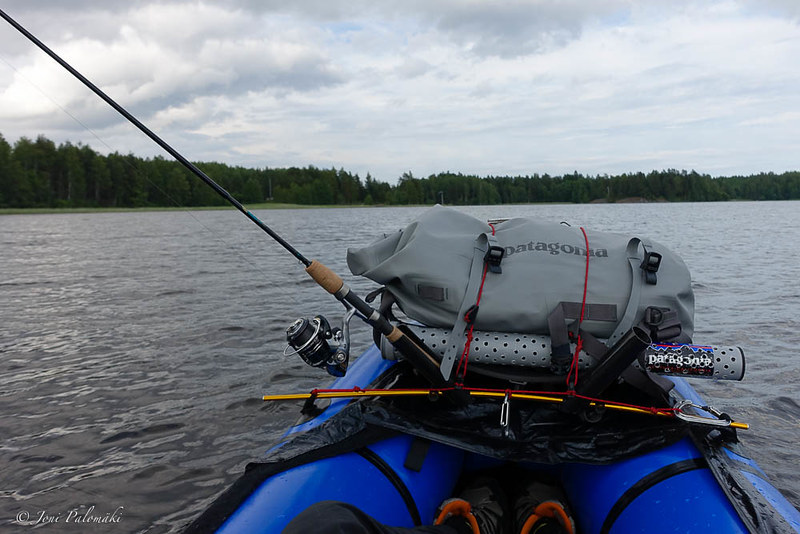
Third one is a bit more complicated. As I mentioned, I upgraded my Llama in 2012 from a barebone raft to a one with a Cruiser spray deck, attached with two zippers and a velcro strip. When I decided I want to have some weather and splash protection after all, I opted for the Cruiser, instead of the Whitewater version, as I wanted to have the option for an open boat. This was smart call, as I’ve for example paddled with my daughter when she was younger, and could easily fit us two, something that wouldn’t have been possible with a Whitewater deck. Same goes for fishing, I like it fully open there as well.
Llama is a snug fit for me and I can just straighten my legs when seated without shoes and the backrest I never use. Opting for the Whitewater deck would have required me to customize the boat, adding some 10 centimeters to its length. Over the years, also capsizing the boat in safe environment to learn how to exit from the raft in case of emergency, I have grown less and less reliant on it, mainly trusting it for flatwater paddling in the rain, where it works reasonably well. In rapids, I am always concerned of capsizing and not being able to pull the velcro open, and even when sealed as tight as possible (purpose of having the deck), water always seeps in, as waves and splashes flow over the deck. So it remains a mixed bag for me. I don’t however have any feasible suggestions on how to improve it, and I do understand its limitations for white water, that’s where the Whitewater deck reigns. For now, my priorities and preferences for boating support having an open boat that I can cover with the removable deck when needed, even if it’s not perfect. So this is not a deal breaker for me.
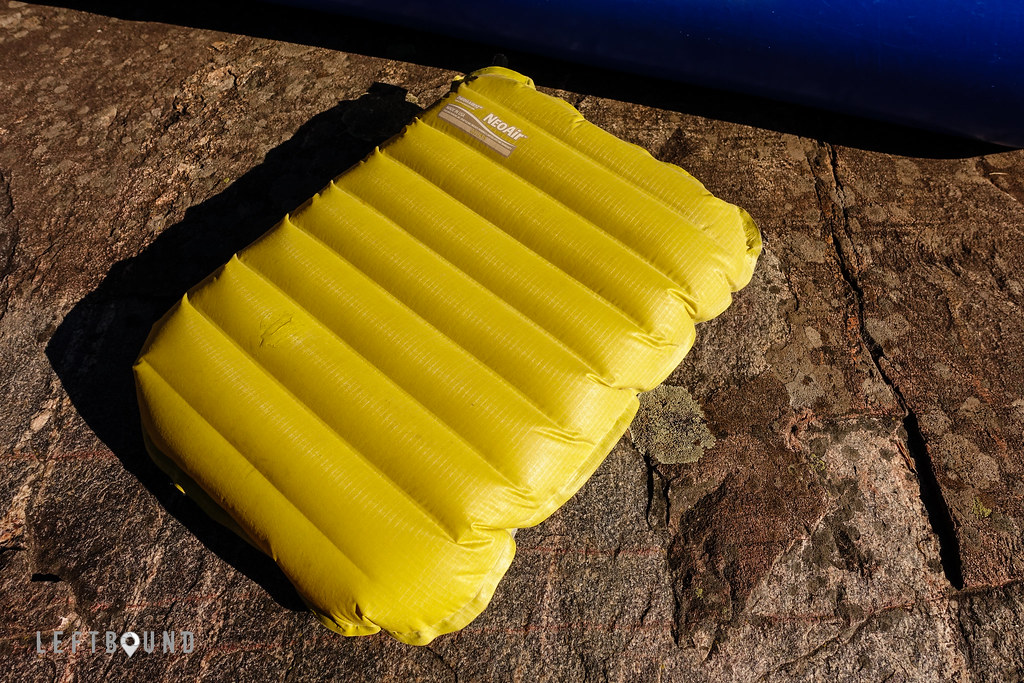
Not a caveat, but worth mentioning - I use an elevated seat, which gives me superior ergonomics over the standard seat. Mine is a simple inflatable seat from Thermarest (NeoAir) which I bought second-hand, on a whim, and turned out to be a keeper. Patched up thrice over two years or so, it’s not overly delicate, but for example fish hooks and such easily puncture it. If the raft would have attchment points for the standard seat some 5-7 centimeters higher (or have that much larger seat), I would happily leave this accessory behind.
This was my personal take on these little chubby boats, hope it gives you some ideas what to expect, and answers some of the questions or concerns you might have. If not, feel free to drop a question below, or contact me directly, I am happy to assist in any way I can, for smooth entry into a new hobby. If you’re from Finland, and capital area, I am happy to offer a demo, should that help to decide which size or which accessories would suite you best. As a photo is worth a thousand words and video is thousands of photos, I’ve hyperlinked both in the text, from the trips I’ve made over the years, to give you some idea what the raft can handle and support.
Although at least here in Finland the season is gradually coming to an end, though not just yet, I felt the timing is good, to plant the seed for the next season. I also did get my first raft in November, you see. Should this post got you interested in Alpacka’s rafts but left you pondering about finances, I remind you that Alpacka Raft has typically had a Christmas sale in November-December, shaving off 10% or more, which might help you to decide to what to invest.
As the communities are growing, there starts to be also a reasonable second-hand market for packrafts and packrafting related gear. To try to consolidate that, few weeks ago I took an initiative and opened a global Sell & Buy group in Facebook. This I hope proves to be useful for anyone looking to save some money or to sell gear no longer needed. At this moment, there are several rafts available within US and Europe, and other good deals on related gear.
❯❯ Flickr album (with more photos): Alpacka Raft Llama
If you already own a packraft, feel free to drop a message below, and share your experiences.
Disclaimer: Despite the obvious appreciation and goodwill towards Alpacka Raft and their products, I have no affiliation with the company, and opinions expressed here are mine, and mine only. Read the Outdoor Blogger Codex for more information on blogger transparency
]]>The nature reserve, that gets its name from the large bog, Tremanskärr, was established in 1986. Not very large in size, only around 45 hectares, there are nature trails that circulate the area, and following the well-marked, figure-eight-shaped route, one gets a complete tour across the reserve.
The main bog is rather special in southern Finland, due to the way it’s been formed. Rather than being the typical overgrown lake or a pond, Tremanskär was born at the aftermath of a forest fire. Without trees to absorb excess moisture from the soil, and ground water rising, previously forested land gradually transformed into peatland some 3000 years ago.
Tremanskär drains northwest into Kurkijärvi, a grand but shallow forest pond. Large aspen trees, rugged wilderness valleys and morasses cut across the woodland.
I hoped to find some ripe cranberries, though it was still relatively early in the season, and did find plenty, hiding in the underbrush. No cloudberries were seen, but plenty of overripe and bland bilberries still hung heavy on the branched stems.
Aside of duckboards and few wooden benches, there are no fixed structures nor fire places in the area. Trails were all clean with no trash at sight, even though the area is easily accessible from a parking lot - not sure how much traffic there is though. Signboards scattered along trails present useful bite-sized info about the history and wildlife of the area.
❯❯ Flickr album (with more photos): Bogged out at Tremanskärr
]]>The passion for nature and life outdoors, planted in the childhood, has grown steadily over the years, sustained by repeating new experiences. Growing up, childhood play turned into mountain biking, climbing and skiing, and due to a curious personality, to a whole range of other activities that have allowed me to get out there to explore and experience. Never interested in doing sports, nor in goal-oriented training, my reasoning for picking up new hobbies has always been, and continues to be, to experience outdoors in new ways. And to see, and to get to, places otherwise inaccessible.
The main reason for the natural kickstart to outdoorsy life is the fact that back in the days, there wasn’t really much to do indoors. We had some toys, sure, and a TV (with two to three channels), but indoors was generally seen as the boring place, though computers started to make their way into homes when I grew up - someone remember Commodore 64? How different it is for today’s youth, when you have the world at your fingertips through household commodities such as powerful computers, smartphones and of course this Internet. And lots of stuff in general. Indoors has become the outdoors of my generation - a bottomless source of enticement and entertainment.
It is this shift that the European Outdoor Group also wishes to address with their latest #ItsGreatOutThere campaign. It’s a call for action, for all of us, to get out there, and spread the word. Despite the technological advances and modern innovations shaping our everyday life, the hunter-gatherer heritage is still engraved deep in each of us, and should be nourished if for nothing more than your personal wellbeing.
Sitting is the smoking of the 21st century so get up, head out, and take your fiancée, kids, parents, friends or your next door neighbour with you! Go wander aimlessly, take a dip in a lake, harvest some season’s mushrooms or go try something new. Each minute spent out breathing fresh air and in the nature will boost your resistance, lower your stress levels and generally make you a happier person - trust me! And if you don’t, there are several studies that have come to the same conclusion.
All of you active in social media channels, feel free to use hashtag #ItsGreatOutThere when sharing your experiences online. To make it more interesting, European Outdoor Group has partnered up with companies and events to bring great prizes to an ongoing roll of competitions, open for everyone. Go check it out - the current one, Community Focused, ends today, but the next one is just around the corner.
Disclaimer: This article is part of an Outdoor Blogger Network campaign. This does not however influence the article, as I maintain full editorial control of all content published on this site. Read the Outdoor Blogger Codex for more information on blogger transparency
]]>Unfortunately, for me, come the week of the event, I managed to pull something on my left shoulder, playing sporty games at my daughter’s school camp I was supervising, and had to make a tough call of bailing out from the longish paddled down the river, and simply join the kick-off at lake Piilolammi in Kytäjä-Usmi, to meet the fellow paddlers and to try catch some fish. Launch was preceded by a simple workshop we had put together with Marko, discussing the few intricacies of fishing from a packraft, and preparing simple line and a hook systems to use with earthworms or bait fish. Although lake offered no catch for the minimalist fishermen, a dark-hued pike was eventually caught in the group, and prepared by the fire.
Some of us, yours truly included, had relied on catching some protein from the lake, so the lone catch quickly disappeared from the pan, with some fried onion and chopped sheep polypore (‘lampaankääpä’), harvested from the surrounding forest, as a side dish. I had mistakenly assumed there would be a lean-to at the lake, so without any shelter with me, I laid my sleeping bag by the fire, bivvying under the cloudy skies, perfectly warm and cozy through the relatively warm autumn night.
Next morning I tried again to catch some perch for breakfast but the lake, rich in humus, still provided none, so porridge it was. The merry team of packrafters then packed up, few heads stronger, and hit the road, hiking to a nearby tributary, for an early launch towards Vantaanjoki. Left behind by my own choise, I had opted to explore the area on a bike, and packing up with day’s supplies and fishing gear, I hit the trails soon after, with a rough plan for a round trip through the forest roads and trails.
Day remained cloudy and comfortably cool, while I roamed in the park on my fatbike, visiting several lakes, including Mäkiperänlampi, Kiiskilampi, Iso Kypärä, Kaksoislammit and Usminjärvi. Of these, the middle three have a lean-to in them, and especially the ones in Kiiskilampi and Kaksoislammit are well positioned with great views. A smart approach in my opinion, the firewood supplies, which there are many, were always positioned some distance away from the lean-to’s and fireplaces, requiring a bit of effort to keep the fire going.
Not so smart choice were the oddly sized lean-tos, sized to accommodate only three people at a time, with anyone over 160 cm tall having to sleep in parallel to the doorway, effectively blocking the way for others sharing the shelter. A 195 cm tall myself, it was not a match made in heaven, as head or feet first is generally the best way to share a lean-to shelter.
I took my time to enjoy the views, to stop here and there, and of course to try catch some fish, as my lunch was mainly dependent on that. Lakes remained silent, which has to do with, if not only my luck, or skills, the specific time of the year and the northerly winds. Regardless, no protein from the lake, but I did have a few slices of buckwheat bread with garnish in my pack and shared a sausage by the fire at Iso Kypärä, offered by a friendly couple finishing up their lunch. If the nature does not provide, a kind passer-by just might! Though I did find some more mushrooms and of course plenty of harvest-ready lingonberries and some overdue bilberries.
The park had just recently received brand new sign-posts all around, which made it super easy to navigate through, with directions and distances carved in each colorful pole. These however were only along the gravel and forest roads, so once on the trails, a general sense of direction, and at times a map of the area, was needed for navigation.
I finished my tour nearby lake Piilolammi, where my car was parked, and guestimating the group just might be done soon with their roughly 20 kilometers of paddling down the river, I deciced to, instead of heading directly home, visit them at the next stop, at Nukarinkoski rapids. Turning up around six in the evening to the lean-to, the group had indeed shortly arrived. Similar to few others joining the event, I hadn’t had high expectations on the surroundings of Vantaanjoki, and having to skip the long paddle had not been a huge disappointment. However, as I got to hear around the camp fire, the river had an ace or two up in its sleeve, and the day had not only been a long strenuous paddle with a good mileage for slow packrafts, but spotted with interesting views and passing attractions.
While the easy rapids down the line had been rock-hopping gardens due to very low water levels, and the big ones at Nukarinkoski (largest of them all along Vantaanjoki), and next day at Myllykoski, unpaddleable again due to insufficient discharge, they had made the days more interesting and also revealed some good potential for a revisit in the future. I bid farewell again to the team at the night fall, heading home with few others, while the remaining packrafters were looking forward to the next day’s paddle.
The outdoorsmen and -women, packraft-nutties, pleased to meet you all! Looking forward to the next annual, or perhaps soon biannual, meeting. For more visuals from the actual event, browse through Caj’s photos. Since this summer, we also have a Facebook group to bring together all packrafters in Finland - feel free to join that, or one of the other local of international groups that already exist, to keep yourself informed on what’s what in packrafting.
❯❯ Flickr album (with more photos from Kytäjä-Usmi): Peeping at the Packraft Gathering
]]>Last weekend, after a short break over the summer months (the typical gap we seem to have each year), we had our 33rd event. Dates set, we agreed we would visit the Isojärvi National Park near Kuhmoinen, and as the park gets its name off its large lake, we chose paddling as the activity.
Amongst the five of us joining for this outing, we had an array of lake-worthy tools to put down in Nokipohja, where we arrived on Friday evening - A single kayak, a family canoe to carry two, a lightweight kevlar canoe for one, and a packraft for me. As I certainly had the slowest of the vessels, I also brought my WindPaddle Adventure sail, to cruise along as the wind and its direction would match our path - and luckily it did!
Isojärvi National Park, about 23 square kilometers in size, is situated mainly south of lake Isojärvi, but extends also to the north, and includes several separate nature reserves. There are roughly 30 kilometers of marked trails, 4 lean-to’s and two separate fire places. As we chose to explore the park paddling, we only visited one of the lean-to’s, where we also stayed overnight, in the small island of Renusaari.
A perfect spot to camp out, the lean-to was built right next to the lake, with a view towards the setting sun. Water in Isojärvi is very clear and the lake is good to drink from - boil it if in doubt. Paddling to Renusaari, potatoes, onions and dill in my pack, I hoped to catch some perch to make a soup, but I only caught one, so I had to resort to my plan B, fish soup turned into a reindeer meat stew - delicious nevertheless!
On Saturday, we paddled around the north side of the lake Isojärvi, going in and out and in between the small islands and islets, enjoying the summery weather and relaxed paddling. I continued to fish, and even got a glimpse of a large pike underneath my raft, but throughout the day caught nothing.
We stopped in one of the scenic small islands with large boulders that were characteristic for this wilderness-like lake, serrated by the breakage of earth crust. It is this what also makes some of the trails in the area tough to hike through, with high cliffs and boulderfields to negotiate.
Fish was hiding from us, but we saw a common crane swooping over the lake, and listened the barks and cackles of red-throated divers (Kaakkuri) at the night fall, as we gazed over the starry sky. Night was clear and a bit chilly, though I slept comfortably in the lean-to, sheltered from the wind by my packraft, hung up at the entrance.
Cowberries were ripe, and were a perfect add-on to the morning porridge. I cannot eat grain, so mine is made of full grain rice which makes a good substitute. I had finished my year-long relaxed project of carving a ‘kuksa’ by hand from a birch gnarl just before the trip, and could now use it for the first time outdoors - coffee tasted even better than usual!
As the wind was present most of the time, I was able to use the sail quite a bit, and also lend it to others to try out, as it’s a neat little tool for any small vessel. I had my keel (leeboard-style, a simple plexiglass board hung on the lee side), so could travel down the wind at an angle, which is useful when touring. Weather stayed clear and despite we got a few drops of rain on the first evening, when landing to our campsite, we got really lucky with the weather - it got downright hot at times during the day, sun blazing, though already at a lower angle.
I hope to return some day to explore also the network of trails around the area, but for now, this was a great first visit, and despite the longish drive from Espoo, well worth it. As usual, browse to Luontoon.fi for a map and other details of the area.
❯❯ Flickr album (with more photos): Paddling Isojärvi National Park
]]>Best known as having the highest ‘mountain’ (a true mountain indeed in the scale of Ostrobothnia) in Western Finland, rising 231 meters above sea level, and of its ancient seashores, called ‘kivijata’ or ‘jata’, this national park extends across roughly 54 square kilometers of hardwood forest with podsolic soil, with springs, ponds and small lakes to enjoy, and of course those aforementioned boulderfields and different types of bog.
Uncommon within the current 39 national parks in Finland, cycling on the trails is luckily not forbidden in this particular national park, but cautiously encouraged within the well-established (and sign-posted) network of trails. As several studies have concluded, mountain biking generally has an (environmental) impact that is less than or comparable to hiking, but one should still thread carefully to avoid any unnecessary conflicts. Bikepacking style of exploration though is less likely to cause friction. During my visit I had only positive encounters with hikers (while I saw no other cyclists), part of which might be due to riding a fatbike, part to my chatty personality, and the rest surely due to the merry folks of Ostrobothnia!
During the day I was mostly alone, as I only met few hikers at the trailend and close to the central parking lot, not far from the lookout tower. Just a sample of one day over one weekend, I did have a short talk with a family, regular visitors themselves, who confirmed park really does not seem to get a whole lot visitors, outside of the parking lot surroundings - what a shame.
Spending a full day on the trail, from dawn till dusk, I got to cycle most of all rideable trails across the park, some 40+ kilometers in total, plus some on the gravel roads, connecting few trailheads. I did not carry a map of the area, but followed the generally well-marked trails and checked my bearings on the GPS, when I was not sure which direction best to take. In addition to marked routes leading to specific attraction or a vantage point, there are plenty of trails to go about and around, so that’s exactly what I did.
Taking my time to stop and enjoy the varied scenes, and to harvest an ample amount of billberies and raspberries as I came across good spots, I rode anything from overgrown forest roads (doubletracks really) and well maintained duckboards to technical single track and fast-paced trails. I was especially enchanted by the small sand-bottomed creeks, populated by brown trouts (fishing not permitted), with chrystal clear waters and mesmerizing views such as this churning sand in a tiny pond (video in Youtube):
Easiest trails were around the Lauhanvuori lookout tower and around the lake Spitaalijärvi and Kaivolammi pond, and heading southwest, kilometers long network of duckboards greets the visitor, providing access across bogs and into the boulderfields.
Towards west, around Lauhansarvi and Huhtakorpi is where I found the narrowest and most technical trails, and also some, hopefully about to be restored, broken down duckboards, before arriving to Ahvenlammi pond. There are few springs in the park, to quench your thirst in - I filled my reserves in Huhtakorpi spring.
Ahvenlammi used to be the camping spot north of the area, a serene mire of a lake, but the fireplace there is about to be torn down, and new site established at another pond, aforementioned Kaivolammi. As the fireplace was still intact, with a poster informing about the upcoming change, I had my dinner there, before continuing my circle around the park as the sun was setting, and to have a post-ride dip in the Spitaalijärvi (‘Leprocy Lake’). Lake Spitaalijärvi is an acidic lake with pH as low as 4.7, with presumed healing properties - hence the name.
A great long day on a bike, glad I picked this one up for one of the summer outings and I highly recommend it for a daytrip or an overnighter on a bike. Map of the area and some other vital pieces of information can be found here. Similar to few other destinations in this area I’ve visited in the past (1, 2), also this one is featured in the Seikkaile Suupohjassa -resource, maintained by Suupohja Development Association (Suupohjan Kehittämisyhdistys ry).
❯❯ Flickr album (with more photos): Lauhanvuori National Park by Bike
]]>With this quick introduction, let’s jump to the first product in the series, and the company behind it. Alcohol consumption in the woods is hardly a trending topic for an outdoorsy discussion, but many, myself included, appreciate a dram of whisky or a shot of something of their liking at the end of the day. Proven good also for the digestion after a heavy dinner by the fire, it’s a modest habit that I’ve had for years. Not much of a drinker otherwise, I think outdoors is where for example a good whisky excels.
Settled to refilling small plastic bottles for overnighters or a larger plastic bottle for longer trips, almost exactly a year ago I received an Ukkomatti 100 hip flask for my 39th birthday from my family. This intriguing steel tubing, with a capacity of 100 milliliters, is made by a company called Continent Finland Oy, in Southern Ostrobothnia, under a brand Ukko Schnapps.
Made with food-grade stainless steel tubing, with screw-on cap and lazer welded bottom cap, it’s plain and minimalistic in design. It’s rather substancial at 277 grams, and comes with a black leather case (which adds another 35 grams), that draws its design cues from puukko sheats. Raw and unpretensious, as the company describes the product, Ukkomatti is indeed clean and utilitarian with a touch of finesse, reflected by the marriage of stiff, stiched leather and polished steel.
The thick leather sheath is a tight fit with embossed brand logo on it. As it’s actually a tube, the lazer engraved bottom of Ukkomatti shines through - a nice original design. I haven’t ran across any fakes so far, but the current models shipping all have also serial numbers engraved in the bottom, which can be tracked down on the Ukko Schnapps website, validating authenticity. Mine is from an early batch when this feature was not yet present.
Obviously simple product to use, threaded cap with a rubber gasket closes cleanly and securely and allows no leaks. The nice thing about steel and leather (like wood, and unlike plastic) is that no matter how many dents and nicks you’ll get, it’ll just add character, instead of simply being wear and tear. I’ve only got one dent on mine, from dropping it on a rock, aside of minor scuffs here and there. You would really have to go to great lengths to destroy one.
What could be improved or changed then? This is a hard one as I really like it as it is, but from hiker’s point of view, one could wish it was a bit lighter, as 300+ grams is quite a lot for carrying 100 milliliters of your favorite liquour, if you’re trying to optimize your pack weight. For short trips and overnighters this is of course not a concern. Then again, it’s not really designed for the weight conscious backpackers first in mind - and I’ve used it to knock a large pike unconscious (percussive stunning they call it in English, had to look that up) when on a fishing trip! I like the sheat, but I think it might look even better with a solid metal ring and a thick leather loop, instead of the soft(ish) spirally loop it now comes with - but that’s me.
Ukkomatti comes in couple of different versions, mine is the original one, and they also have few other products to go with it, such as stainless steel shot glasses - go check them out.
All products can be ordered from the company’s webstore, but shipping is currently limited to Finland and Sweden only. Same goes for Discshop, which seems to stock at least Ukkomatti. In Finland, you can also find them conveniently at your nearest Alko - get your favorite refiller on the same round. Mine is currently Talisker Skye.
❯❯ Flickr album (with more photos): Made in Finland - Ukko Schnapps Matti 100
]]>Come this spring, we recalled Järvsö and after checking it online and learning there was a new ski-in/ski-out hotel, Bergshotellet, built during 2015 and now open for the first season - we quickly deciced to skip Åre this year, and go finally check this place out. This year we had also other commitments for the vacation days, so similar to our Hemavan trip at the end of the year, we decided three full skiing days would do. A familiar route, we chose again to cross the Baltic Sea on Tallink Silja ferries, this time Silja Symphony, which had a nice new sushi restaurant, Sushi & Co. There are always shows on these boats, typically 2-3 during the evening (aerobatics, music, dancing and whatnot), but this time there was a bonus gig, as one of the coveted pop artists in Finland at the moment, Antti Tuisku, was starting a two-week tour on the boat, and we got to see the first one. Not my kind of music, I must say, but live performances are always fun to watch, with the rest of the crowd.
Arriving to Stockholm next morning and only about 320 kilometers to drive to Järvsö, we spent few ours roaming the city, and started towards Järvsö early afternoon. We quickly arrived to Tönnebro on E4 and diverted inlands towards Ljusdal, reaching our destination only after four hours of driving.
Arriving at the hotel late in the evening, we had a dinner at the Bergskrogen, to not have to go searching for a restaurant downtown. And as the restaurant turned out to be very good, we dined there again (they also have a great lunch buffé), and naturally had breakfast there every morning. Everything brand new, lots of wood was used as building material, and for decoration and furniture. Following a kind of eco-friendly approach, the restaurant for example sources much of the incredients locally, makes their own bread, and so on. It was a fantastic place to stay in, must say!
A ski-in/ski-out hotel, we had a kids slope, and a platter lift, just in front of the hotel, with a conveyor-belt style skilift also for the small sledding hill on the side (with small snow scoots to borrow at the hotel). And a nice movable stall serving fresh crepés and beverages.
Järvsö ski resort has two sides - south side, where the hotel is at, and north, where majority of the slopes are. As the resort is not very big, all slopes are accessible from either side, connected on the top, at 3700 decimeters over the sea, as they playfully state on the top lift station. Resort puts a lot of effort into maintaining the piste, and all the slopes are prepared each day, as they close at 16:30 (except on Tuesday and Thursday, when there’s night skiing on the north side from 18:00 to 20:30). During our stay, the slopes were all in excellent condition, and while there is no real off piste to speak of (some forest trails and bike paths to run, but there wasn’t that much snow and terrain is thick and rocky), we had a blast skiing in the sun for all three days. Especially the slopes number 12, 13 and 15 were our favorites, as well as number 3 on the south side.
In the area, just behind the hotel, there is also a zoo, Järvzoo. In there, built on the slopes just next to the piste, a range of Nordic animals can be viewed in their natural environment (considering it’s still a zoo). A wooden walkway leads through it (accessible also by wheelchair), forming a loop roughly 3 kilometers in length. While the zoo is open only until 15:00 during winter season, one can enter just before that, and spend as long as needed inside - this is also what we did, as we first had a day’s worth of skiing bagged, and then entered the zoo just before closing time.
I hoped to get a glimpse of were wolves, wolverines and lynxes, and got plenty of good views of all but the last, as lynxes could not be found in the plain daylight. I recommend bringing binoculars, as the encloses are relatively large (which is good), so you will get better views with them. I tried to take a few photos through my Leica Ultravid 8X25 binoculars, but could not really get them sharp, handheld and not attached together in any way.
While it was nice to see those animals live, especially wolves which I followed for a long time, the really nice surprise came in the evening. It was thursday, so the north side had the night skiing ongoing. Rather than taking the free bus transfer to the other side, I opted to skin up in the dark, and ski a few laps on the illuminated slopes on the other side, before skiing back down to the hotel from the top, equipped with a headlamp.
Skinning up, I could listen the owls calling in the dark - there were several types of owls in the zoo, I think what I heard was the long-eared owl. Then, stopping to view the surroundings under the full moon, I saw a wolf emerging from the woods behind and downhill of me, and lope across the piste, to disappear into the woods again. This was the first time I’ve seen a wolf run free, and though I had just been viewing a pack of them inside the zoo, it was a cool bonus for the evening’s little ski tour!
On the morning of departure, I used the last opportunity to get some more mileage on skins, and did another ‘topptur’ after breakfast, skinning up the long meandering blue piste and across the forest, to the top, for the very last run. During our stay I had only seen few other people on telemark skis, and now me ski touring there on such gear in bright daylight triggered a few smiles and thumbs up on the way up. A perfect ending for a nice vacation, glad we chose Järvsö as our destination, let’s see if we’ll make another visit (or a stop) here sometime. I can warmly recommend this resort, and the hotel, especially if you travel with kids, even very small ones. Outside the Bergskrogen, there’re several other good restaurants to go to - check especially the cozy Condis Bar & Kök. And lots of cottages as well! Note though that Järvsö is often fully booked, also why the new hotel was welcomed to the area, so book on time.
❯❯ Flickr album (with more photos): Järvsö - 3700 dm.ö.h
]]>Come Boxing Day, we boarded the ferry in Vaasa, with heavy winds (around 20 meters per second) pounding the harbor. Needless to say the journey across was on rough seas, but as the distance is quite short, it took only about four hours, until we docked in Umeå.
Although the distance between Umeå and Hemavan is only about 380 kilometers, the road conditions were quite tough on our trip, with much of it being on iced up roads, which slowed us down a bit. With friction tires under the car, I didn’t want to push it, but rather arrive a bit later, but without incidents, to Hemavan. We had no rush as the skiing would only start the next day.
Hemavan Fjällcenter is a cozy guesthouse-like hotel/hostel, with several one-floor buildings with rooms and facilities. In addition to the hotel room we stayed in, there’s also an option for room with just beds and a faucet - toilets and showers, and kitchen, would then be shared. We originally had booked the latter option, but closer to the trip, upgraded to a hotel room with a very small fee. We ended up staying in building Renen, opposite the main building, which had been just refurbished. The only thing we would have liked to have was a dryer and a locker for skis, to stash the wet gear after the day - now we just had to fill up the bathroom. Breakfast was served in the main building and was top notch - same goes for the dinner buffé we had on our arrival night. Sadly that was the only time we could enjoy it, as it did not run during the weekdays, at this time of the year.
Fjällcenter, as it turned out, is THE place for people riding snowmobiles. Tracks start at the backdoor, and every morning there were tens and tens of snowmobiles revving the engines at the yard and hitting the extensive trail network around Hemavan-Tärnaby region. Skiers, although that week in minority, have it almost as good, with only a short walk from the Fjällcenter to the nearest lift station (Centrumliften) - no car was needed during our stay to get in and out of the slopes.
We got really lucky with the weather, despite the high winds preceding. There had been a good dump of snow couple of days before, and while during our first day the high zone (lifts) was closed due to wind, the lower zone offered superb skiing, on and off piste, with few of the closed (but roughly prepared before the snow fall) piste having a knee plus deep powder to plow all day. No crowd meant no queuing for the lifts, and virgin powder was easily found until day’s end, taking new lines each round.
Next day the wind had calmed down up in the fells, and the high zone lifts were opened. As the high zone had been closed since the snow fall, snow was again untouched and with vast plateau above the treeline to zigzag, we did not run out of powder that day either. My daughter hadn’t really skied off piste (or powder) before this trip, but now she was going at it second day in a row, not wanting to cross the prepared piste, I think she’s hooked for good!
Third day, and our last day offered more of the same, but the lower zone now prepared all across, we stayed most on the high zone, finding remaining patches of untouched snow, which was still soft at the treeline and below, while it had started to pack and harden higher up. From above the treeline, traversing to skiers right, there’s very good skiing in the woods, as I learned from a local I met in the lift - snow was fluffy and plentiful also there. I had a friend who came over to Hemavan on our last day, so we had few runs together and few folköl’s in the neat new Björk restaurant, up on the fell (top of the Sollkatsliften).
After three great days of skiing, our legs were toast, so a break from skiing was due. This time, it had also come time to end our short vacation and head back to Umeå and across the, again stormy, seas back to Finland, to celebrate New Year.
Hemavan resort did not leave much to desire, it was pretty much what we expected and wanted - Mellow slopes with easy access off piste and good skiing in general. The town, if you can call it that, is very small, a cluster of houses with a grocery store and few restaurants, some of which were surprisingly closed during our stay, and opening up only for the New Year. The days between Christmas and New Year are low key, so expect no crowd - great! Same goes for the week 8 (protip!), the winter vacation week at schools in southern Finland.
One of the additional bonuses, though only available from February onwards, is the very affordable heli-skiing, taking skiers to the nearby fells for very a reasonable fee. The booking is also made easy and practical. You call to a number, stating when you are in the area and available (non-binding), and you will be notified when a group is formed and conditions allow to fly, typically the previous day. As we all liked the place a lot, we’ll certainly be back, and hopefully then will be able to give a try that heli-skiing as well!
Sometimes it’s good to leave the camera behind and simply enjoy the views, rather than trying to make digital copies of them. This trip was one of such for me, and I barely pulled out the camera to grab a photo. Photos featured in this post are hence mostly from my daughter’s iPhone.
❯❯ Flickr album: Hemavan on Skis
]]>With packrafting slowly gaining popularity also here in Finland, I was hoping for a decent participation rate, despite the usual timing-related challenges with a large group, and invitations were sent all around, and event pitched in social media, such as Facebook and Twitter. Sharing a ride from Espoo with Marko, we were happy to meet seven other paddlers on the campsite in Haukanhieta. Preparing a late dinner and downing few beers, we discussed about the possible options for the next day’s activities, and while the drafted original plan had us heading down the Haukkajoki river, with some insight from a local packrafter, discouraged by the low water levels, a new plan was made. Instead of heading down the river, we would instead do a lake-hopping tour, returning to this same campsite by the lake Haukkajärvi at day’s end.
Saturday dawned sunny but windy. Prepared with fishing gear, we decided with Marko to head out on the lake, early in the morning, to try and catch some surf (perch or pike) for our turf (bacon). While I was catching nothing, Marko did manage to pull up a couple of fair-sized pikes, and we had our fried breakfast with some extra protein - delicioso!
Closing noon, with our merry group now two paddlers stronger, it was time to go, and see what the national park had to offer for us, most being in the area for the very first time. Heading out on the lake again, we started with a push into the headwind, out from the sandy shores of Haukanhieta. While I had been looking forward to the river, with some easy rapids, and a larger one in the end, to negotiate, with a large group of ours, it was actually very nice to glide across the lake, chatting and basking in the sun. Lake-hopping is surely a great way to utilize the ultimate portability of these rafts, and we kept a relaxed pace throughout the day.
Our route around the park passed through seven lakes and ponds: Ketvenjärvi and Vähäketven, Iso Helvetinjärvi, Sammakkolammi, Pikku Helvetinjärvi, Pitkä Helvetinjärvi and Luoma, our point of exit. In each one, I tried catching some perch for dinner, but throughout the day just couldn’t get any, not a single bite. But this did not matter all too much, as fishing on this trip was simply a way to kill time and relax, and Marko again kept the situation under control and brought food on the dinner table, catching two more beautifully copper-hued pikes.
Until Helvetinkolu (a famous dry canyon at the western end of Iso Helvetinjärvi, barely visible from the lake except for the majestic cliff at the exit) paddling and hiking was simple and clean, although we did collect a reasonable amount of deer flies on the way, crawling in every nook and grannie. Continuing from there, we found ourselves working slightly harder, first passing through a bog following a meandering ditch that was possible to paddle only for first few tens of meters, then hopping over and under fallen trees, and circumnavigating random obstacles. At the last lake, before the final leg of our paddle, I noticed my fishing rod with reel, carefully stashed two-fold inside of packraft during the day’s hikes, pulling the raft behind me, had fallen out, and was nowhere to be seen.
Flabbergasted, I was sure it was lost for good, but Marko providing company, and an extra pair of eyes, a hike back to the previous lake was done, trying to locate the earthy-colored combo in the bushes. Against the odds, we did locate it eventually, having fallen out on a soggy leg half way up from the previous lake, and with a relief, fully equiped again, we headed back to our rafts, to catch up with the rest of the group, already preparing late lunch on the shores of lake Luoma.
After lunch, we deflated the rafts, packed up, and headed back to the campsite along the dirt roads, just on time before the darkness fully fell. We then had to bid farewell to few of the fellow packrafters who could not stay for another night, and with a smaller group a round of steamed pike and other delicacies were consumed around the campfire, before the night fell.
Next day, while finishing breakfast (thanks for the bag of chanterelles Konstantin, they perfected our scrambled eggs in the morning!), we decided with Jaakko and Marko to go take a peek at the Haukkajoki river, where the road meets the Karhukoski rapid. On site, hiking up to the lean-to at the start of the roughly 300-meter long meandering rapid, the river did not actually look all that bad, though shallow indeed. Not wanting to miss out a small piece of action, Jaakko having to head towards home, with Marko we decided to raft down the Karhukoski rapid. A rocky and narrow channel, dropping down to the rapid led us through plenty of maneuvers around and over surfacing rocks and occasional grounding was inevitable. Next time around, at high water, Haukkajoki is definitely on the to-do list!
This was a fun weekend with like-minded paddlers, and as always, it was nice to meet new faces and catch up with few old ones. Most definitely this tradition needs to continue, and during the weekend there was also some discussion on whether there could be room for more get-togethers throughout the season - stay tuned!
❯❯ Flickr album: Second Finnish Packrafting Gathering
]]>Owning a pair of Ticket to the Moon camping hammocks for several years now, this is exactly what they’ve been used for. Quick to set up, as a portable bed slash recliner, they easily come along for day trips, especially with the family.
Come this spring, I wanted to finally try out how it was to sleep in one, and, to be honest, was expecting I would not like it at all. Since it was early spring, lakes still frozen and temperatures around zero degrees celsius at night, I laid my Therm-A-Rest XTherm on the Single-sized hammock and slipped inside my winter bag. Resting slightly diagonally, as generally suggested for practically any hammock suspended from two points, I quickly fell asleep and while I woke up a few times during the night since my feet hat slipped off the hammock and got cold, I had a good night’s sleep. At 195 cm (or 6' 5"), the Single-sized Ticket to the Moon hammock is simply too narrow when positioned diagonally, so for the next test I used the other one I have, a Double-sized version, and the problem with my feet slipping off was solved. While a basic open hammock like this is perfectly fine for random outings in good weather, with summer and the bug season approaching, encouraged by these trials, I started to look for a hammock that be suitable for year around use.
To ensure a proper fit, the sizing was at first the main driver, and while for example Hennessy hammocks are readily available here locally, with model Explorer suitable for taller sleepers, I took my time and eventually turned into Warbonnet Outdoors, a small family-owned business from Evergreen, Colorado. Contacting Brandon at Warbonnet, interested in their Blackbird XLC line of hammocks, that I had read some good reviews about, I was able to discuss about the different options and get advice on accessories, such as tarps. In the end, come April, I ordered a kit consisting of a Blackbird Double layer 1.1 XLC with whoopie slings (and tree straps), a Winter Topcover and Superfly tarp.
Blackbird XLC is an ingenious hammock in a way that while at first sight it appears not much different to any comparable hammock, it does pack a lot of interesting and useful features that make it very versatile. Footbox, to start with, is a feature that effectively maximizes the leg space, allowing a full extension without constriction, even for us tall folks. As with any hammock of this type, the best sleeping position is slightly diagonally, often around 30 degrees from the center line is recommended, and with Blackbird’s footbox draws you into the optimal position naturally.
Another imaginative feature is the storage shelf, that forms on the right-hand side of the hammock, pulled tight by the elastic drawstrings on both sides, that can be (optionally) used to pull the netting further away from your face, creating more head space. This shelf is large enough to accommodate a good amount of gear, pretty much anything you might want to have at hand, and while you might at first see it just as a nice add-on, I could not imagine choosing a hammock without one, it is that convenient.
With XLC, as compared to the original Blackbird hammock, Warbonnet changed the zipper system to allow full removal of the bug netting, which in turn, with the optional Winter Topcover, allows an easy swap to a closed system for winter, with added insulation. Despite the relatively cold summer so far here in Finland, I have only tested the Topcover briefly, ensuring it fits the hammock perfectly - notice that these add-on covers are not sold individually, as they need to be paired with the hammock. Like the hammock itself, also the Topcover is DWR treated for water resistance, so tarp is still required for wet conditions. Time will tell, but I expect to use the hammock through the winter mostly without a tarp, as in sub zero conditions precipitation will not be a problem - Topcover will however be useful to reduce draft and to trap a few degrees of heat.
Of course another perk of the removal netting is that you can easily transform the XLC into a an open traveler-style hammock, something to be on your backyard, on the beach or at the lake side for example, rocking gently. The version of XLC I chose also features a double layer bottom. What this means that there is essentially a pocked to hold your chose mattress, in my case most often a Therm-A-Rest XTherm inflatable mattress that is super comfortable and well insulating, if a bit noisy.
Rigging the hammock is as easy as it should be. Spot chosen with two solid trees to hung from, tree straps with loops on each pulled around a tree with no knots required, a pair of carabiners connects the whoopie slings and adjustments are made quickly. I prefer to use the whoopies, but Warbonnet also offer a webbing and a sliding buckle as an option. Once hung at the correct height, a quick check to ensure the correct tension - seated in the hammock, twisting the ridleline with few fingers will confirm this - and it’s all set up. Hammock comes in a storage sack that is open from both ends, making it easy to pull cleanly, or to stuff back in, while the sack never needs to be disconnected from the hammock, so you won’t be losing it either.
Since the hammock is not waterproof, even with the optional Winter Topcover as I mentioned, for mixed weather use a tarp is essential. A large tarp, while providing ample protection for your hammock, can also be used as a standalone shelter for cooking, with or without a hammock hung underneath. It was for this reason I eventually chose the Superfly, instead of one of the smaller tarps, such as the Edge or a Mamajamba. With a slight weight penalty, Superfly brings more space and better protection including fixed doors and altogether 12 tieouts to secure it even in severe weather. The door panels can be folded in to create a more open shelter. Pitched first between two trees it also allows you to rig your hammock sheltered from the rain. Since I haven’t yet used these a whole lot, just trying them out quickly, I will leave it here for now and get back to the topic once I’ve spent some time in the hammock during the winter months, for what these accessories were especially purchased for.
Pitched first between two trees it also allows you to rig your hammock sheltered from the rain. I have been lucky with my outings so far, despite the relatively wet and cold summer (though much improving towards autumn it seems), and have not really needed the tarp so far, being able to hang under an open sky. One night though I got an unexpected wave of hard wind and rain, so had to jump up and set it up at night - the four panel pull tie-outs became handy, and the Superfly fared well through the blast. Easy to set up in case of a sudden rain, one can simply pre-attach one end of the ridgeline, keeping the tarp in the storage back, and if the weather suddenly closes in, it’s relatively quick to pull out and over the hammock and then go stake it down as required. With the kit I also ordered a roll of tarp guyline, as the tarps do not come equipped with those.
While I cannot yet comment on the longevity of this kit, I am very satisfied with the quality of craftsmanship, leaving nothing to desire. The fabrics are solid, despite me choosing the lightest option, and all the seams are well made. The removable netting and the required full length zipper could potentially be a weak point, but the way Warbonnet has implemented it, I have no fear of failure. Zipper teeth are large enough for a good strength, and while there is a tight corner on each end of the hammock, zipper making a u-turn, it has been made in a way that it puts no stress on the zipper directly. Removal (and re-attachment) of the netting and/or Topcover is a breeze, something one can easily do even in the middle of the night, should you need to, taking only a minute or two.
Since I have a couple of tents and a bivy sack to keep me protected from the elements, why did I went on exploring (and investing in) yet another system? Curiosity was the first trigger, and as I already had the traveler-style Ticket to the Moon hammocks for casual use, it was just a matter of giving it a go. However, the curiosity was followed by a small revelation.
Being tall is one thing, but I happened to grow up with a crooked back, suffering from a case of scoliosis and kyphosis, with my vertebrae being wedge-shaped instead of squared, putting stress especially on the muscles on the lower back and around the shoulders and neck. Nowadays it would be diagnosed and treated early on, avoiding permanent deformation of vertebrae, but back when I grew up, it was simply written off as a case of poor posture due to fast growth, requiring no treatment. Too late to repair once grown up, the best thing I can do is to keep on moving, and doing sports, that keep the muscles active and hence relieve the pain and reduce congestion. Getting older, it is not unfortunately getting any easier to maintain, but with regular exercises, massage and for example a good bed/mattress (still looking for one) it hopefully stays in control.
With my problematic back, and also being a side sleeper, I did not originally have high hopes for having a comfortable nights in a hammock. So when I first observed, and later confirmed with consecutive nights, that good night’s sleep was indeed possible, and actually guaranteed in a hammock, it really came as a quite surprise. Not just good for my back, allowing a relaxed, slightly curved angle for the spine, I also learned that sleeping on the side is easy and comfortable. With the Blackbird XLC, the natural position, helped with the footbox and the asymmetrical design in general, is easy to obtain and keep through the night. Naturally there is a bit of a learning curve, but I found it easy to adjust. While I have pretty much never fell asleep lying on by back in a bed (or in a tent), I have to my surprise done that several times while in a hammock. It has something to do with the slightly curved angle that puts you in a position you can relax in, kind of a flattened-out recliner. But for me it seems to have more to do with the views - with or without the netting you are exposed to an open sky and views around you, and gazing up, be it for a starlit sky or clouds passing by, tree branches swaying in the wind. It is the kind of a natural baby crib mobile - and it works the same way! A lot better than staring at the typical silnylon roof of a tent. For this same reason, especially in the winter with no bugs to bug you, I have preferred to use the bivvy sack instead of the tent, however I have never fallen asleep on my back while in it.
Another revelation was, and this is also something a typical side sleeper might relate to, that in a hammock I no longer suffer from pain on the hips and on the shoulders, that typically wake me up in a tent or in a bivvy few times during the night, having to turn around to relieve the pressure induced pain. While with the big and thick inflatable mattresses, such as the XTherm I am using, comfort has improved, my bony hips and relatively wide shoulders continue to cause discomfort, and hence I was glad to find out that a hammock also addresses this. It was a very positive surprice during the first few nights, to wake up in the middle of the night for some reason, realizing that you actually are comfortable the way you are, and continuing to sleep without having to shift position or to roll over to the other side.
In summary, as you can read above, I have been very satisfied with the Blackbird XLC and will continue to use as my main shelter. There is still room for a tent, and at times for a bivvy as well, for example in places like Iceland where you would struggle to find a pair of trees to hung your hammock from, but the Blackbird XLC is definitely a keeper and will come along for most if not all the overnighters and trips below the treeline.
Warbonnet Outdoors provides extensive instructions, including video guides, through their website, and they are happy to give you more guidance should you need it. Purchasing experience was straightforward, and the kit shipped quickly (at a reasonable cost) once the order was ready. These hammocks (and chose accessories) are typically made to order, so expect a short lead time for your kit. Personally I am happy that I chose a Warbonnet hammock, it has been exceeding the expectations and finding no apparent design or structural weaknesses I expect to use it for years to come. It’s still a long way to winter, but autumn rains will certainly bring more use for the Superfly tarp, and it will be interesting to see how the winter use will be in general. I have chosen not to invest into any quilts at this stage, trying to manage with the thick inflatable mattress only, but should those become paramount for extended winter use, Warbonnet offers a range of underquilts and topquilts to choose from.
❯❯ Flickr album (with more photos): Warbonnet Blackbird XLC Hammock
]]>Having spent considerable time enjoying fishing from the little raft, using it to access good spots especially on small lakes and for example to troll along the shores for the main incredient of tasty homemade fish balls, pike, or some perch for the pan, I was looking into rigging some kind of a rod holder system on my Alpacka Llama. It was then when I ran across also the RodRig rod holder made in Norway. Initially designed for the Alpacka rafts, variants for kayaks, Ally canoes and alike are now available, and I contacted the owner Ståle to discuss about the product line. Learning more about the design, I agreed to take one in for testing and a review.
RodRig is made of high quality carbon fiber and aluminum frame and sports two rod holders for efficient trolling or easy swapping from side to side. Weighting a mere 220 grams, it packs in 5 pieces in a small nylon pouch, and has no loose bolts or nuts that could get lost easily. Assembly at first requires a look at the manual, but once assembled a few times, you can easily do without. The trick here is to use the included Pull-the-DOT snap fastener the right way, as trying to force them in or out the wrong way could lead to a failure. These fasteners, though new to me, have a long reputable history of hard use and abuse, in difficult environments, and for example conform with United States Military Standards - A solid choice also for this application.
Once assembled, the rigging slids tightly into the four standard tiedowns on Alpacka raft, keeping it securely in place simply with tension - no additional straps required. I’ve found it best not to completely inflate the raft at first, this way the RodRig slids into place easier and once fully inflated, you can adjust it as you wish. RodRig does not interfere with normal use of the bow and the frame is solid enough to withstand any normal cargo on top - your large backpack or a dry sack for example.
The rod holders (one slotted, one solid, interchangeable) are long enough to keep the rod securely in place, even when catching a large fish while trolling, and in my opinion no separate lock-down mechanisms are needed. They have a slight backwards angle, and as with any similar rigging, you need to watch out a bit especially with those power strokes, to not hit the backwards leaning rod(s) with your paddle. This is of course dependent a bit on your size (and your boat size), I have very long arms for example. While trolling not much speed is typically required and gentle strokes suffice, so this is more when you want to push it quickly to a new spot.
I have had the RodRig in use now for several weeks and been fishing with it in lakes and rivers. It is a very sophisticated yet not overly engineered piece of rigging for easy trolling with your Alpacka, or any comparable packraft with suitable tiedowns installed. Having done my fair share of trolling with the reel simply on my lap, rod thrown over the shoulder, this certainly is a lot better option and feels secure to use. With its low weight it’s a no-brainer to take along at all times, even if just used as a rod holder for hands free float fishing. All the different variants of the RodRig rod holder can be ordered directly through the website, which also includes detailed specifications and assembly instructions for the different types of boats.
]]>While the plan overall appeared solid, I hadn’t accounted for the very late summer in Scandinavia this year, that turned out to be, in Iceland, unlike any since 1969. Summer arriving late, it meant the highland roads were blocked by snow, making it impossible even for the super jeeps to travel, keeping huts on the northern end of the trails shut, obviously blocking also the buses transporting hikers to the area. Another small surprise upon landing was finding all my spare batteries been confiscated by the airport security at Helsinki, leaving me with only one battery inside the camera. Luckily I had the Xiaomi Power Bank with me, so I did not miss them in the end, charging the one I had directly inside the Sony RX100 III.
Having only booked the flight and the airport transport with Flybus to Reykjavik Campsite, not tying myself into a fixed schedule, upon arrival I was met with news about Landmannalaugar still being buried in snow, making my original plan futile. I unloaded all the gear into my Tarptent Rainbow pitched in the grassy field among a melange of shelters, jumped to a bus 14, and headed downtown. Seated in the great Icelandic Fish & Chips restaurant, quadrupled in size since my last visit, I locked down to the free wifi over some local beer and delicious catch of the day, and started pondering over my options for the next four days. Before the dinner was done, I had decided to head to Skógar instead, and start hiking towards north, leaving the finish open as the conditions on the trail in the next few days, and the storm just about to hit the south coast, would allow.
The great thing about traveling in Iceland, in addition to very affordable direct flights from Helsinki to Keflavik, is the comprehensive network of buses running around the island, and into the selected huts and trail ends, and of course to plethora of attractions. For hikers, both Reykjavik Excursions and Trex are companies to get in touch with. I opted for the Hiker’s Bus Pass from Trex, which is essentially an open return ticket to selected stops, guaranteeing a seat without committing to a specific date. There are few passes to choose from, and as I planned to start from Skógar, I purchased one covering Skógar, Þórsmörk and Landmannalaugar. Hence, starting from Skógar, I would have the option to retreat from Þórsmörk, once over the mountains and through the Fimmvörðuháls pass, or to continue up to my original starting point at Landmannalaugar, should the hut and hence the bus connection be opened by the time I could, possibly, reach that high point.
With an early awakening, I jumped to the bus at the campsite (another perk for staying there, no transfer to BSÍ bus station required) and by 10:30 arrived to the Skógafoss waterfall, majestically marking the trail end with a 60-meter drop over a former coastline cliff. I had visited this place in 2013 on my day-tour along the south coast, and with storm rising on the sea behind my back, and heavy precipitation forecasted later the day in the mountains ahead of me, I skipped the attraction and hit the stairs going up next to the waterfall, hoping to gain ground and escape at least some of the bad weather. The hike up along Skógá River towards the Fimmvörðuháls pass is spotted with views into the mountains ahead and the river on your left, running through deep gorges and over multitude of waterfalls, with a roar. Gaining elevation, wind from northeast became stronger and gusty and meeting some other hikers taking shelter behind a boulder about half-way up the mountain learned about 15-18 m/s readings from their carry-on anemometer. And then the wind picked up.
I had met two chaps from UK at the trail end, arriving in the same bus, and as we turned out to have the same brisk pace, I ended up having some good company and outdoorsy chat on the way up, fighting the wind. Catching up few hikers, there was some oncoming traffic, including a group that had turned around in the snowline, where a bridge crosses the river. As the group was somewhat ill-prepared, with at least one of the guys missing his gloves, that was probably a smart move, as the conditions continued to get worse.
Stopping behind a crop of rocks for a quick lunch, our group of three was met with a sight of a person hiking up behind us with a bike on his shoulder. As I later learned, it was some misinformation from a bike shop in Reykjavik that had encouraged this tough cyclist to hit the trail and try to cycle through the Fimmvörðuháls pass in one go, some 25 km in total distance. Perfectly doable in normal summer conditions, it turned out to be an epic hike-a-bike, as he joined our loose group and pushed all the way up to the manned hut some 2 km before the pass, where we stopped over for shelter, and ended up spending the night there, as the weather continued to deteriorate. We were later joined by more solo hikers and groups and ended up having a full house before the night fell.
Listening to the rumble of wind shaking the hut through the night, morning brought significantly better conditions, while wind remained relatively strong throughout the day. Visibility had improved, and even sun was peeking between the rolling clouds, so it was time to pack up and hit the trail again. I bid farewell to my earlier companions, and continued up in the mountain in solitude. Reaching the pass, weather kept on improving and I was strolling between the two glaciers and past Magni and Móði, the two new volcanoes formed when Eyjafjallajokull erupted in 2010. Soil around them is still warm to touch.
Before heading down the other side, one must pass a ridge that proved to be an interesting alpine-style scramble, with gusty wind trying to knock you over the edge. On the lower plateau, with a steep snow slope to tackle at first, I reached the snowline and with a pretty traverse over a mountain side I was back on the green, in the lush meadows with glaciated mountains as the backdrop.
Down in the valley, in Þórsmörk, I took a short break, filled up the water bottles, and then decided to continue on the trail, heading north towards Botnar, some 19 kilometers away. With dark clouds approaching from the east, I decided I would hiked for few kilometers and camp somewhere nice along the trail.
Couple of kilometers in I arrived to the first river crossing. I had brought a pair of lightweight Salomon running shoes for camp shoes and for crossing rivers, and though already proven over the previous day of pushing into the wind, I had brought the collapsible hiking poles, Distance Carbon FLZ from Black Diamond, especially to secure the river crossings while traveling alone. Crossing turned out to be an easy one, water running only at a knee high on a wider spot I chose, and the ones further down the trail were possible to cross with dry feet - I wore La Sportiva Trango Guide Evo’s on this trip - these comfortable and lightweight mountain boots provided good support on the mixed terrain.
Few kilometers onwards the terrain shifted and became more barren, and choosing an alternative trail instead of the Landmannalaugar trail with blue route markers, I made way through the erored Almenningar pastures and feeling fresh I decided I would continue all the way to Botnar in one go. Weather got gradually grimmer, wind as a constant companion, and even some rain fell towards the end of the trail. Once I reached the Botnar hut, I had hiked around 32 kilometers in about 10 hours (of which 7 hours moving), with some 1000 meters of ascent, and 1400 meters descent, according to the Garmin fēnix3 statistics. It was time to pitch up the tent in a windy plateau, supported with piles of rocks and extra guylines. Despite the wind pounding and binding on it, it held up fine. Talking to the hut warden I learned my wishful plan to get a lift out from the next hut at Álftavatn was futile, as despite the hut already being opened, no transportation would run to and from it at least for a week. At the same time there was a strong rumor that the Landmannalaugar hut (and the bus connection to and from Reykjavik) would be opened the next day. Rehydrating and loading up on calories I pondered whether I should continue to Álftavatn the next day, and try to get to Landmannalaugar (presuming it was to be open) in one push from there (some 25 kilometers over the snow covered mountains), or would I be better off returning to Þórsmörk instead and spending the remaining day off this trail.
With the unknowns regarding Landmannalaugar transportation and and conditions up in the mountains ahead, I decided the next morning I would head back to Þórsmörk, and give the trail another go at another time, when I would not need to rush it through bad weather, while risking missing my flight back home. Hardly disappointed, I enjoyed finally some tailwind while hiking back to Þórsmörk, now following the blue Landmannalaugar signposts through slightly more green pastures. Dark clouds rolled around me, hiking essentially in the eye of the small storm around in the mountains and the coastal sea, while I made it back to Þórsmörk well on time for the bus transport back to Reykjavik.
Back in the town, and in the Campsite, I got a confirmation that indeed the Landmannalaugar hut had been opened that day, and buses were running according to the normal summer schedules. For a brief moment I considered jumping into one next morning and making a day trip to the trail end, but quickly decided I would head to another direction. Weather forecast around the Landmannalaugar trail (and in the south coast in general) promised rain and poor visibility, so I decided to leave that behind me and chase the sun up north.
Come next morning, I booked a car at the reception, and in half an hour I was picked up to sign it off the at the rental office. With my airport transfer leaving at around 22:00, I decided I would have enough time to explore the Western Region, driving all the way to the small town of Hellissandur, and around the peninsula, following the coastal roads.
It turned out to be a great day filled with sunshine and warmth, with more spectacular views of Iceland and the North Atlantic, visiting waterfalls and caves, crossing glaciated mountains and watching seals. I hadn’t met any Finns during the trip, but finally did, picking up two girls hitchhiking near Hellissandur. We shared a short ride together as I dropped them off at the the Snaefellsjoekull National Park.
Back in the Campsite, I dropped the car keys in the reception, and met Agga who had made me a very fine custom fitted (and designed) Lopapeysa wool sweater. Before heading to the airport, oblivious to the fact my hard shell would be left behind, on the backseat of the rental car, I had a delicious lobster soup at the restaurant next door, the Lauga-ás. Then it was just the night flight back to Helsinki, followed by a busy day at work.
The question is not whether I will go back, but simply when it will be, though I already got my jacket back on the mail. Obviously Iceland is far from done, and while I am not really bummed about the change of plans and not being able to tackle the whole of Landmannalaugar trail as originally planned, I might be back to do the rest of it. Or, I might as well try to cover again some new areas in this wonderland of fire and ice. I will likely start planning something that would involve a bike and/or a packraft, but for that, if just for the logistics of it, I would need some more time on the ground. However, with relatively cheap direct flights from Helsinki, and the nowadays comprehensive bus network around the island and in and out the trail ends, it certainly is a good destination also for shorter trips, compared to for example northern Sweden and Norway where I’ve been going to in the past, having to spend almost two days just for the travel.
In addition to a map and a compass you should naturally bring with you, I can highly recommend this free MapSource map, that covers most of the known trails (obviously including also the Landmannalaugar) and mountain roads, and is hence a good resource if you carry a compatible GPS device. I have a basic Garmin eTrex 20 that runs on two AA-sized batteries (Alkaline, Lithium or NiMH), small and inexpensive with all the essentials (except USB charging), which I brought along as a backup.
While I enjoy traveling alone, it is always great to meet people all around the world on the trail and share some moments together. If you happen to run across this blog, feel free to comment below or drop me an email, I might even have some photos to share.
]]>Kesäpurje, having its home base in Helsinki, at the HSK Yacht Club in Lauttasaari, is the largest sailing school in Finland, offering courses at all levels, both in the Baltic Sea and Mediterranean, as well as in UK, including navigation and specialty courses. They also help to create and follow through personal learning paths, and since 2011 are offering the full curriculum (PDF) also in English, to better serve the growing international sailing community in Finland. I see this very useful also for the Finnish speaking students, myself included, as one could as well take some of the courses, if not the whole curriculum, in English. Knowing the terms and procedures in English could be helpful when for example renting a boat some day in the Mediterranean.
Purjehtijakurssi, or the Competent Crew course, is targeted both for people without prior experience with boating or sailboats, and for anyone who wants to freshen up their skills before continuing on the learning path, for example towards the Day Skipper and Coastal Skipper qualifications (Perämiestutkinto and Päällikkötutkinto in Finnish, which however from 2016 onwards will be called Saaristopäällikkötutkinto and Rannikkopäällikkötutkinto, as proposed by the Association of Sailing Instructors in Finland (PORY ry) this spring. The minimum requirement for the course duration is 32 hours, typically done over 4-5 days. With Kesäpurje, 8 hours of theory is separate from the practical part, which in this case was split over two evenings and a full weekend. This worked very well, and being a complete rookie it was easier to digest the information in small doses.
The course content is standardized, and covers the topics on the guide book included in the course fee (Purjehduksen Opas), including but not limited to docking procedures, rigging and trimming of sails, navigation and anchoring. There was plenty to cover in four days, but with constant rotation with 3 other participants, everything was covered in sufficient depth, everyone getting their fair share at the helm and in the ropes. Although course does not cover navigation in detail, we did some basic route planning and worked with the charts, as well got some hints on some mobile apps that today complement the paper charts and boat electronics nicely. For example for IOS there are quite a few marine applications, some of which I’ve already installed to my iPhone for a trial. Take a look at for example Navionics Boating, iSailor and Fleetmon.
I was the only person in our group with no previous experience with sailboats, but as confirmed also within the other group (all women group by the way, another Kesäpurje specialty), everyone felt the course was on the money and benefited also those with days or weeks of sailing under their belt. This was coming from a fact that unless your skipper has been explaining for example the mechanics (and purpose) of certain maneuvers and adjustments, you really do not learn a whole lot but just follow instructions. Not knowing much at all from the start, I did ask a lot of questions and our skipper (and instructor, also the man behind the English curriculum) Mikko was patiently answering all of them, while I tried to internalize it as quickly as possible. While we all made mistakes here and there, even on the last day, while gradually gaining more confidence and perhaps even some muscle memory through repetition, we passed the course without incidents. Weather varied between the days and we had both bluebird and overcast, got soaked in rain and slit through the waves and swell. With wind ranging from just a few knots to up to around 28, we switched between full sail and reefed main and genoa as conditions required.
Finishing the course last Sunday it was evident the hands on experience I had long awaited had not put out the spark, but quite the opposite, and for me the idea of sailing paled in comparison to actual sailing. Based on this particular course I can warmly recommend Kesäpurje if you wish to get a good start for a new hobby, whether you own a boat or not (or like myself, want to find out if you like only the idea of sailing, or the real thing). I am certain I will be using Kesäpurje also when progressing on my learning path, and as a natural next step have already pre-booked a seat on the navigation course that will take place later this summer. Before that I am focused on gaining as much nautical miles as possible, on sailboats needing crew, building on the solid foundation obtained from the course. For theoretical reference, I will start with a book I found from a local antiquarian bookstore, The Complete Sailing Manual by Steve Sleight, translated in Finnish. A 2012 edition, it is a comprehensive guide to everything and anything about sailboats and sailing, generally considered as a good buy for a rookie like me. The original book, in 3rd Edition, can be found online for example from Amazon.
]]>